TL;DR:
- Proper planning, measurement, and physical adjustments are crucial for optimal projector setup.
- Ceiling mounting provides stability and aesthetics, but requires careful stud and safety considerations.
- Physical alignment should be prioritized over digital keystone correction for the best image quality.
You've dimmed the lights, pointed the projector at the wall, and hit play. The image looks blurry, tilted, and weirdly trapezoidal. Sound familiar? Over 80% of home theater owners struggle with placement issues, and wrong throw distance is the top mistake that kills sharpness. Whether you're setting up a cozy home theater in Petaling Jaya or equipping a classroom in Johor Bahru, the difference between a frustrating setup and a stunning one comes down to preparation, measurement, and a few calibration tricks. This guide walks you through every step, from gathering the right tools to dialing in the perfect picture.
Table of Contents
- Essential tools and preparation checklist
- Finding the right position: Throw distance and screen alignment
- Mounting your projector: Step-by-step installation
- Achieving a perfect image: Alignment and calibration tips
- Our experience: Practical projector installation isn't about perfection
- Get more from your projector: Recommended solutions
- Frequently asked questions
Key Takeaways
| Point | Details |
|---|---|
| Plan before you mount | Measuring your space and gathering all tools prevents common installation mistakes. |
| Use correct throw distance | Calculating throw ratio based on your room and screen ensures a sharp, focused image. |
| Prioritize physical adjustments | Align the projector directly with the screen and use lens shift instead of digital keystone for best clarity. |
| Calibrate picture afterward | Fine-tune brightness, contrast, and focus in your actual room for superior results. |
Essential tools and preparation checklist
With common problems in mind, let's start with the essential preparation. Jumping straight to drilling is the fastest way to regret your installation. A few minutes of planning saves hours of rework.
The two main mounting methods each have real trade-offs:
| Mounting method | Pros | Cons |
|---|---|---|
| Ceiling mount | Stable, clean look, saves space | Harder to access, requires drilling into joists |
| Shelf or table | Easy access, no drilling needed | Less stable, cables more visible, takes up room space |
For most permanent home theater or classroom setups, ceiling mounting is the preferred method for stable, aesthetic installations, requiring secure attachment to joists or studs. Explore our projector ceiling mount guide for a deeper look at bracket types and weight ratings.
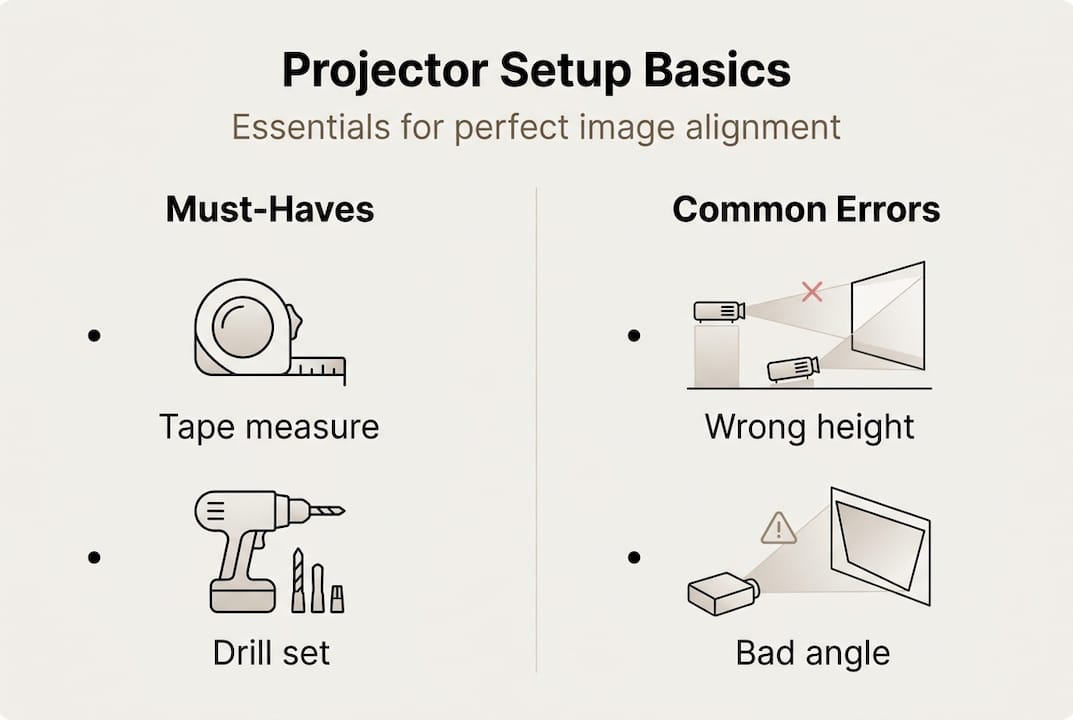
Tools you'll need before you start:
- Stud finder (critical for locating ceiling joists)
- Spirit level or laser level
- Measuring tape (at least 5 meters)
- Power drill with appropriate bits
- Hardware rated for your projector's weight (check the spec sheet)
- Cable management clips or conduit
- Painter's tape for marking test positions
- Ladder rated for your ceiling height
Beyond tools, think about the room itself. Check that your wall or screen surface is flat and free of texture that scatters light. Plan your cable paths before drilling, not after. HDMI cables running across a visible ceiling look messy and can be a trip hazard if they drop down a wall. Ventilation matters too. Projectors generate significant heat, so never mount one flush against a ceiling without at least 15 cm of clearance around the vents.
For educators, our classroom projector tips cover room-specific considerations like ambient light control and screen height for seated students.
Pro Tip: Before climbing a ladder, clear the floor directly beneath your work area and have a second person steady the ladder. Rushing a ceiling mount is how accidents happen. Take 10 extra minutes to set up safely.
Finding the right position: Throw distance and screen alignment
Once you've gathered the right tools, the next step is deciding exactly where your projector should go. This is where most people skip a critical calculation and end up with a soft or oversized image.

Throw ratio is the relationship between the projector's distance from the screen and the width of the image it produces. The formula is simple:
Throw distance = Throw ratio x Screen width
So a projector with a 1.5:1 throw ratio placed 3 meters from the screen produces a 2-meter-wide image. Understanding this number upfront lets you choose a mounting position that actually fits your room. Learn more about optimal projector distance for different screen sizes, or use a throw distance calculator to run the numbers fast.
Here's how short-throw and long-throw projectors compare for typical Malaysian spaces:
| Projector type | Best for | Typical throw ratio | Min. room depth needed |
|---|---|---|---|
| Short-throw | Small classrooms, compact living rooms | 0.4:1 to 0.8:1 | 0.5 to 1.5 m |
| Standard | Medium rooms, open-plan spaces | 1.5:1 to 2.0:1 | 2.5 to 4 m |
| Long-throw | Large halls, auditoriums | 2.0:1 and above | 4 m and above |
Steps to test your position before drilling:
- Calculate your target throw distance using the formula above.
- Use painter's tape to mark a test spot on the ceiling or shelf.
- Set up the projector temporarily at that point using a stack of books or a tripod.
- Project a white test image and check that it fills the screen without spilling over the edges.
- Check horizontal alignment. The projector lens should be centered on the screen width.
- Adjust forward or backward until the image size is correct, then re-mark the final position.
Avoiding common setup mistakes at this stage saves you from re-drilling later. Use our classroom setup steps if you're working in an educational environment with fixed furniture layouts.
Pro Tip: Mark your final test position with a small X of painter's tape on the ceiling. Take a photo of the room with the projected image so you have a reference if anything shifts during permanent mounting.
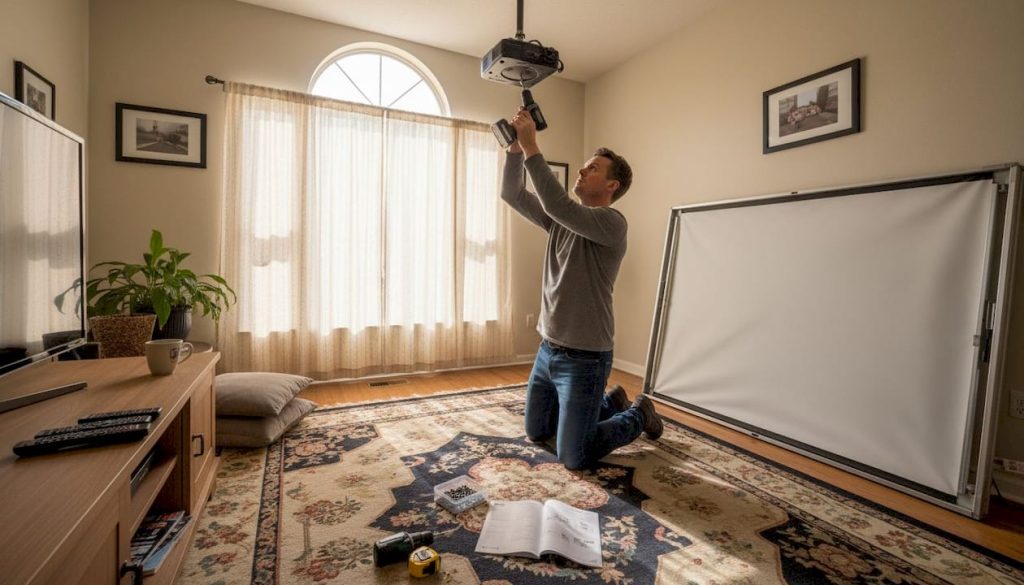
Mounting your projector: Step-by-step installation
With your projector position marked, it's time for hands-on installation. Follow the steps in order. Skipping ahead is where costly mistakes happen.
- Mark your drill points. Hold the mount bracket at your marked position and use a pencil to mark every anchor hole. Double-check with a level before marking.
- Locate joists or studs. Run your stud finder across the marked area. If your marks don't land on a joist, shift the bracket slightly or use a ceiling backer board rated for the load.
- Predrill pilot holes. Use a drill bit slightly smaller than your screws to reduce splitting risk in timber joists.
- Attach the mount bracket. Drive screws into the joists firmly. Give the bracket a firm tug in all directions before trusting it with your projector.
- Attach the projector to the mount. Most mounts use a quick-release plate. Secure it to the projector base first, then click it onto the bracket.
- Level and adjust. Use your spirit level on the projector body. Most ceiling mounts allow tilt and swivel adjustments at this stage.
- Route your cables. Run HDMI and power cables along the ceiling edge using cable clips or inside a conduit, then drop them down the wall inside a cable channel.
For detailed bracket options, our guide on how to mount a projector covers universal and model-specific mounts. If you're building a dedicated viewing room, check our home theater ceiling mounts section for heavy-duty options.
Safety warning: Never rely on drywall anchors alone for a ceiling-mounted projector. Always anchor into joists or studs using hardware rated for at least twice the projector's weight. A falling projector is a serious safety hazard.
Achieving a perfect image: Alignment and calibration tips
Now with the hardware installed, let's make sure the picture is clear and vivid. Physical setup determines 80% of your image quality. Calibration handles the rest.
Start by confirming the projector is perpendicular to the screen, meaning the lens points straight at the screen surface without any upward, downward, or sideways angle. When the projector is off-axis, you get keystone distortion, where the image looks like a trapezoid instead of a rectangle.
Keystone correction is a feature that digitally reshapes the image to compensate. But here's the catch: digital keystone reduces resolution by cropping and scaling pixels, which visibly softens the image. Always use physical adjustments first: tilt the mount, adjust the projector's feet, or use lens shift if your model has it. Our keystone correction tips explain when digital correction is acceptable and when to avoid it entirely.
Only use digital keystone as a last resort when physical adjustment isn't possible. Even a few degrees of digital correction can noticeably reduce sharpness on a 1080p or 4K source.
Post-installation calibration checklist:
- Focus: Adjust the focus ring until text on a test pattern is sharp at the screen edges, not just the center.
- Zoom: Set zoom so the image fills the screen without overshoot.
- Brightness: Set to 45 to 50% in a darkened room using a calibration test pattern.
- Contrast: Target 55 to 65% for balanced highlights and shadow detail.
- Resolution: Match the projector output to your source signal (1080p source, 1080p output).
- Color temperature: Start at the "warm" or "cinema" preset and adjust from there.
If your projector supports picture profiles, save your calibrated settings as a named profile. This lets you switch between a bright "classroom" mode and a darker "movie" mode without recalibrating every time.
Pro Tip: Plug your projector into a surge protector rated at a minimum of 1,200 joules. Malaysia's power grid can experience voltage spikes, especially during storms, and projector lamp or laser modules are expensive to replace.
Our experience: Practical projector installation isn't about perfection
With calibration handled, here's our honest take on what matters most for real-world projector setups.
After helping hundreds of Malaysian customers with their installations, the pattern is clear: people who obsess over achieving the theoretically perfect setup often end up more frustrated, not less. Chasing the last millimeter of alignment or the absolute ideal throw distance can make you overlook the basics that actually matter.
The most common errors we see are not about fine-tuning. They're about skipping room measurement entirely, mounting without locating studs, or leaning on digital keystone to fix a placement problem that should have been solved physically. These aren't subtle mistakes. They produce noticeably bad results.
The installations that look and perform best are the ones built on a simple process: measure the room, test before drilling, mount securely, and calibrate in the actual viewing conditions. That's it. Our installation experience guide reflects exactly this approach, focusing on repeatable methods over theoretical perfection.
Comfort and safety matter more than squeezing out the last 1% of sharpness. A well-planned, safely mounted projector that you can adjust easily will serve you far better than a technically optimal setup that's a pain to live with.
Get more from your projector: Recommended solutions
Ready to put these tips into action? Here's where you can get the best tools and advice.
ProjectorDisplay.com stocks a hand-picked range of projectors and mounting accessories suited for Malaysian homes and classrooms. Whether you're still deciding on the right model, our short vs. long throw guide helps you match the projector type to your room size and budget.

Browse our current projector deals for discounted models across portable, laser, and smart projector categories. And if you want the sharpest possible image, pairing your projector with a dedicated projection screen makes a bigger visual difference than most people expect. Fast shipping across Peninsular Malaysia and WhatsApp support are available for every order.
Frequently asked questions
What is the ideal throw distance for a classroom or home projector?
The ideal throw distance depends on your projector's throw ratio and screen size. A 2:1 ratio with a 100" screen means roughly 4.4 meters of distance, so always check your projector's manual for the exact specification.
Is it better to use ceiling mounts or a shelf for my projector?
Ceiling mounts offer better stability, a cleaner look, and better ventilation compared to shelves. For permanent setups in homes or classrooms, ceiling mounting is the recommended choice.
How can I avoid keystone distortion on my projector?
Position the projector perpendicular to the screen and use physical lens shift or tilt adjustments to align the image. Digital keystone correction should only be used when physical adjustment is no longer possible.
What basic calibration should I do after installation?
Set brightness to 45 to 50% and contrast to 55 to 65% in a dark room using test patterns, and always match your output resolution to your source signal for the sharpest result.
Recommended
- Projector installation guide 2026: Home and business tips – Projector Display
- 7 Expert Tips for Video Projectors Best Buy Success – Projector Display
- Home Theater Projector Setup: Achieve the Ultimate Viewing Experience – Projector Display
- How to Mount Projector for Optimal Home Viewing Experience – Projector Display