Setting up a projector at home sounds simple and exciting. But even the tiniest mistake in positioning or hardware choice can ruin the entire viewing experience. Precise measurements matter more than most people realize and just a few millimeters off could mean a blurry or off-center image. What surprises most is that the real secret to a crystal-clear picture is not found in the projector itself but in the careful planning and tiny adjustments you make before a single screw goes into the wall.
Table of Contents
- Step 1: Assess Your Room Layout For Projector Placement
- Step 2: Choose The Right Mounting Hardware And Tools
- Step 3: Install The Mount Securely On The Ceiling Or Wall
- Step 4: Connect Your Projector To The Power And Input Sources
- Step 5: Adjust The Projector's Position And Focus For Clarity
- Step 6: Test The Setup And Fine-Tune The Image Quality
Quick Summary
| Key Point | Explanation |
|---|---|
| 1. Assess room layout carefully | Measure wall space and consider obstructions for optimal projector placement. |
| 2. Select appropriate mounting hardware | Ensure the mount is compatible with your projector's specifications for stability and performance. |
| 3. Secure installation is crucial | Mounting to wall studs or ceiling joists guarantees the safety and stability of your projector. |
| 4. Manage cables effectively | Use quality cables and organize them to avoid clutter and ensure signal clarity. |
| 5. Fine-tune image quality with settings | Calibrate colors and modes based on viewing content for the best picture performance. |
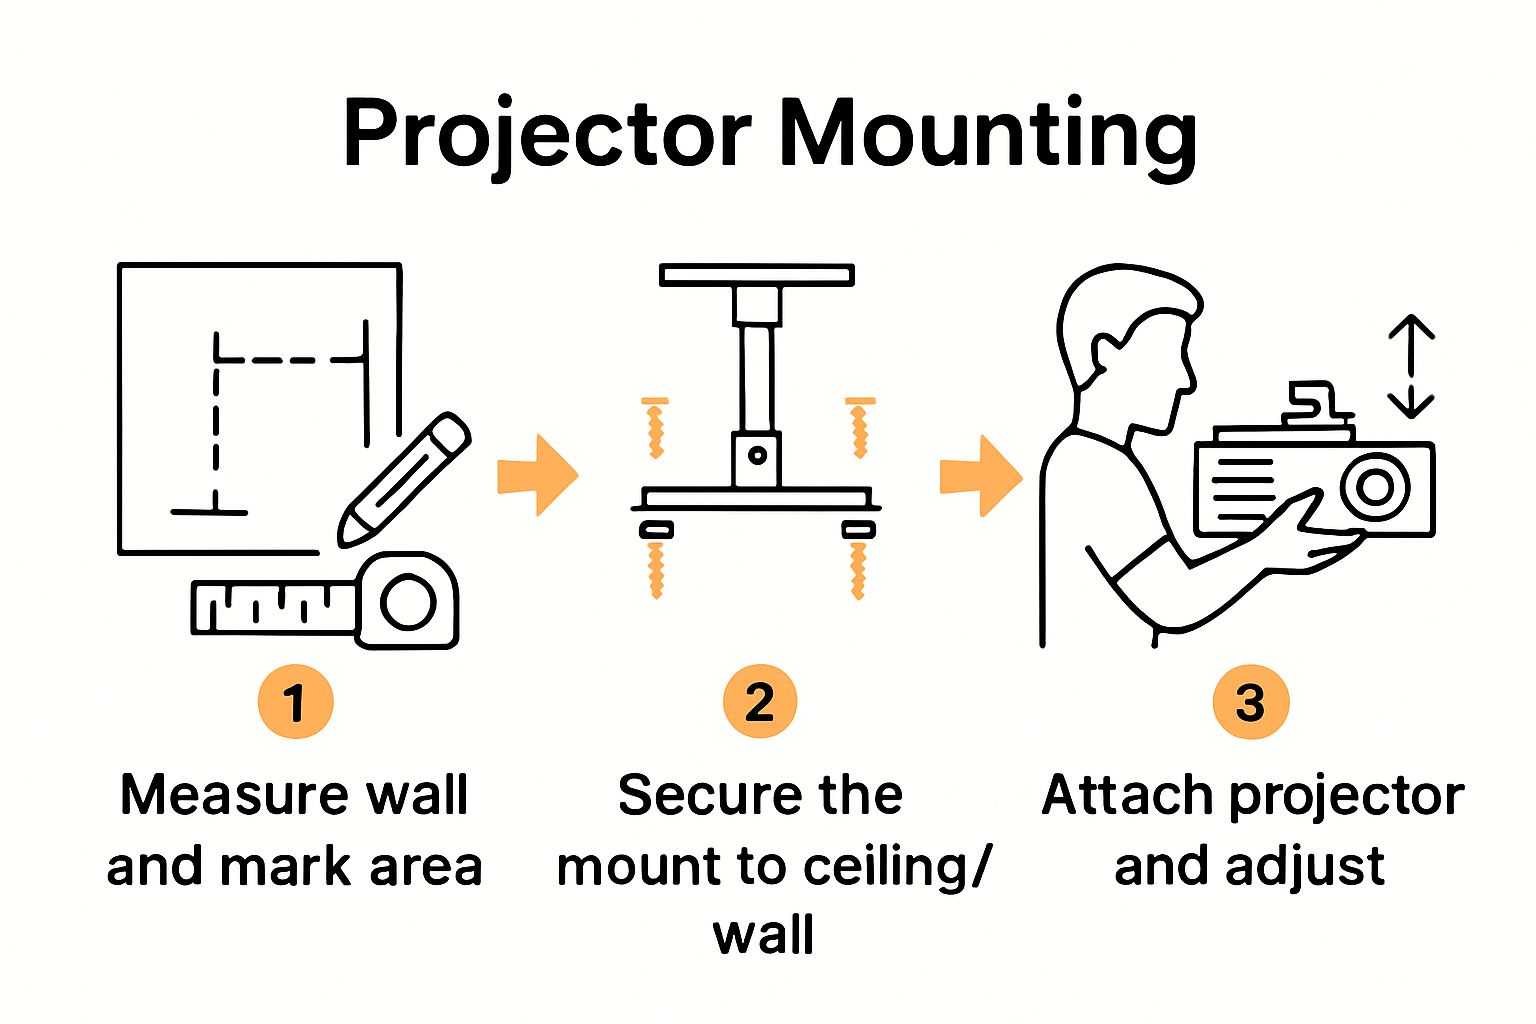
Step 1: Assess Your Room Layout for Projector Placement
Successful projector mounting begins with a strategic room assessment that will determine your optimal viewing experience. Before drilling any holes or purchasing mounting hardware, you need to carefully analyze your space to ensure the best possible projection setup. This initial step involves understanding your room's unique characteristics and how they interact with projector placement.
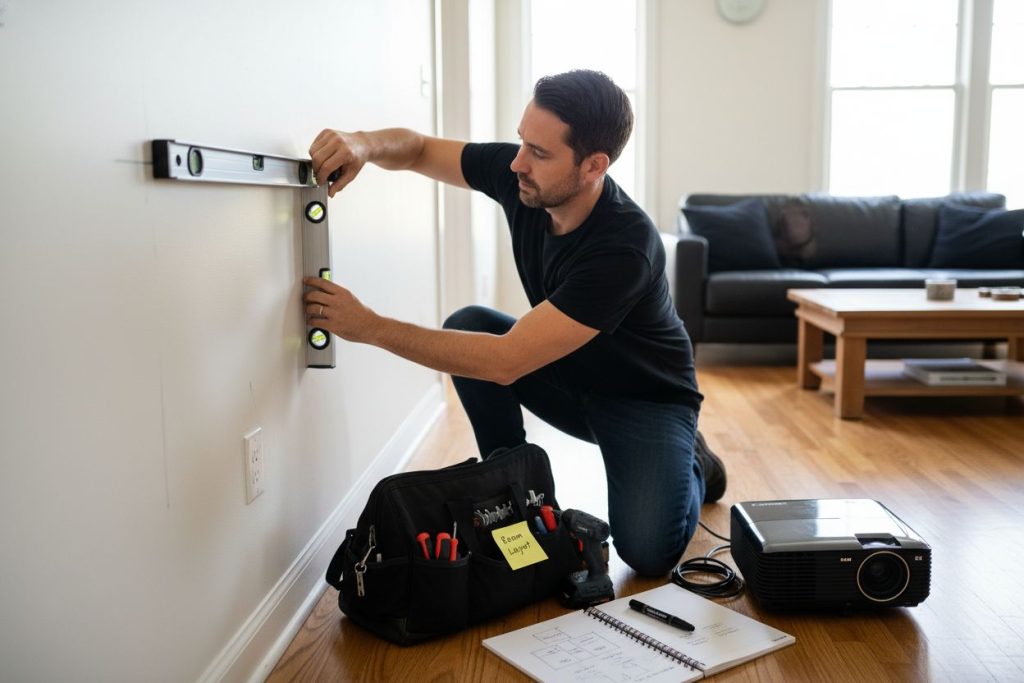
Start by measuring the total available wall or screen area, paying close attention to potential obstructions like windows, furniture, or architectural features that might interfere with your projection. Precise measurements are crucial – you want to confirm you have sufficient blank wall space that allows for your desired screen size without compromising image quality. Use a laser measuring tool or standard tape measure to get accurate dimensions, recording both the width and height of your potential projection surface.
Next, consider the room's depth and seating arrangement. The distance between your projector and the screen significantly impacts image clarity and size. Most projectors require specific throw ratios, which determine how wide the image will be based on the distance from the lens to the screen. Our comprehensive home theater projector guide can help you understand these technical nuances. Typically, you'll want a minimum of 10-12 feet of throw distance for a 100-inch screen, though this varies depending on your specific projector model.
Light control is another critical factor in your room layout assessment. Ambient light can dramatically reduce image quality, so evaluate your room's natural and artificial lighting conditions. Rooms with large windows or bright overhead lights will require additional light management strategies, such as blackout curtains or strategic lamp positioning. Ideally, choose a wall or area that allows for minimal light interference and maximum projection surface. Taking time to methodically assess these elements ensures you'll create a viewing environment that maximizes your projector's potential and delivers an exceptional home entertainment experience.
Step 2: Choose the Right Mounting Hardware and Tools
Selecting appropriate mounting hardware is a critical phase in creating your ideal home projection setup. The right equipment ensures not just successful installation but also long-term stability and optimal projector performance. Your mounting solution needs to match both your projector's specifications and your room's architectural characteristics.
Projector mount compatibility becomes your primary consideration. Different projector models require specific mounting brackets, so carefully review your projector's weight, dimensions, and manufacturer recommendations. Universal mounts can work for many models, but precision matters. Explore our screen size guide to understand how mounting hardware correlates with screen dimensions and projector positioning.
Quality mounting hardware typically includes adjustable ceiling or wall mounts constructed from robust materials like steel or aluminum. Look for mounts with multiple adjustment points that allow fine-tuning of projection angle and distance. Some advanced mounting systems offer integrated cable management, allowing you to route power and signal cables cleanly and professionally. When selecting your mount, prioritize load-bearing capacity that substantially exceeds your projector's weight to ensure maximum safety.
Your essential toolkit will include precision instruments for accurate installation. You'll need a reliable stud finder to locate secure mounting points, a high-quality bubble level to ensure perfect horizontal alignment, an electric drill with appropriate drill bits, heavy-duty wall anchors, measuring tape, and a reliable screwdriver set. According to manufacturer installation guides, always pre-drill pilot holes and use mounting hardware specifically rated for your wall or ceiling material to prevent potential structural damage. Invest in professional-grade tools to guarantee a secure, precise installation that protects your valuable projection equipment and maintains optimal viewing angles.
The following table summarizes the essential tools and materials required for a secure home projector installation, including their specific purpose to help you prepare for a smooth setup.
| Tool/Material | Specification/Type | Purpose |
|---|---|---|
| Stud finder | Electronic or magnetic | Locates wall studs or ceiling joists |
| Bubble level | Standard or digital | Ensures mount alignment and projector leveling |
| Electric drill | With drill bits matched to screws | Pre-drills holes for screws and anchors |
| Heavy-duty wall anchors | Rated for wall/ceiling material | Provides secure mounting if studs are unavailable |
| Mounting screws | Compatible with mount and surface | Attaches mount securely to ceiling or wall |
| Measuring tape | Standard (at least 16 ft) | Measures screen area and projector distance |
| Screwdriver set | Phillips, flathead | Tightens mounting screws and adjustments |
| HDMI/Video cables | High-quality digital (HDMI, VGA) | Transmits video signal from source device |
| Cord management accessories | Clips, sleeves, ties | Organizes and secures cables for tidy setup |
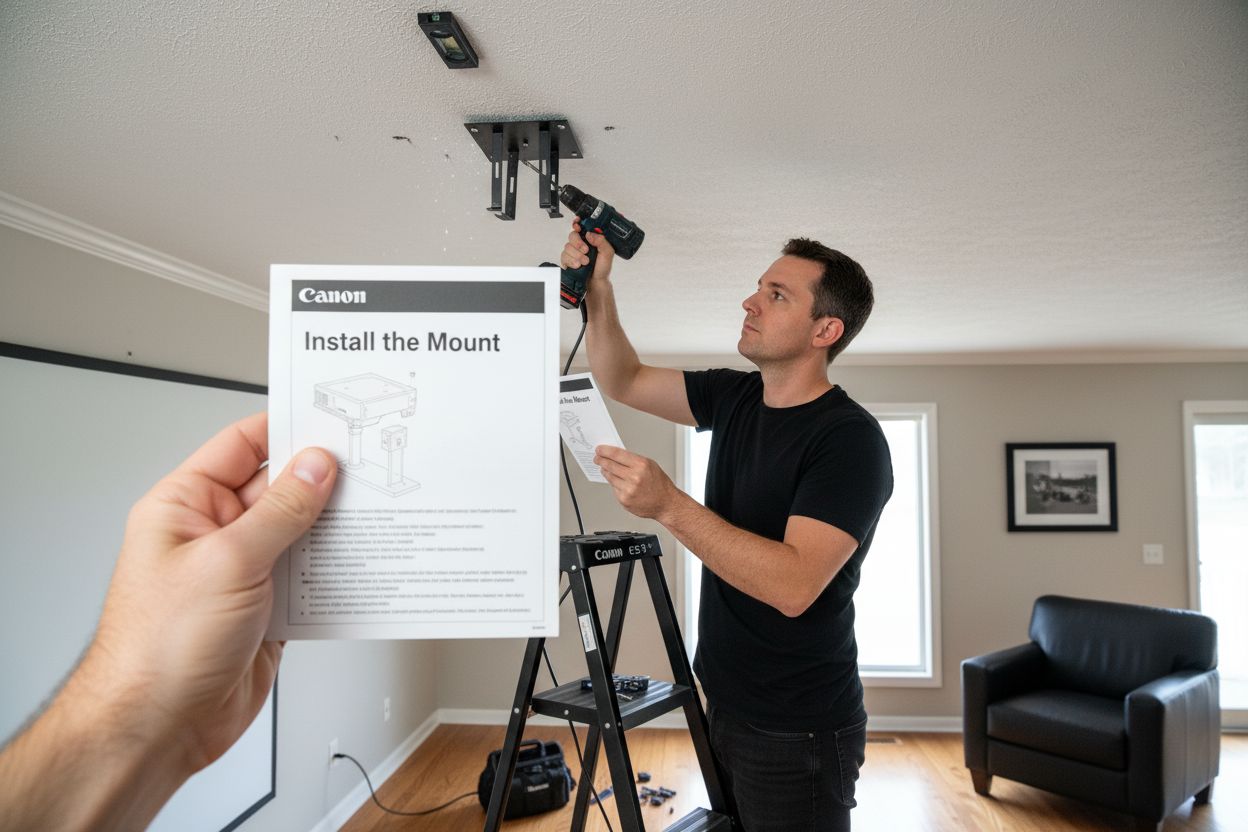
Step 3: Install the Mount Securely on the Ceiling or Wall
Installing your projector mount represents a pivotal moment that demands precision, patience, and methodical execution. This critical step transforms your carefully selected mounting hardware into a robust foundation for your home theater experience. Your goal is to create an installation that provides rock-solid stability while allowing future adjustments for optimal projection alignment.
Begin by meticulously locating and marking your mounting points using the stud finder. Structural integrity is non-negotiable – mounting directly into wall studs or ceiling joists provides the most secure attachment. If studs are not perfectly positioned for your desired projection angle, use high-quality toggle bolts or specialized heavy-duty wall anchors designed to distribute weight across a broader surface area. Avoid drywall-only mounting, which can lead to dangerous equipment failure.
Careful measurement becomes your closest ally during installation. Use your level to mark perfectly straight mounting points, ensuring your projector will hang precisely parallel to your screen or viewing surface. Our home theater projector tips emphasize the importance of millimeter-level accuracy. Pre-drill pilot holes slightly smaller than your mounting screws to prevent wood splitting and provide optimal grip. When driving screws, apply steady pressure and avoid over-tightening, which can strip threads or create structural stress.
After initial mounting, perform a comprehensive stability test before attaching your projector. Gently apply pressure to the mount from multiple angles, checking for any wobbling or movement. Wiggle is the enemy of great projection – your mount should feel absolutely solid and immovable.
 Double-check all connection points, ensuring each screw is flush and secure. A properly installed mount not only protects your valuable projection equipment but also provides the rock-solid foundation necessary for achieving that perfect, crystal-clear home viewing experience.
Step 4: Connect Your Projector to the Power and Input Sources
Connecting your projector to power and input sources represents the critical moment where your carefully planned setup transforms from potential to performance. This step demands careful attention to detail and a systematic approach to ensure seamless connectivity and optimal signal transmission.
Cable management becomes your primary focus during this phase. Select high-quality HDMI or digital video cables that match your source device's output capabilities. Learn more about connecting your projector to various devices to understand the nuanced connection requirements. Examine your projector's input ports carefully – most modern units offer multiple connection options including HDMI, VGA, DisplayPort, and sometimes wireless connectivity. Choose the highest quality digital connection available, typically HDMI, which provides superior audio and video signal transmission.
Position your power and signal cables strategically to minimize visual clutter and potential interference. Avoid creating tight bends or unnecessary strain on cable connections, which can degrade signal quality or cause physical damage. Use cable management accessories like cord clips or sleeves to create a clean, professional installation. When connecting power, ensure you're using a surge protector or dedicated power strip that can handle your projector's electrical requirements. Some projectors have specific voltage needs, so consult your device's manual to confirm compatibility.
After completing connections, conduct a systematic verification process. Power on your projector and source device, then cycle through input sources to confirm signal reception. Check image clarity, color accuracy, and audio synchronization. A successful connection will display a clean, sharp image without distortion or signal dropout. If you encounter any issues, double-check cable connections, verify input source settings, and ensure all devices are powered on and communicating correctly. Patience and methodical troubleshooting will help you achieve the perfect audio-visual setup for your home entertainment system.
Step 5: Adjust the Projector's Position and Focus for Clarity
Achieving the perfect projected image requires meticulous positioning and precise focus adjustment – a delicate process that transforms your mounted projector from hardware to visual magic. This step demands patience, attention to detail, and a systematic approach to fine-tuning your projection setup.
Begin by making incremental adjustments to your projector's physical positioning. Slight movements can dramatically impact image quality, so use the mounting bracket's adjustment points to align the projector perfectly perpendicular to your screen or projection surface. Explore our guide on optimal projector distance to understand the technical nuances of positioning. According to installation experts, the goal is to create a perfectly rectangular image without relying heavily on digital keystone correction, which can compromise image sharpness.
Focus becomes your next critical consideration. Most projectors feature manual focus rings or digital focus controls that allow you to sharpen the image with precision. Start by projecting a test image with fine details – text or a high-resolution graphic works best – and slowly rotate the focus mechanism. Watch carefully as the image transitions from blurry to crystal-clear, paying special attention to edge sharpness and overall clarity. Some projectors include built-in focus assist features that can help you achieve perfect resolution. Take your time during this process, as even a millimeter of adjustment can significantly impact image quality.
Once you've achieved initial positioning and focus, conduct a comprehensive verification test. Project a variety of content – movies, presentations, games – to ensure consistent image quality across different scenarios. Check for color accuracy, sharpness, and uniform brightness across the entire screen. A perfectly adjusted projector will display crisp, vibrant images with no visible distortion or focus falloff. If you notice any imperfections, return to your positioning and focus adjustments, making minute corrections until you achieve visual perfection. Remember that achieving the ideal setup is an iterative process that rewards patience and careful observation.
Step 6: Test the Setup and Fine-Tune the Image Quality
The final stage of your projector installation involves comprehensive testing and meticulous image quality optimization – a critical process that transforms your technical setup into a stunning visual experience. This step requires systematic evaluation across multiple content types and careful adjustment of your projector's built-in settings to achieve picture-perfect performance.
Color calibration and picture mode selection become your primary focus during testing. Modern projectors offer multiple preset modes like Cinema, Sports, Standard, and Dynamic, each optimized for different viewing scenarios. Learn more about projector settings and configuration to understand the nuanced differences between these modes. Start by selecting a mode that matches your typical content – cinema mode for movies, sports mode for athletic events, and standard mode for general viewing. Experiment with each preset, observing subtle variations in color temperature, contrast, and brightness.
Precise color and contrast adjustments require a methodical approach. Use high-quality test images or calibration discs that provide standardized color charts and resolution patterns. Pay close attention to subtle details like skin tone accuracy, shadow definition, and color gradation. Most projectors include granular controls for brightness, contrast, color saturation, and color temperature. Make incremental adjustments, comparing each change against a reference image or professional calibration standard. For the most accurate results, consider using a color calibration tool or hiring a professional calibration service to fine-tune your projector's performance.
Finally, conduct real-world testing across diverse content types. Watch movies, play video games, stream television shows, and display presentations to ensure consistent image quality. Check for potential issues like color banding, motion blur, or uneven brightness across different scenes. A perfectly calibrated projector will deliver smooth, accurate images with natural color reproduction and excellent detail preservation. Document your preferred settings for future reference, understanding that environmental factors like room lighting can necessitate periodic recalibration to maintain optimal visual performance.
The table below provides an at-a-glance checklist to help you verify that your home projector is properly installed and fully optimized for the best viewing experience.
| Verification Step | How to Check | Success Criteria |
|---|---|---|
| Mount Stability | Gently apply pressure to the mount from all angles | No wobble or movement detected |
| Image Alignment | Check that projected image is perfectly rectangular | Even borders, aligned with screen edges |
| Focus Accuracy | Project test image and adjust focus controls | Crisp, clear image edge-to-edge |
| Cable Management | Inspect cable routing and connections | No clutter, cables secure and unobstructed |
| Signal Quality | Cycle through all input sources, verify audio/video | No distortion, dropouts, or lag |
| Color Calibration | Display test images, adjust picture settings | Natural colors, good contrast and brightness |
| Real-World Content Test | Play different media (movies, games, presentations) | Consistently high image and audio quality |
Turn Your Home Theater Vision into Reality with ProjectorDisplay.com
Are you struggling to create a flawless home viewing setup even after following every step to mount your projector just right? Many home users find that even with precise room measurements and careful adjustments, real satisfaction only comes with the right screen and accessories. Imagine the difference when your sharp projected image is paired with a perfect projector screen that enhances color and clarity, and reliable products backed by expert support. ProjectorDisplay.com is dedicated to helping you achieve crystal-clear pictures free from distortion, uneven lighting, or awkward setup limitations.

Do not let small details hold your home movie nights back. Now is the time to upgrade with a trusted, all-in-one source for high-quality projectors, screens, and accessories designed specifically for Malaysia's standards. Explore our extensive Projector Screen collection or head to ProjectorDisplay.com to find everything you need for a seamless setup. Enjoy fast shipping, local support, and the tools to finally experience your favorite films and games just as you imagined. Visit us today and make your home cinema dreams come true.
Frequently Asked Questions
How do I assess my room layout for optimal projector placement?
To assess your room layout, measure the wall or screen area and identify any obstructions like windows and furniture. Ensure you have enough blank space to support your desired screen size, aiming for a throw distance of at least 10-12 feet for a 100-inch screen.
What should I consider when choosing mounting hardware for my projector?
Choose mounting hardware that is compatible with your projector's specifications, including weight and dimensions. Look for adjustable mounts made of strong materials, ensuring the load-bearing capacity exceeds your projector's weight for safety and stability.
How do I securely install a projector mount on the wall or ceiling?
Secure your projector mount by locating studs and marking mounting points accurately. Use heavy-duty anchors if studs aren't available, and ensure everything is leveled and stable before attaching the projector to prevent wobbling.
What are the steps to connect my projector to power and input sources?
Begin by selecting high-quality HDMI or digital video cables that match your source device's output. Strategically position the power and signal cables to avoid clutter, and ensure that all connections are secure before powering on the devices to check for signal reception.
How can I adjust my projector for the best image clarity?
To adjust your projector for clarity, fine-tune its physical position incrementally and manually adjust the focus using the projector's controls. Make sure to project a test image and make small adjustments until the image is sharp and rectangular without relying on digital corrections.
What is the best way to test and fine-tune my projector setup?
To test your projector setup, evaluate its performance across various content types and adjust color and contrast settings as needed. Use test images to check color accuracy and details, making iterative adjustments until you achieve visually pleasing results.
Recommended
- 7 Best Home Theater Projector Tips for Ultimate Viewing – Projector Display
- Best Projector and Screen for Home Theater in Malaysia 2025 – Projector Display
- Projector Screen Size Guide 2025: Perfect Fit for Malaysian Needs – Projector Display
- How to Mount a Projector: Step-by-Step Guide for Malaysia 2025 – Projector Display