TL;DR:
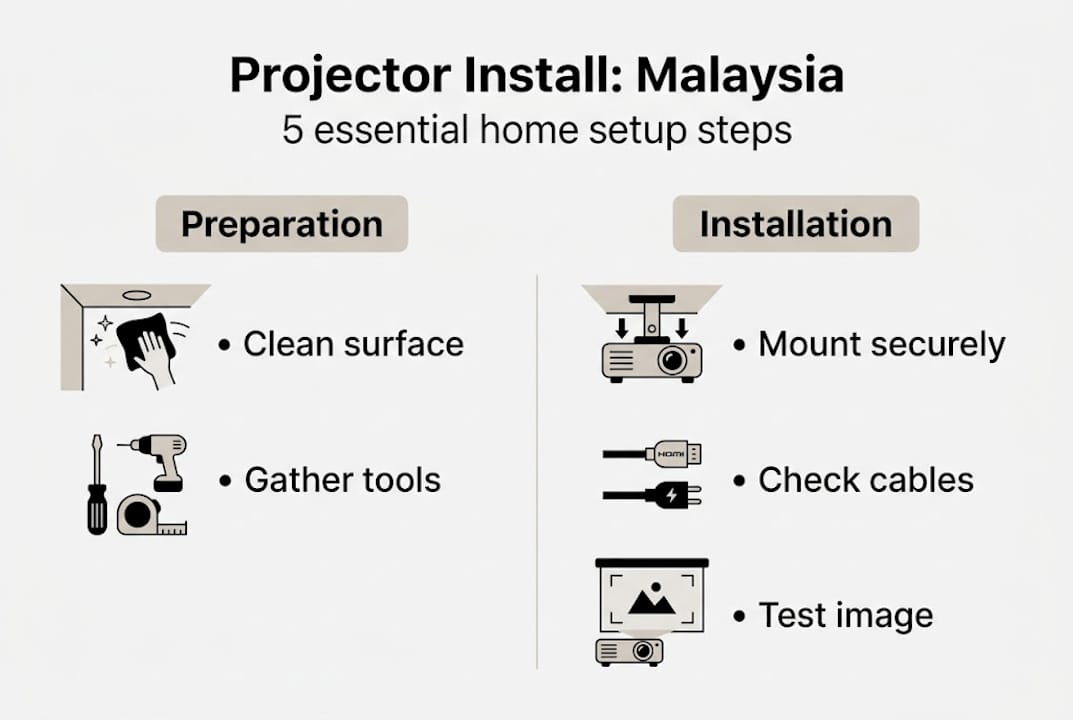
- Proper preparation and tool gathering prevent installation mistakes and ensure safety.
- Correct projector selection and placement are critical for optimal image quality in Malaysian conditions.
- Secure mounting with appropriate anchors and safety wires ensures stability and long-term performance.
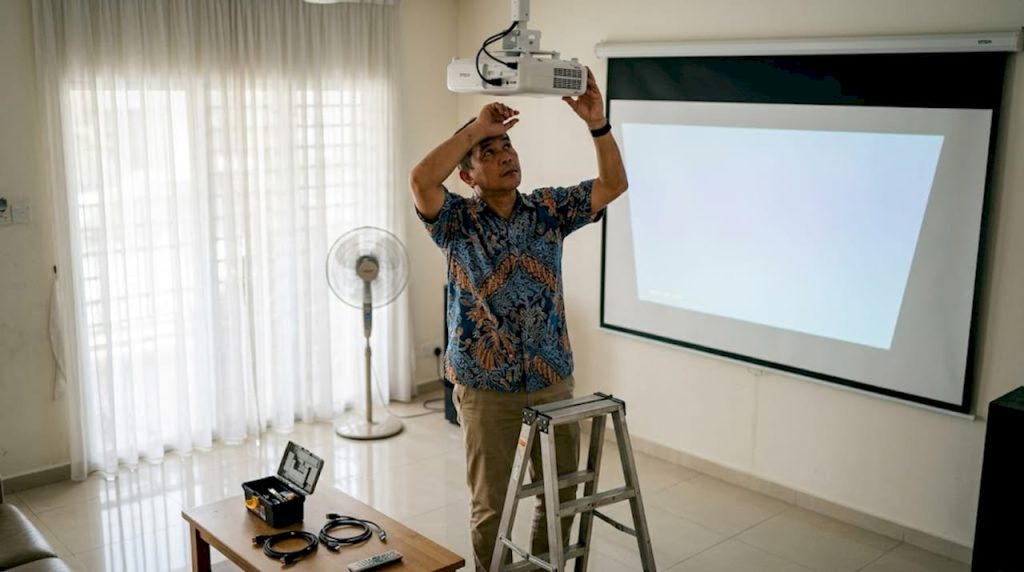
Getting your projector installed only to find a blurry, misaligned image is one of the most frustrating experiences in home theater setup. Many Malaysian homeowners and classroom educators skip critical preparation steps, then spend hours troubleshooting problems that a simple checklist would have prevented. Malaysian rooms bring their own challenges too: high humidity, compact condo layouts, and uneven ceilings are not covered in most generic guides. This article walks you through every stage of projector installation, from gathering tools to calibrating your final image, so you get it right the first time.
Table of Contents
- Gathering tools and preparing your space
- Selecting the right projector and placement
- Mounting and installing your projector securely
- Connection, calibration, and image optimization
- A Malaysian perspective on projector installation checklists
- Level up your projector installation with expert solutions
- Frequently asked questions
Key Takeaways
| Point | Details |
|---|---|
| Preparation is everything | Assembling the right tools and prepping your space prevent costly mistakes. |
| Choose the right projector | Short-throw and high-lumen models excel in Malaysian homes and classrooms. |
| Mount safely | Always use safety wires and proper anchors—inadequate mounting risks both equipment and personal safety. |
| Optimize for climate | Humidity control is essential for preventing projector damage and maintaining top image quality. |
Gathering tools and preparing your space
Before diving into installation steps, you'll need to gather tools and prep the space for the best results. Skipping this stage is the number one reason installations go wrong. You reach the critical mounting step only to realize you're missing a drill bit or the right anchor bolts. Laying everything out beforehand saves you time and prevents costly mistakes.
Here are the essential tools and materials you'll need:
- Drill and drill bits (for concrete or drywall, depending on your ceiling or wall type)
- Stud finder to locate solid anchor points
- Projector ceiling or wall mount (adjustable models work best for Malaysian spaces)
- Safety wire for ceiling installations
- Cable ties and cable management sleeves
- HDMI and audio cables of the correct length
- Measuring tape and spirit level
- Screwdrivers (flathead and Phillips)
- Pencil and masking tape for marking positions
| Tool | Optional or required | Purpose |
|---|---|---|
| Adjustable ceiling mount | Required | Supports projector at correct angle |
| Safety wire | Required (ceiling) | Prevents falls if mount fails |
| Stud finder | Required | Ensures anchoring into solid material |
| Cable management sleeves | Optional but recommended | Keeps wiring tidy and safe |
| Dehumidifier | Strongly recommended | Protects against lens fungus in humid rooms |
| Laser distance meter | Optional | Speeds up throw distance calculations |
Preparing the room itself is just as important as having the right tools. Clean the ceiling and wall surfaces where you plan to mount. Measure the distance from the screen to the projector position and mark it clearly. Check your room's lighting conditions at different times of day, since natural light from Malaysian windows can wash out your image if you're not careful.
Humidity is a serious concern in Malaysia. The average indoor humidity in Malaysian homes can exceed 70% during rainy season, which creates the perfect environment for lens fungus to grow inside your projector. Run a dehumidifier in the room for at least 24 hours before and after installation. You can find guidance on protecting your equipment in this projector accessories guide, which covers protective tools worth adding to your setup.
For must-have projector accessories specific to Malaysian conditions, consider anti-fungal silica gel packs placed near your projector storage area. Short-throw projectors suit small rooms and adjustable mounts handle slanted ceilings well, which is a common issue in older Malaysian landed homes and shophouses.
Pro Tip: Lay out every tool and component on the floor before you start. Take a photo of the layout. This acts as your visual checklist so nothing gets missed mid-installation.
Selecting the right projector and placement
Once your space is ready, the next crucial step is choosing and positioning your projector correctly. The wrong projector type in the wrong position produces a poor image no matter how carefully you mount it.
| Projector type | Best for | Key advantage |
|---|---|---|
| Short-throw | Small condos, classrooms | Works within 1 to 1.5 meters from screen |
| Long-throw | Large home theaters, halls | Better for rooms deeper than 4 meters |
| High-lumen (3000+ lumens) | Bright rooms, classrooms | Handles ambient light well |
| Standard lumen (1500-2500) | Dedicated dark home theaters | Richer contrast in controlled lighting |
| Laser projector | Premium home or business use | Longer lifespan, consistent brightness |
Follow these steps to measure and position your projector correctly:
- Measure your screen size first. Decide on the diagonal screen size you want, typically 100 to 120 inches for home theaters and 80 to 100 inches for classrooms.
- Calculate throw distance. Multiply your desired screen width by the projector's throw ratio (listed in the spec sheet). A 2.0 throw ratio with a 2-meter-wide screen means you need 4 meters of distance.
- Mark the projector position on the ceiling or wall. Use masking tape to mark the spot before drilling anything.
- Check viewer seating positions. The center of the image should align with seated eye level for comfortable viewing over long periods.
- Account for keystone correction range. If your projector position is off-center vertically, confirm the keystone correction range in the specs can compensate without degrading image sharpness.
For classrooms and Malaysian condos, short-throw high-lumen projectors are the practical choice because tight spaces and ambient light make standard projectors underperform. A condo living room with glass sliding doors and no blackout curtains needs at least 3000 lumens to produce a watchable image during the day.
For small room projectors that balance price and performance in Malaysian conditions, short-throw models with built-in keystone correction are the most forgiving during installation.
Pro Tip: Use an adjustable mount rather than a fixed one. Malaysian ceilings, especially in older homes and HDB-style units, are rarely perfectly flat. An adjustable mount lets you correct the angle without repositioning the entire bracket.
Mounting and installing your projector securely
With your projector chosen, it's time to secure it for high performance and long-lasting stability. This is the stage where most DIY installations go wrong, usually because of shortcuts that compromise safety.
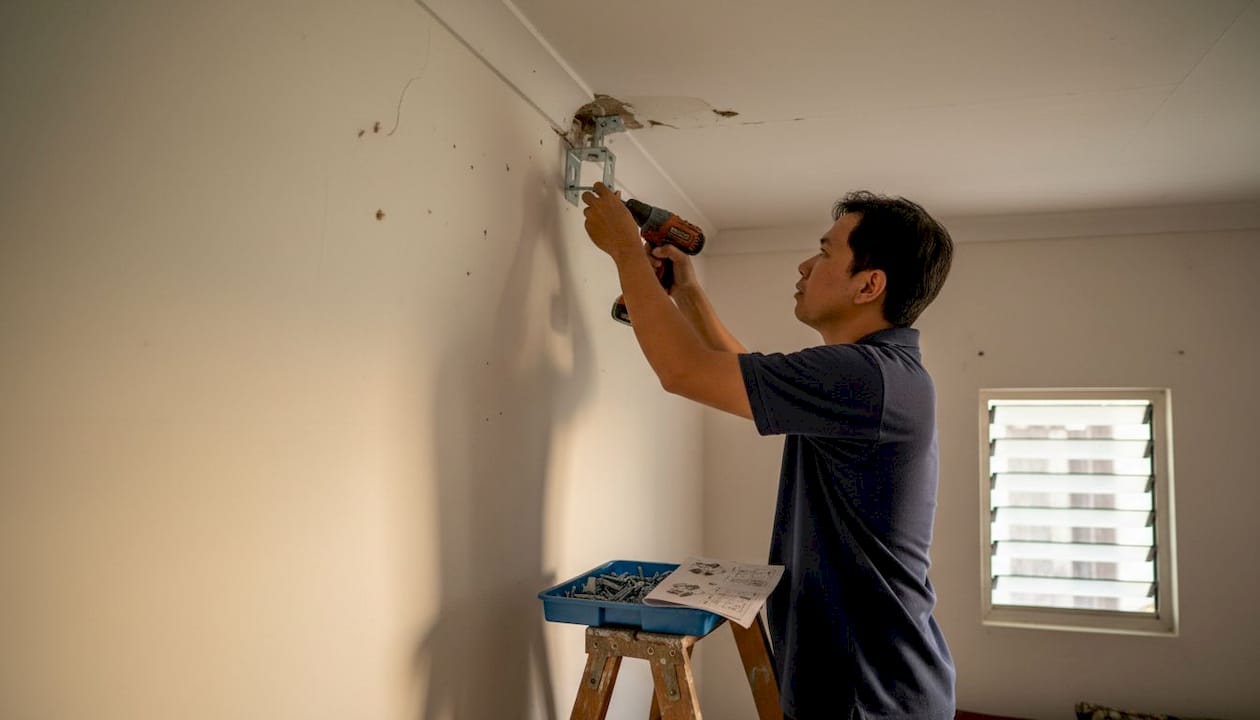
Follow these steps for a secure ceiling or wall mount:
- Locate ceiling joists or concrete anchor points using your stud finder. Never mount into drywall alone, especially for projectors heavier than 2 kg.
- Mark and pre-drill pilot holes at the mount bracket positions. For concrete ceilings common in Malaysian apartments, use a hammer drill with masonry bits.
- Insert appropriate anchors. Use expansion bolts for concrete and toggle bolts for hollow drywall cavities.
- Attach the mount bracket to the ceiling. Hand-tighten first, then use a wrench to snug the bolts firmly. Do not over-tighten, as this can crack plaster or strip threads.
- Attach the projector to the mount plate. Follow the manufacturer's torque specifications if listed.
- Attach the safety wire from the projector body to a separate anchor point on the ceiling.
- Adjust the mount angle to align the lens with your marked screen position.
- Double-check all connections before releasing the projector from your hands.
Safety note: Always attach a safety wire for ceiling mounts. If the primary mount bracket fails due to vibration, heat expansion, or anchor failure, the safety wire prevents the projector from falling and causing injury or damage.
Common mistakes to avoid include over-tightening screws (which strips threads and weakens the mount over time), using inadequate anchors for the ceiling material, and relying on adhesive products. Adhesives are not safe for projector installation under any circumstances, regardless of the weight rating on the packaging.
For slanted ceilings found in attic conversions or older Malaysian terrace houses, use a fully adjustable ball-head mount. These allow you to tilt and rotate the projector independently of the bracket angle. Read the full ceiling mount guide for detailed bracket options, and review mounting your projector for step-by-step photos covering different ceiling types.
Connection, calibration, and image optimization
With the projector installed, it's time to connect hardware and fine-tune your picture to perfection. A perfectly mounted projector with poor calibration still delivers a disappointing image.
Start by running your cables cleanly. Use HDMI 2.0 cables for 4K or high-refresh-rate sources. Run audio cables to your receiver or soundbar separately from power cables to avoid interference. For networked projectors, a wired Ethernet connection is more stable than Wi-Fi in dense Malaysian apartment buildings where wireless congestion is common.
Once connected, work through these image optimization settings in order:
- Focus ring: Adjust until text on screen is sharp at the center and edges.
- Zoom: Set the image size to match your screen borders precisely.
- Keystone correction: Use only the minimum correction needed. Heavy keystone adjustment reduces resolution and sharpness noticeably.
- Brightness and contrast: Set brightness so black areas look truly dark without crushing shadow detail.
- Color temperature: Use the "warm" or "cinema" preset for home theater. Use "cool" or "presentation" mode for classroom use.
- Sharpness: Keep this at 50% or lower. Over-sharpening creates artificial edge halos.
Malaysian humidity causes lens fungus that shows up as cloudy patches or soft spots in your image. Regular calibration checks help you catch this early before it becomes permanent damage.
For troubleshooting common visual issues: blurry edges usually mean the focus ring needs adjustment or the projector is not perpendicular to the screen. Hot spots (a bright circle in the center of the image) indicate a lens alignment issue or dirty optics. Color distortion often points to a faulty HDMI cable or incorrect color space settings in the source device.
Pro Tip: Run a humidity check in your projector room every month. Use a digital hygrometer (available at most hardware stores in Malaysia for under RM30). If humidity consistently exceeds 65%, invest in a small dehumidifier to protect your lens. You'll find additional installation tips and a full home theater setup guide to help you optimize every aspect of your viewing environment.
A Malaysian perspective on projector installation checklists
Most projector installation guides are written for temperate climates with standard room sizes. They assume you have a clean, rectangular room, a flat ceiling, and moderate humidity. That describes almost no home or classroom in Malaysia.
The real risk of skipping a checklist here is not just a crooked image. It's condensation forming inside the lens housing during a wet season, which creates mold that permanently etches the glass. We've seen projectors under two years old rendered unusable because the owner skipped basic humidity precautions. That's an expensive lesson.
Planning every step before you touch a drill also saves money in ways that aren't obvious upfront. Repositioning a mount after drilling into concrete is difficult and leaves permanent marks. Choosing the wrong projector for a bright classroom means buying again within a year.
Document your installation: write down the throw distance, mount height, keystone settings, and cable lengths used. When you move, upgrade, or set up a second unit in a different room, this record makes the process far faster. For a localized guide covering both homes and classrooms, installing projectors in Malaysia is a practical reference worth bookmarking.
Level up your projector installation with expert solutions
Ready to take the next step? Equip yourself with the best local support and products available for Malaysian conditions.

At ProjectorDisplay.com, we stock a curated range of best projectors in Malaysia suited for condos, classrooms, and dedicated home theaters. Whether you need a short-throw model for a tight living room or a high-lumen laser unit for a bright classroom, we have options tested for Malaysian use. Follow our detailed installation guide for step-by-step support, and browse our full range of projector screen options to complete your setup. Fast shipping across Peninsular Malaysia and WhatsApp support mean you're never left guessing.
Frequently asked questions
What is the ideal height for mounting a projector in a home theater?
Mount the projector level with the top of the screen and as close to center as possible. Center alignment reduces keystone correction needs and preserves image sharpness.
How do I prevent projector lens fungus in humid Malaysian climates?
Use a dehumidifier, store the projector in a dry environment, and inspect monthly for condensation or haze. Humidity maintenance is the single most important long-term care step in Malaysia.
Are safety wires necessary for ceiling-mounted projectors?
Yes, always use a safety wire for ceiling mounts. A safety wire prevents falls if the primary bracket fails due to vibration or anchor failure.
What projector type works best for small Malaysian condos?
Short-throw high-lumen projectors are the best fit for small, bright Malaysian condo spaces where throw distance and ambient light are both limiting factors.
Can I use regular adhesives to mount my projector?
No. Adhesives are unsafe for projector mounting regardless of weight rating. Always use proper mechanical mounts and anchors rated for your projector's weight.
Recommended
- Projector installation tips for perfect images in any room – Projector Display
- How to Install a Projector Mount for Perfect Viewing – Projector Display
- How to Mount a Projector: Step-by-Step Guide for Malaysia 2025 – Projector Display
- How to Mount a Projector: Step-by-Step Guide for Malaysia 2025 (Repost) – Projector Display