
Most small businesses in Malaysia know that downtime during presentations can hurt sales and credibility. When projector lamps start to fail, finding reliable, cost-friendly replacements becomes a priority. Quality matters just as much as price, especially if you want results as sharp as an American boardroom. This practical guide highlights the key steps and tools needed to safely replace your projector lamp and keep your business presentations running smoothly, saving both time and unnecessary costs. Replacing a faulty lamp can instantly restore up to 80 percent of your projector's lost brightness.
Table of Contents
- Step 1: Gather Necessary Tools And Safety Gear
- Step 2: Power Off And Prepare The Projector
- Step 3: Remove The Old Projector Lamp
- Step 4: Install The Elplp88 Replacement Projector Lamp
- Step 5: Test And Confirm Lamp Functionality
Quick Summary
| Key Point | Explanation |
|---|---|
| 1. Gather essential tools first | Collect tools like microfiber cloth, screwdriver, and gloves to ensure a smooth replacement process. |
| 2. Power off and cool down | Always turn off and unplug the projector, allowing it to cool for at least 30 minutes to prevent burns. |
| 3. Handle lamp carefully | Avoid touching the glass with bare hands to prevent oil damage; use gloves for protection. |
| 4. Install lamp with precision | Align the new lamp correctly and secure it without overtightening to ensure proper functionality. |
| 5. Test the new lamp thoroughly | Power on the projector to confirm proper startup, checking for brightness and clear images, and reset the lamp timer. |
Step 1: Gather Necessary Tools and Safety Gear
Replacing your Elplp88 projector lamp requires preparing the right tools and safety equipment to ensure a smooth and damage-free process. You will want to collect everything you need before starting to minimize potential complications and protect both yourself and your valuable projection equipment.
Start by gathering essential tools like a soft microfiber cloth for safe handling, which will help prevent scratching or damaging sensitive lamp components. A manual screwdriver will be crucial for carefully removing panel covers and accessing the lamp assembly. Additionally, wear clean work gloves to prevent transferring skin oils onto the delicate lamp surface, which could potentially reduce its operational lifespan or cause premature failure.
Aside from basic tools, make sure you have a clean workspace with good lighting and enough room to carefully maneuver around your projector. Keep a small container nearby to safely store screws and small components you will remove during the replacement process. Having everything organized and prepared will make your lamp replacement experience much more straightforward and stress-free.
Here's a quick summary of essential tools and safety gear for projector lamp replacement:
| Item | Purpose | Benefit |
|---|---|---|
| Microfiber cloth | Safe handling of lamp components | Prevents scratches |
| Manual screwdriver | Remove/attach screws | Prevents stripping screws |
| Cotton work gloves | Handling lamp surface | Reduces skin oil transfer |
| Magnetic parts tray | Store screws and small parts | Avoids lost components |
| Non-conductive surface | Workspace setup | Minimizes static damage |
Pro tip: Keep your workspace static-free by working on a non-conductive surface and avoiding carpeted areas that could generate unwanted electrical charges during your projector maintenance.
Step 2: Power Off and Prepare the Projector
Before attempting to replace your Elplp88 projector lamp, you must carefully power down and prepare your equipment to ensure a safe and successful maintenance process. Safety should always be your primary concern when working with electronic devices.
First, completely power down the projector by switching off the power button and unplugging the device from the electrical outlet. This critical step prevents potential electrical shock and ensures no residual current flows through the system. After disconnecting the power, allow the projector to cool down for at least 30 minutes. Projector lamps generate extreme heat during operation, and handling the device too soon could result in serious burns or potential injury.
While waiting for the projector to cool, take this time to clear your workspace and gather any additional tools you might need. Place the projector on a stable, flat surface with plenty of room to work. Ensure good lighting so you can see all components clearly and work comfortably. A clean, organized workspace will make the lamp replacement process smoother and help you avoid accidentally misplacing small screws or components.
Pro tip: Use a small magnetic parts tray to keep track of screws and tiny components during your projector maintenance to prevent losing critical pieces.
Step 3: Remove the Old Projector Lamp
With your projector powered down and cooled, you are now ready to remove the old Elplp88 lamp. This delicate process requires patience and careful attention to prevent damage to your expensive projection equipment.
Begin by carefully removing the lamp compartment door by locating and unscrewing the retaining screws. Use a manual screwdriver that fits the screw heads precisely to avoid stripping them. As you loosen the screws, keep them in a safe place where they will not roll away or get lost. Once the cover is removed, you will see the lamp assembly waiting to be extracted.
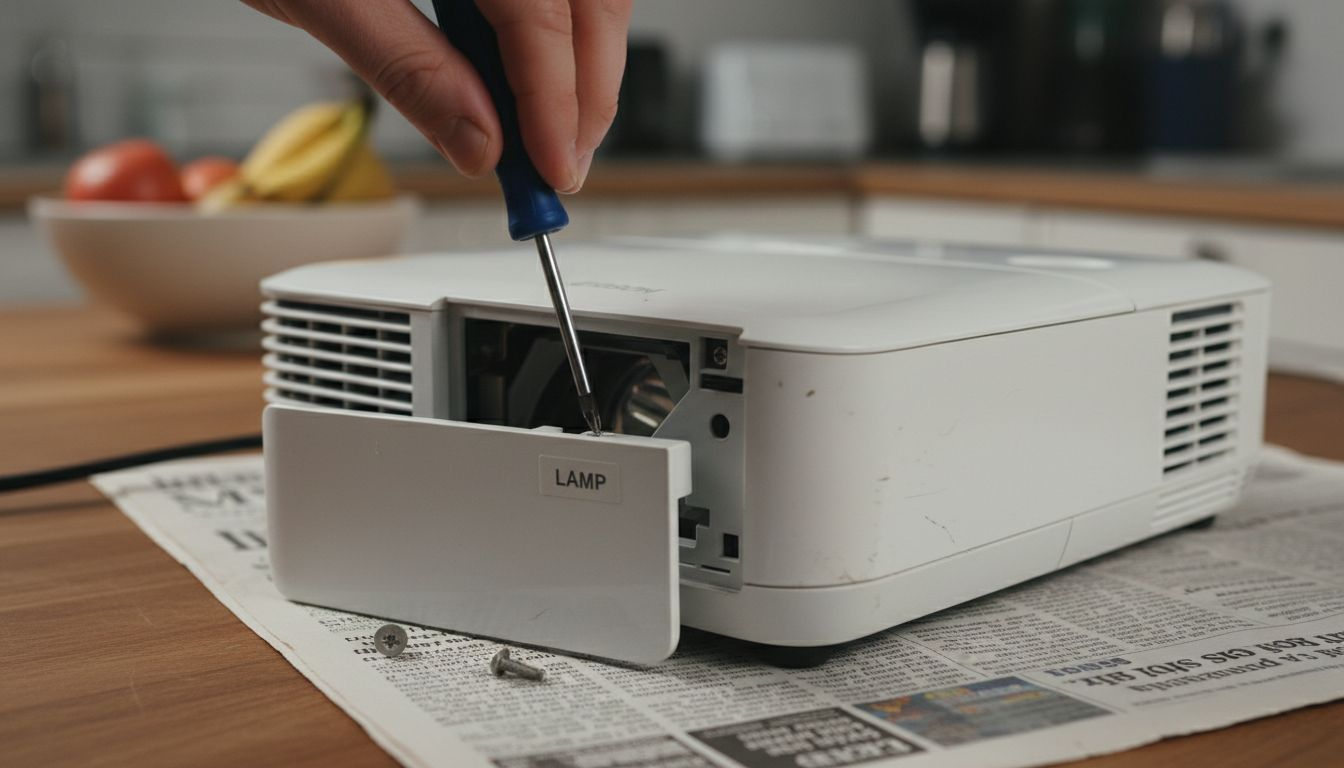
Next, gently disconnect any power cords attached to the lamp assembly. When handling the old lamp, avoid touching the glass surface with your bare hands as skin oils can damage the delicate components and potentially reduce the lamp's performance. Grasp the lamp by its raised handling section and pull it out slowly and straight to prevent any accidental bending or stress on the mounting brackets. Place the removed lamp in a safe location away from your workspace to prevent mix-ups with the new replacement lamp.
Pro tip: Always wear clean cotton gloves when handling projector lamps to prevent transferring skin oils and potentially damaging the sensitive glass surface.
Step 4: Install the Elplp88 Replacement Projector Lamp
Now that you have carefully removed the old lamp, you are ready to install the new Elplp88 replacement lamp. This critical step requires precision and careful handling to ensure proper functionality of your projector.
Insert the new lamp carefully into the projector's lamp compartment, maintaining the exact same orientation as the previous lamp. Pay close attention to the alignment markers or guides inside the compartment to ensure a correct fit. Wearing clean cotton gloves, hold the lamp by its edges and avoid touching the glass surface. Gently slide the lamp into place, making sure it sits flush and secure in its mounting brackets.
Once the lamp is positioned correctly, reattach any power cables and secure the lamp with the original screws. Tighten the screws evenly but carefully to avoid over-tightening, which could potentially damage the lamp assembly or the projector. Replace the lamp compartment door, ensuring it is locked properly and aligned correctly. This will protect the new lamp and prepare your projector for its next use.
Compare common projector lamp installation mistakes and their impacts:
| Mistake | Potential Consequence | Prevention Tip |
|---|---|---|
| Touching lamp glass | Reduced lamp lifespan | Always wear cotton gloves |
| Incorrect lamp alignment | Poor image quality | Match orientation markers |
| Overtightening screws | Damage to assembly | Tighten screws gently |
| Skipping lamp timer reset | Inaccurate usage tracking | Reset via projector menu |

Pro tip: Keep the original packaging of the new lamp for a few weeks in case you need to return or verify the replacement part.
Step 5: Test and Confirm Lamp Functionality
With your new Elplp88 lamp installed, the final critical step is to verify its performance and ensure everything works correctly. This testing phase will confirm your successful lamp replacement and prevent potential projection issues.
Power on the projector and carefully observe the lamp startup process. Check that the lamp illuminates evenly and produces a clear, bright image without flickering or unusual color distortions. Pay close attention to image quality, brightness levels, and overall projection performance. Most projectors will display a startup message or self diagnostic screen that can help you confirm the new lamp is functioning properly.
Access your projector's menu settings and reset the lamp timer to track the new lamp's usage accurately. This step is crucial for monitoring the lamp's lifespan and planning future replacements. If you notice any unusual behavior such as dimming, inconsistent lighting, or strange noises, immediately power down the projector and double check your installation process.
Pro tip: Keep the lamp replacement receipt and packaging for at least 90 days to ensure you can easily return or exchange the lamp if any unexpected issues arise.
Upgrade Your Projection Experience with Reliable Equipment
Replacing your Elplp88 projector lamp can be challenging if you want to avoid common issues like poor lamp alignment, damaging delicate parts, or reduced lamp lifespan. The article highlights the importance of careful handling, proper workspace setup, and using the right tools to ensure a smooth lamp replacement. If you want to enhance your overall projection setup and reduce downtime in the future consider upgrading to high-quality projectors and accessories that deliver consistent performance.

Explore a wide selection of premium projectors on ProjectorDisplay.com to find models with features like high lumens and full HD resolution designed for home theaters, business, or classrooms. Complement your device with a durable projector bag or case to protect your investment during transport. For the best visual experience, browse projector screens that enhance image quality at Projector Screen Archives. Act now to take advantage of fast shipping and expert customer support in Malaysia and avoid projector headaches down the line.
Frequently Asked Questions
How do I prepare to replace the Elplp88 projector lamp?
To prepare for replacing the Elplp88 projector lamp, gather essential tools such as a microfiber cloth, manual screwdriver, and clean cotton gloves. Set up a clean work area with adequate lighting and a small container for screws to ensure a smooth replacement process.
What safety precautions should I take when replacing the Elplp88 lamp?
Always power off and unplug the projector before starting any maintenance. Allow the projector to cool for at least 30 minutes to prevent burns and ensure safety while handling the lamp.
How do I remove the old Elplp88 projector lamp?
To remove the old lamp, unscrew the lamp compartment door using a manual screwdriver and gently disconnect any power cords attached to the lamp assembly. Carefully pull the lamp straight out by its handling section, avoiding contact with the glass surface to prevent damage.
How do I install the new Elplp88 replacement lamp?
Insert the new lamp into the projector's compartment in the same orientation as the old one. Ensure it sits flush and attach the power cables before securing the lamp with screws and replacing the door to protect the new lamp.
How can I test the new Elplp88 lamp after installation?
After installing the new lamp, power on the projector and check for even illumination and clear image quality. Reset the lamp timer in the projector's menu to accurately track the usage of the new lamp, helping plan future replacements.
What should I do if the new lamp is not functioning properly?
If the new lamp does not light up or shows poor performance, power off the projector immediately and double-check the lamp installation process for any misalignment or loose connections. Keep the receipt and packaging for at least 90 days in case you need to return or exchange the lamp if issues persist.
Recommended
- How to Replace Epson Projector Lamp Effectively – Projector Display
- Master the Art of Projector Lamp Replacement in 2025 – Projector Display
- Changing Projector Lamp: A Step-by-Step Guide for 2025 – Projector Display
- BenQ 5J.JCJ05.001 Original Replacement Projector Lamp / Bulb | BenQ Projector Lamp Malaysia – Projector Display