
Replacing a projector lamp might sound straightforward, but there's a lot riding on each step. Mess up, and you could be out hundreds of dollars or even damage your gear. Here's the twist that surprises many people: a single fingerprint on the new lamp's glass can cut its lifespan dramatically or ruin performance altogether. The process involves precision, planning, and a few unexpected details most guides overlook.
Table of Contents
- Step 1: Gather Necessary Tools And Replacement Lamp
- Step 2: Power Off And Disconnect The Projector
- Step 3: Access The Lamp Compartment Safely
- Step 4: Remove The Old Projector Lamp Carefully
- Step 5: Install The New Projector Lamp Securely
- Step 6: Test Projector Functionality And Adjust Settings
Quick Summary
| Key Point | Explanation |
|---|---|
| 1. Assemble essential tools first | Gather a Phillips head screwdriver, microfiber cloth, anti-static gloves, and compressed air before starting the replacement process. |
| 2. Power off and disconnect safely | Ensure the projector is completely powered down, and disconnect all cables to avoid electrical hazards before maintenance begins. |
| 3. Access the lamp compartment carefully | Remove the lamp compartment cover with caution, following your projector's manual to avoid damage to the delicate parts. |
| 4. Handle the old lamp properly | Remove the lamp with care, avoiding contact with the glass, and dispose of it according to local electronic waste guidelines. |
| 5. Test projector after installation | Reconnect and power on the projector, checking for any warning lights and testing the image quality for optimal performance. |
Step 1: Gather Necessary Tools and Replacement Lamp
Preparing for a projector lamp replacement requires methodical organization and precision. Your success depends on having the right tools and replacement lamp before starting the delicate process. This initial stage sets the foundation for a smooth lamp swap that will restore your projector's optimal performance.
To begin your projector lamp replacement journey, you'll need to assemble a carefully curated toolkit. Essential tools include a Phillips head screwdriver, clean microfiber cloth, anti-static gloves, and compressed air for dust removal. Most projector lamp replacements will require precision screwdrivers specifically designed for electronic equipment. A clean workspace with good lighting is also crucial for managing small components.
When selecting a replacement lamp, accuracy is paramount. Check your specific projector model's lamp requirements before purchasing. Each projector model demands a precisely matched lamp to ensure compatibility and optimal performance. Manufacturers typically provide exact part numbers for replacement lamps, which you should cross-reference meticulously.
Your replacement lamp kit should include:
- Original manufacturer-recommended lamp module
- Protective packaging
- Installation instructions specific to your projector model
Before handling the new lamp, protect its delicate surface by wearing clean anti-static gloves. The lamp's glass envelope and internal components are extremely sensitive to oils and contaminants from human skin. A single fingerprint can potentially compromise the lamp's performance or lifespan.
Finally, verify that your workspace is clean, well-lit, and free from static electricity. Place your tools within easy reach and have a soft, clean surface prepared for organizing screws and components during the replacement process.
Below is a table summarizing all the major steps in the projector lamp replacement process, along with the estimated difficulty and main goal for each step.
| Step | Difficulty | Main Outcome |
|---|---|---|
| Gather Tools & Replacement Lamp | Easy | All required tools and correct lamp assembled |
| Power Off & Disconnect Projector | Easy | Safe, cooled projector ready for maintenance |
| Access Lamp Compartment | Moderate | Lamp compartment exposed without damaging projector |
| Remove Old Projector Lamp | Moderate | Old lamp safely removed for proper disposal |
| Install New Projector Lamp | Moderate | New lamp securely and properly seated |
| Test & Adjust Projector | Easy | Confirmed optimal operation and settings configured |
Step 2: Power Off and Disconnect the Projector
Safety and systematic preparation are critical when preparing a projector for lamp replacement. This step focuses on properly powering down and disconnecting your device to prevent electrical risks and potential equipment damage. Electrical safety is non-negotiable during any technical maintenance procedure.
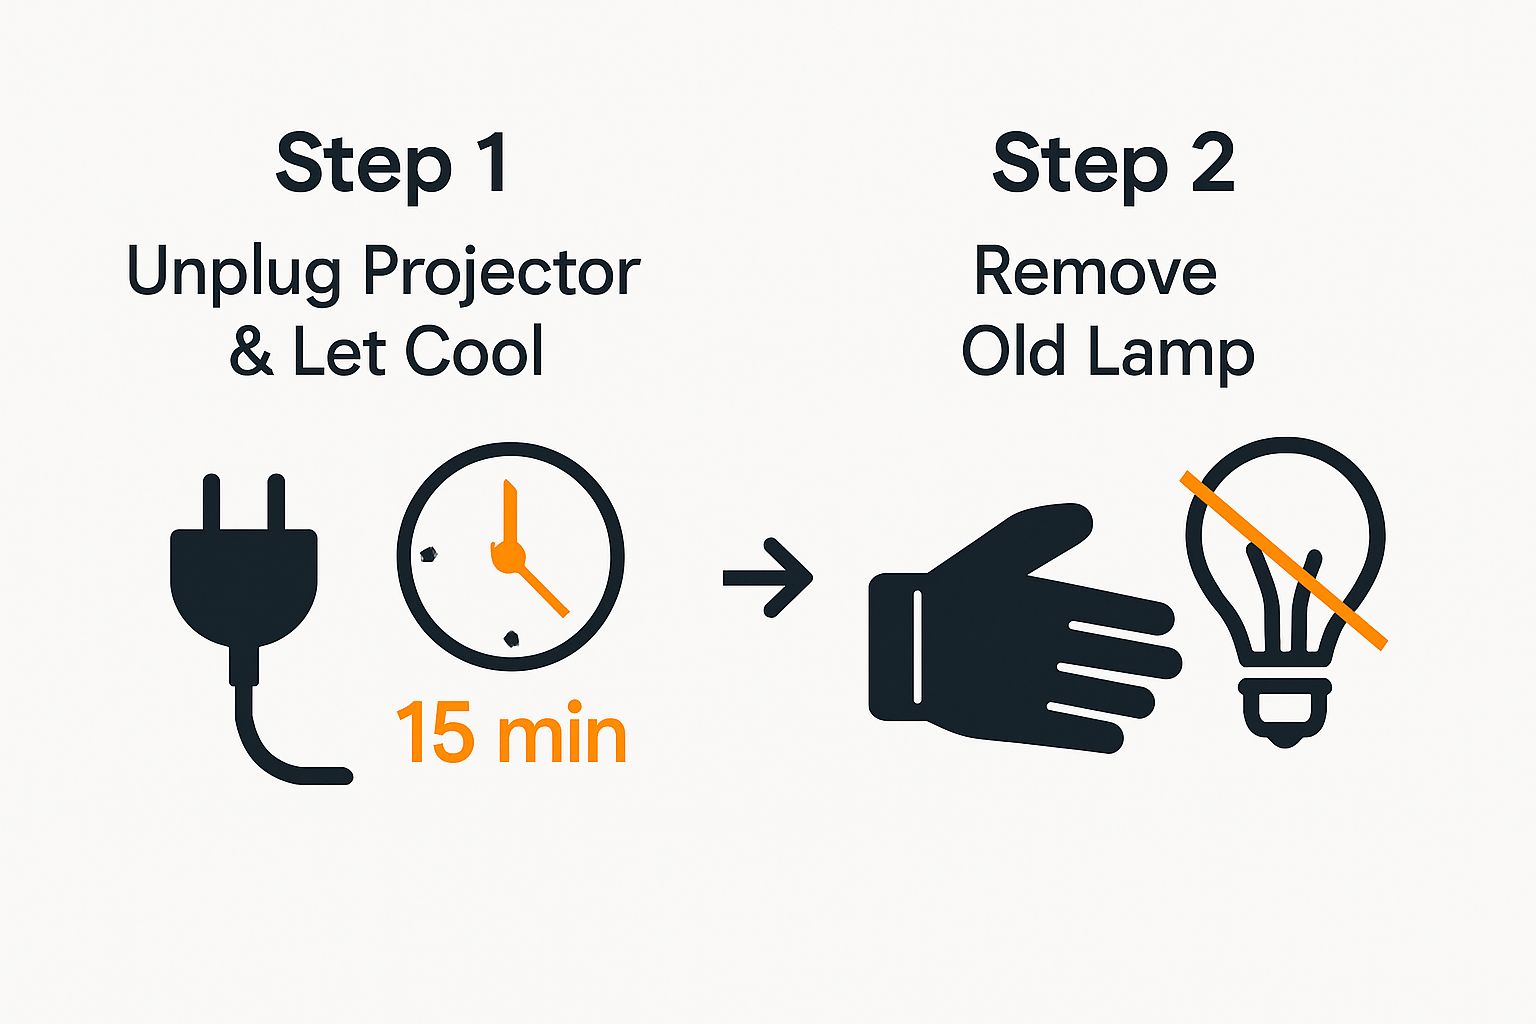
Disconnect all cables and peripherals carefully and methodically. Begin by powering off the projector using its dedicated power button, not just the remote control. Wait approximately 15-20 minutes to allow the internal components to cool completely. Projector lamps generate significant heat during operation, and touching components immediately after use can result in burns or accidental damage.
Unplug the power cord from the electrical outlet, not just from the projector itself. This additional step ensures complete electrical isolation and prevents any residual electrical current from potentially causing harm. Remove all connected devices, including HDMI cables, VGA connections, USB peripherals, and audio cables. Organize these cables neatly to prevent tangling or accidental damage during the lamp replacement process.
Take a moment to document your current setup. If you're unsure about cable placement or connection order, consider taking a quick smartphone photograph. This simple documentation can serve as a helpful reference when reconnecting everything after the lamp replacement.
Verification checklist for this step includes:
- Projector is completely powered off
- Power cord is unplugged from wall outlet
- All peripheral cables are disconnected
- Device has cooled down for at least 15 minutes
- Work area is prepared with necessary tools
By meticulously following these disconnection procedures, you create a safe environment for performing your projector lamp replacement. Your careful approach minimizes risks and sets the stage for a successful maintenance operation.
Step 3: Access the Lamp Compartment Safely
Accessing the lamp compartment requires precision, patience, and a methodical approach. This critical step determines the success of your entire lamp replacement procedure. Understanding your specific projector model is crucial, as lamp compartment designs vary significantly across different manufacturers and models.
Handle the lamp compartment cover with exceptional care, recognizing that these access panels can be delicate and potentially fragile. Begin by consulting your projector's user manual to identify the exact location of the lamp compartment. Most projectors feature a clearly marked access panel on the side, bottom, or rear of the unit. Look for small screws or sliding mechanisms that secure the cover.
Prepare your workspace by laying out a soft, clean cloth to place screws and the removed cover. Using your precision screwdriver, carefully remove the screws holding the lamp compartment cover. Keep the screws organized and in order – some projectors have different sized screws for specific locations. If your projector has a sliding mechanism, gently slide the cover in the indicated direction, typically following the molded guidance lines on the projector's body.
As you open the compartment, take note of the lamp's current positioning and any securing mechanisms. Some projectors use additional brackets or locking clips that must be carefully manipulated. Avoid touching the lamp's glass surface with bare hands – the oils and potential contaminants from your skin can significantly reduce the lamp's lifespan and performance.
Verification checklist for this step includes:
- Lamp compartment cover is completely removed
- Screws are safely stored
- Internal lamp area is clean and free from dust
- No visible damage to internal components
- Clear view of the existing lamp
By approaching this step with patience and attention to detail, you're setting the stage for a successful lamp replacement. The careful navigation of your projector's internal components demonstrates the precision required in technical maintenance.
Step 4: Remove the Old Projector Lamp Carefully
Removing an old projector lamp demands surgical precision and careful attention to prevent damage to your expensive equipment. Lamp removal is a delicate process that requires steady hands and methodical approach. Understanding the specific mounting mechanism of your projector's lamp is crucial before attempting extraction.
Begin by identifying the lamp's securing mechanism. Most projectors use either bracket clips, screw fasteners, or specialized locking systems. Wear anti-static gloves to protect both the lamp and your hands from potential static discharge or oils that could compromise the lamp's integrity. Gently release any locking clips or carefully unscrew the fasteners holding the lamp in place. Move slowly and deliberately, maintaining a consistent grip to prevent accidental dropping.
Dispose of the old projector lamp according to local electronic waste guidelines, recognizing that these components often contain hazardous materials like mercury. Some lamp modules have specific disposal requirements to prevent environmental contamination. Once released from its mounting, hold the lamp by its edges, avoiding contact with the glass surface or internal components.
Pay close attention to the lamp's orientation and positioning. Take a mental snapshot or quick photograph of how the current lamp sits within the compartment. This visual reference will prove invaluable when installing the new lamp, ensuring you maintain the correct alignment and positioning.
Verification checklist for this step includes:
- Lamp is completely detached from mounting brackets
- No visible damage to projector interior
- Lamp removed without touching glass surface
- Securing screws or clips are set aside safely
- Lamp ready for proper disposal
By executing this step with patience and precision, you're ensuring a smooth transition to installing your new projector lamp. Each careful movement brings you closer to restoring your projector's optimal performance.
Step 5: Install the New Projector Lamp Securely
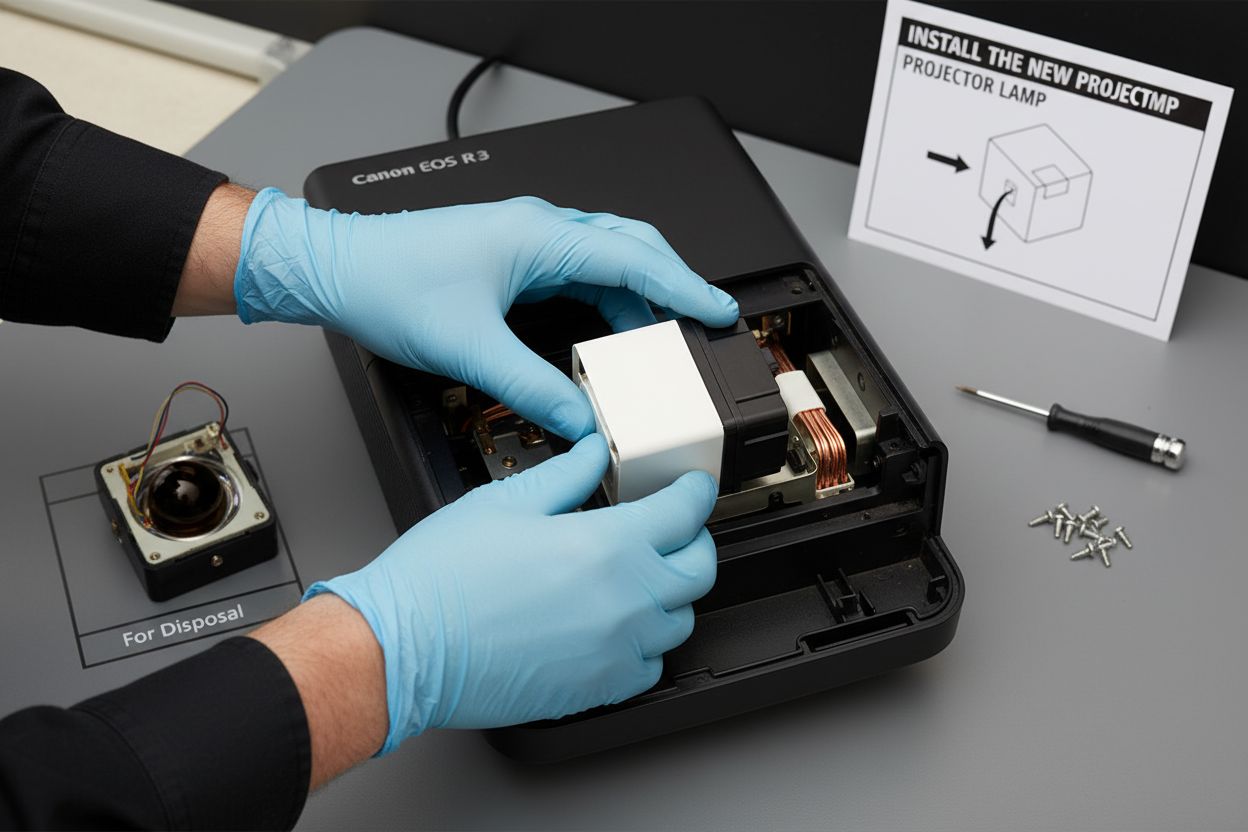
Installing a new projector lamp represents the pivotal moment of your maintenance journey. Precision is absolutely critical during this phase, as improper installation can compromise your projector's performance or potentially cause permanent damage. Take a deep breath and prepare to execute this step with meticulous care.
Avoid touching the bulb surface with bare hands by using clean anti-static gloves or handling the lamp by its edges. Align the new lamp exactly as the previous one was positioned, referencing any mental notes or photographs you took during removal. Most projector lamps have specific orientation markers or keyed connections that prevent incorrect insertion. Gentle, consistent pressure is key when seating the lamp – never force the component.
Carefully slide the lamp into its designated compartment, ensuring all connection points and mounting brackets align perfectly. Listen for a subtle click or look for visual indicators that suggest the lamp is correctly seated. Some projectors have small alignment pins or grooves that help guide the lamp into its precise position. If resistance is encountered, stop immediately and reassess the lamp's orientation.
Secure the lamp using the original fastening mechanism – whether screws, clips, or specialized locking systems. Tighten screws evenly and carefully, avoiding over-torquing which could crack the lamp's mounting bracket or damage internal components. Maintain a consistent, light touch throughout this process.
Verification checklist for this step includes:
- Lamp is completely seated in its compartment
- No visible gaps or misalignment
- Mounting screws are secured evenly
- No excess movement when gently tested
- All original brackets are correctly replaced
By executing this installation with patience and attention to detail, you're ensuring your projector will operate at peak performance. The careful precision you've demonstrated sets the stage for successful lamp replacement and continued optimal projection quality.
Refer to this table for a checklist of key verification steps to ensure safety and successful completion at each major stage of the projector lamp replacement process.
| Stage | Verification Checklist Item |
|---|---|
| Power Off & Disconnect | Projector fully powered off and unplugged from wall outlet |
| All cables and peripherals disconnected | |
| Device allowed to cool down for at least 15 minutes | |
| Access Lamp Compartment | Lamp compartment cover fully removed, screws stored safely |
| No visible damage, lamp in clear view | |
| Remove Old Lamp | Lamp detached without touching glass, no interior damage |
| Screws or clips set aside safely | |
| Install New Lamp | Lamp completely seated, no visible gaps or misalignment |
| Mounting screws/brackets secure | |
| Test Projector | Power restored, no warnings, image clean and uniform |
| Lamp hour meter reset completed |
Step 6: Test Projector Functionality and Adjust Settings
The moment of truth arrives as you transition from lamp replacement to functional testing. Careful validation ensures your projector returns to peak performance. Reconnecting and powering on the device requires methodical attention to detail and a systematic approach to troubleshooting potential issues.
Reconnect the power and turn on the projector, paying close attention to any warning indicators or unusual sounds. Your first observation should focus on the lamp indicator light. A steady green or blue light typically signals successful installation, while blinking or red indicators might suggest a connection problem. Do not panic if initial startup seems unusual – some projectors require a brief calibration period after lamp replacement.
Proceed with comprehensive visual testing by projecting a variety of content. Start with a solid white screen to check for uniform brightness and identify any potential dark spots or uneven illumination. Gradually introduce different color backgrounds, text documents, and high-resolution images to verify color accuracy and projection clarity. Pay special attention to the edges of the projected image, looking for any distortion or inconsistent focus that might indicate improper lamp seating.
Adjust your projector's settings to optimize the new lamp's performance. Access the device's menu and review lamp-related settings such as brightness, contrast, and color temperature. Many projectors include a lamp hour reset function that you should activate to accurately track the new lamp's usage time. Some models require manual reset, while others automatically update lamp runtime.
Verification checklist for this step includes:
- Power successfully restored
- No warning indicators displayed
- Image projected cleanly and uniformly
- Color reproduction appears accurate
- Lamp hour meter reset completed
- No unusual noises during operation
By executing this final testing phase with patience and systematic observation, you confirm the success of your projector lamp replacement and ensure optimal visual performance.
Ready for Flawless Projector Lamp Replacement? Power Up Every Presentation with ProjectorDisplay.com
Struggling with projector lamp replacement can leave you frustrated and concerned about damaging vital equipment. Whether you are worried about compatibility, worried your lamp is not seated correctly, or feeling uncertain about safe installation, you deserve a clear solution. After mastering the steps and understanding terms like precision installation, lamp compartment, and optimal performance, your next move is to get equipment you can truly trust. For the smoothest upgrade, do not overlook high-quality accessories, such as a premium Projector Screen, to enhance your new lamp's brilliance.

You have the skills. Now, complete your setup with top-tier projection essentials from ProjectorDisplay.com. Explore our handpicked range designed for easy lamp swaps and superior visual results. Shop now and transform every projector replacement into a stress-free success.
Frequently Asked Questions
How do I know which replacement lamp to buy for my projector?
Check your projector model's lamp requirements by referencing the manufacturer's documentation or warranty information, which often includes the exact part number needed for replacement lamps.
What tools do I need to replace a projector lamp?
Essential tools include a Phillips head screwdriver, clean microfiber cloth, anti-static gloves, and compressed air. A clean workspace with good lighting is also important for managing small components during the replacement process.
How can I safely remove my old projector lamp?
Gently release any locking clips or unscrew the fasteners holding the lamp in place. Always wear anti-static gloves, handle the lamp by its edges, and avoid touching the glass surface to prevent damage.
What should I do if my projector doesn't turn on after replacing the lamp?
Ensure that all connections are secure and that the lamp is properly installed with no visible gaps. Check the lamp indicator light for any warning signals. If issues persist, consult the user manual for troubleshooting steps specific to your projector model.
Recommended
- BenQ 5J.JKC05.001 Original Replacement Projector Lamp / Bulb | BenQ Projector Lamp Malaysia – Projector Display
- BenQ 5J.JCJ05.001 Original Replacement Projector Lamp / Bulb | BenQ Projector Lamp Malaysia – Projector Display
- 2025年马来西亚教室投影仪配置指南:选择与安装实用技巧 – Projector Display
- Barco R9842020 / R9842440 / R764225 Original Replacement Projector Lamp / Bulb | Barco Projector Lamp Malaysia – Projector Display