
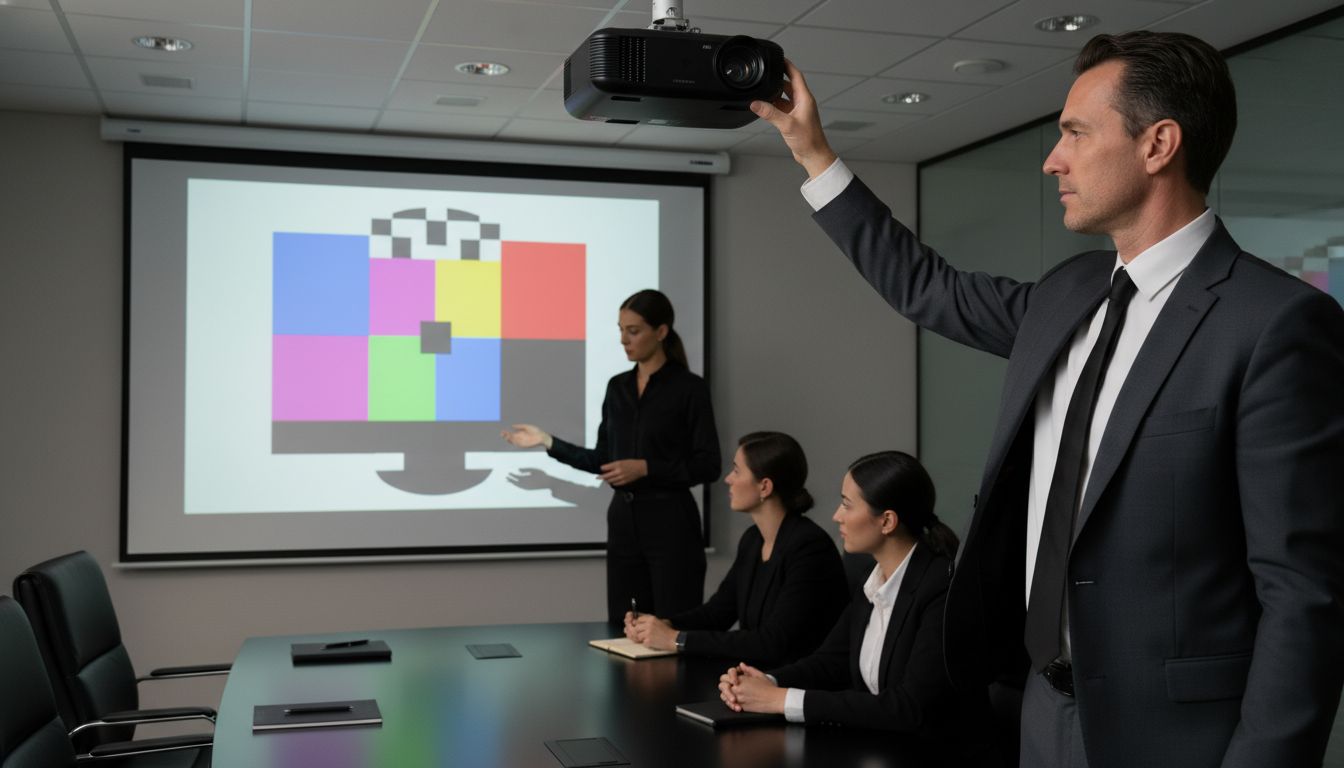
Over 80 percent of projection problems start with setup mistakes. A crisp, vibrant image does not happen by accident, and even the best projector can't compensate for poor placement or alignment. If you want every pixel to stand out, getting your projector's setup right from the beginning is the secret. This straightforward guide shows you how to create perfect focus, color, and clarity with step by step instructions for a flawless viewing experience.
Table of Contents
- Step 1: Prepare Your Projector Setup Area
- Step 2: Power On And Position The Projector
- Step 3: Select The Correct Input Source
- Step 4: Adjust The Projector Lens Focus Ring
- Step 5: Fine-Tune Image Sharpness Using Test Patterns
- Step 6: Verify Focus And Image Clarity From Viewing Positions
Quick Summary
| Key Point | Explanation |
|---|---|
| 1. Position projector parallel to screen | Aligning the projector parallel to the screen minimizes distortion and enhances image quality significantly. |
| 2. Test lighting conditions for projection | Ambient light control is crucial; dim environments improve contrast and clarity in projected images. |
| 3. Use the best input connection type | Prioritize HDMI for its superior audio and video quality when connecting input devices to the projector. |
| 4. Fine-tune focus using test patterns | Utilize built-in test patterns or downloadable resources for precise focus adjustments, ensuring optimal image clarity. |
| 5. Verify image quality from different angles | Check image clarity and sharpness from various seating positions to ensure a consistent viewing experience for all. |
Step 1: Prepare your projector setup area
Preparing the right environment is crucial for achieving crystal clear projected images. This initial setup step ensures your projector performs at its absolute best, minimizing potential image distortions and technical challenges.
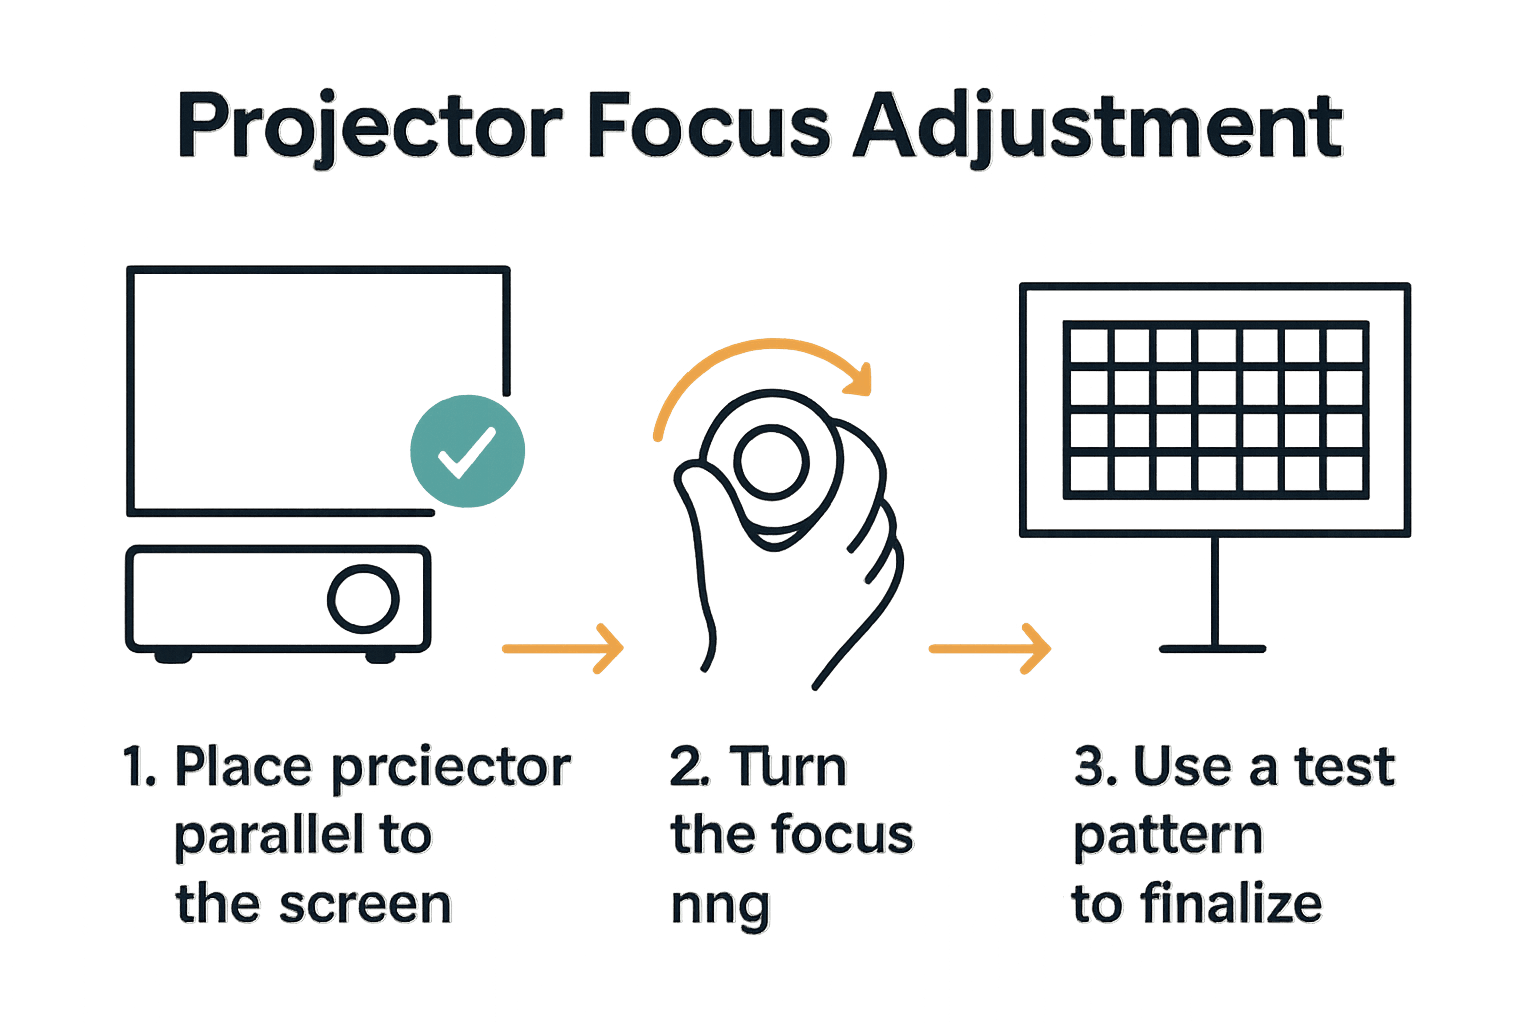
Start by selecting a clean, flat surface where you can position your projector parallel to your projection screen. According to Philips Projection Support, optimal image quality depends on having the projector perfectly aligned with the screen. This means placing the projector as flat and square to the screen surface as possible, which helps prevent unnecessary digital corrections that can reduce image resolution.
Take time to clear the area around your projector, ensuring no objects obstruct the projection path. Remove potential obstacles like decorative items, furniture, or anything that might cast unintended shadows. As recommended by Techwalla, clean the projector lens using a microfiber cloth before setup to eliminate any dirt or smudges that could impact image clarity. These small preparatory steps will significantly improve your overall projection quality.
A pro tip when preparing your setup area is to test the lighting conditions. Dim ambient light helps enhance image contrast and sharpness, so consider positioning your projector in a space where you can easily control light levels. This will give you more flexibility in achieving the perfect projected image.
Step 2: Power on and position the projector
Now that your setup area is prepared, it is time to power on your projector and position it precisely for the best possible image quality. This step transforms your preparation into an actual viewing experience by bringing your projection setup to life.
According to Philips Projection Support, you can turn on the projector using either the power button located on the top of the device or through the remote control. Once powered on, carefully adjust the projector to ensure it is perfectly aligned with your projection screen. The goal is to create a rectangular image that fills the screen without any distortion.
As recommended by Techwalla, after powering on the projector, you will need to fine tune the focus. Do this slowly by turning the focus knob slightly in different directions until you achieve the sharpest possible image. Take your time with this step the difference between a good and great projection often comes down to precise focus adjustment.
Pro tip: When positioning your projector, try to keep it as level and perpendicular to the screen as possible. This minimizes the need for digital keystone correction which can reduce overall image quality. Optimize Your Home Theater with Projector Mounting Options can provide additional guidance on achieving the perfect projector placement for your specific setup.
Step 3: Select the correct input source
Selecting the right input source is a critical step in getting your projector to display the content you want. This process connects your projection device to your preferred media source and ensures you can start enjoying your visual experience.
Most modern projectors offer multiple input options including HDMI, VGA, USB, and sometimes wireless connections. Locate the input source button on your projector remote or the device itself. Press this button to cycle through available input channels. Look for the input that matches your connection type whether you are connecting a laptop, gaming console, streaming device, or smartphone.
Pay close attention to the input port you are using. An HDMI connection typically provides the highest quality digital signal for video and audio, so prioritize this option when possible. If you are using an older device with VGA connections, ensure you have the appropriate adapter or cable to establish a clear connection. Memahami Fungsi Remote Control Projektor untuk Pengguna can provide additional insights into navigating your projector's input options effectively.
Pro tip: Keep your input cables organized and labeled to make future connections quicker and more straightforward. Some projectors have multiple HDMI ports marked for specific devices like computer, gaming, or streaming inputs. Take a moment to understand your specific projector model's input configuration to streamline your setup process.
Step 4: Adjust the projector lens focus ring
Adjusting the lens focus ring is a precision task that transforms a blurry projection into a crystal clear image. This step is crucial for achieving the sharpest possible visual experience with your projector.
According to Philips Projection Support, you should locate the focus knob typically positioned on the top of the projector. Turn the knob slowly left or right to adjust the focus level. The goal is to create a crisp image where text appears sharp and details are clearly visible.
As recommended by Techwalla, the key is to fine tune the focus by turning the knob gradually. Move the focus ring slightly in both directions to find the absolute sharpest setting. Take your time during this process visual clarity can make a significant difference in your viewing or presentation experience.
 How to Clean Projector Lens for Clearer Images can provide additional tips to ensure optimal lens performance.
Pro tip: If you wear glasses or contact lenses for viewing, keep them on while adjusting focus to ensure the most accurate adjustment. Different people perceive sharpness slightly differently, so take your time to find the setting that looks best to your eyes.
Step 5: Fine-tune image sharpness using test patterns
Fine-tuning your projector's image sharpness requires precision and the right tools. Test patterns are the professional secret to achieving the most accurate and crystal clear projection possible.
Many modern projectors include built-in test pattern features that help you calibrate focus and image quality. Look for a menu option labeled test pattern which typically displays geometric shapes like grids, lines, and color blocks. These patterns help you assess image clarity by providing standardized visual references. Pay close attention to line definition, edge sharpness, and text legibility when examining these patterns.
Carefully adjust your focus ring while viewing the test patterns. Look for the point where lines appear most crisp and text becomes razor sharp without any blurring or bleeding. Some patterns will help you identify subtle focus issues that might not be immediately apparent during regular viewing. How to Calibrate Projector for Stunning Image Quality can offer additional insights into professional calibration techniques.
Pro tip: If your projector does not have built-in test patterns, numerous free downloadable test pattern resources are available online.
Use a laptop or media device to display these patterns and achieve the same precise calibration effect. Remember that different content types may require slightly different focus settings so experiment with various test patterns to find your optimal configuration.
Step 6: Verify focus and image clarity from viewing positions
Verifying focus and image clarity across different viewing positions ensures that your projection looks great no matter where people are seated. This final fine-tuning step guarantees a consistent visual experience for everyone in the room.
Move around the room and observe the projected image from multiple locations including center seats, side angles, and rear positions. Check for consistency in sharpness, color intensity, and text legibility. Pay special attention to how the image appears at different distances and viewing angles. Some areas might reveal subtle focus variations that were not apparent during initial setup.
If you notice any variations in image quality across different viewing positions, return to the projector and make minor adjustments to the focus ring. Small tweaks can make a significant difference in overall image clarity. Master Projector Keystone Correction for Perfect Images can help you address any additional image distortion challenges that might arise during this verification process.
Pro tip: For presentations or home theater setups, consider asking a friend or family member to sit in different positions and provide feedback. A second perspective can help you identify focus issues that you might have missed. Remember that the goal is to create an optimal viewing experience for everyone in the room.
Discover Sharp, Vivid Images with the Right Projector Setup
Struggling to get your projector image perfectly sharp and clear can be frustrating. This article breaks down essential steps like precise focus adjustments, lens ring tuning, and test pattern usage to eliminate blurry pictures and improve your viewing experience. We understand how crucial it is to have equipment that supports these fine-tuning efforts, giving you vivid visuals whether for home theater, presentations, or classroom use.

Take your projection quality to the next level by exploring our wide selection of high-performance projectors and accessories at ProjectorDisplay.com. Featuring models with advanced focus controls and HD resolution, plus fast shipping across Malaysia, you can find the perfect device that fits your clarity needs today. Don't settle for fuzzy images any longer — visit ProjectorDisplay.com now to shop and get expert advice on optimizing your setup for flawless, sharp projections.
Frequently Asked Questions
How do I adjust the focus on my projector?
To adjust the focus on your projector, locate the focus knob usually found on the top or side of the device. Turn the knob slowly left or right until the image becomes sharp and clear.
What should I do if my projector image seems blurry?
If the image appears blurry, start by ensuring the projector is correctly aligned with the screen. Then, fine-tune the focus by gradually adjusting the focus knob until you achieve a crisp image.
How can I tell if my projector image is sharp enough?
To verify sharpness, look for clear lines and defined text when projecting. Adjust the focus while viewing test patterns or detailed content; the goal is to achieve clarity where details are distinct without any blurring.
What lighting conditions are best for focusing my projector?
Dimming the lights in the room can help enhance contrast and sharpness in your projected image. Whenever possible, control ambient light to improve viewing quality while you focus the projector.
Do I need to readjust focus for different viewing positions?
Yes, you should verify focus from various viewing angles and distances. Make slight adjustments to the focus ring if you notice differences in clarity when moving around the room.
How can test patterns help with projector focus adjustment?
Test patterns provide visual references that make it easier to calibrate focus and image quality. Display a geometric test pattern and carefully adjust the focus until lines appear sharp, ensuring optimal clarity.