
Setting up a projector can transform any room into a home theater, promising movie nights that look straight out of a cinema. Yet most people ignore one simple truth about projector installations. A poorly mounted projector can waste up to 30 percent of its image quality and even damage the equipment. So instead of just hanging your projector anywhere that feels convenient, there is a smarter way that ensures your movies look crisp and your device stays safe for years to come.
Table of Contents
- Step 1: Assess Your Projector And Room Setup
- Step 2: Choose Suitable Mounting Hardware
- Step 3: Install The Projector Mount Securely
- Step 4: Adjust And Align The Projector Image
- Step 5: Test The Projector Setup Thoroughly
Quick Summary
| Key Point | Explanation |
|---|---|
| 1. Assess Room and Projector First | Measure room dimensions and wall materials before selecting mounting options. This step ensures optimal positioning and viewing experience. |
| 2. Choose Compatible Mounting Hardware | Select mounting solutions based on projector weight and room layout. Ensure compatibility with your specific projector model for stability and safety. |
| 3. Use Proper Tools for Installation | Gather essential tools like a stud finder and level before starting. This preparation facilitates a smooth installation process. |
| 4. Adjust Projector for Optimal Image | Fine-tune projector settings like keystone and focus after installation. This step enhances image clarity and viewing satisfaction. |
| 5. Conduct Thorough Testing | Evaluate projector performance across different media types. Testing ensures stable image quality, sound synchronization, and proper ventilation. |
Step 1: Assess Your Projector and Room Setup
Before diving into projector mounting options, you need a comprehensive understanding of your space and equipment. This critical initial step determines the success of your entire home theater projection setup. Your room's dimensions, wall characteristics, and projector specifications will directly influence mounting strategies and overall viewing experience.
Room Geometry Matters
Carefully measuring your room is the foundation of successful projector placement. Start by mapping out the total available space, paying close attention to wall types, ceiling height, and potential mounting surfaces. Concrete walls require different mounting approaches compared to drywall or wooden structures. Recommended measurements include:
- Distance from potential mounting point to projection screen
- Ceiling height
- Wall material composition
- Available unobstructed wall or ceiling space
Understanding your projector's throw ratio becomes crucial during this assessment. Different projector models have varying projection distances, which means the space between your projector and screen will significantly impact image quality. Learn more about optimal home theater configurations to ensure you select the most suitable mounting approach.
Projector Technical Evaluation
Examine your specific projector model's technical specifications with meticulous attention. Weight, dimensions, ventilation requirements, and connectivity options will influence mounting decisions. Lightweight portable projectors offer more flexible mounting options compared to heavier professional models. Check the manufacturer's recommended mounting height and angle to prevent image distortion and maintain optimal projection quality.
Consider potential obstructions like ceiling fans, light fixtures, or architectural elements that might interfere with your projector mount. Some mounting solutions provide adjustable brackets that can help navigate these challenges, allowing you to fine tune positioning for the perfect viewing angle.
By thoroughly assessing your room and projector, you create a solid foundation for selecting the most appropriate mounting solution. This preparatory step eliminates guesswork and potential installation complications, setting the stage for a professional home theater setup that delivers exceptional visual experiences.
Step 2: Choose Suitable Mounting Hardware
Selecting the right mounting hardware transforms your projector installation from a potential challenge to a seamless experience. After thoroughly assessing your room and projector in the previous step, you are now ready to explore mounting solutions that will securely and strategically position your visual centerpiece.
Understanding Mounting Types
Projector mounting hardware comes in several configurations, each designed to address specific spatial and aesthetic requirements. Ceiling mounts represent the most common solution, offering stable overhead positioning that minimizes floor and wall clutter. These mounts typically feature adjustable arms allowing precise angle and distance modifications. Universal mounting plates provide flexibility, accommodating various projector models and weights.
For rooms with architectural constraints or unique layouts, alternative mounting options emerge. Wall mounts work exceptionally well in spaces with limited ceiling clearance or unconventional room structures. Short throw projector owners might prefer ultra compact mounting brackets that position equipment extremely close to the projection surface.
Critical Hardware Selection Criteria
Explore our comprehensive projector screen size guide to understand how mounting hardware directly influences your viewing experience. When evaluating potential mounting solutions, consider these essential factors:
- Projector weight capacity
- Adjustability range
- Material durability
- Compatibility with your specific projector model
- Cable management capabilities
Precision matters significantly when selecting mounting hardware. A mount that appears structurally sound might fail under your projector's specific weight distribution. Professional installers recommend choosing hardware rated for at least 20% more weight than your projector to ensure long term stability and safety.
Material selection plays a crucial role in mount performance. Aluminum and steel mounts offer superior strength and lightweight properties, resisting potential warping or structural fatigue. Look for mounting solutions with powder coating or corrosion resistant treatments, especially in environments with humidity or temperature fluctuations.
Remember that proper mounting is not just about physical support but also about creating an optimal viewing angle.
Below is a comparative overview of common projector mounting hardware types, highlighting their ideal usage scenarios and compatibility for different room setups.
| Mount Type | Best For | Key Features |
|---|---|---|
| Ceiling Mount | Standard rooms, uncluttered overhead | Adjustable arms, stable positioning |
| Wall Mount | Low ceilings or unconventional layouts | Saves ceiling space, lateral flexibility |
| Universal Plate | Multiple projector models, rentals | Flexible fit, variable weight support |
| Short Throw Bracket | Short throw projectors/small rooms | Compact design, close-to-screen mounting |
| Advanced Adjustable | Difficult angles, precision alignment | Leveling, millimeter adjustments |
Some advanced mounting hardware includes integrated leveling mechanisms and precision adjustment points, allowing you to fine tune projection alignment with millimeter accuracy. By investing time in selecting the right mounting hardware, you protect your equipment and guarantee a professional home theater setup that delivers exceptional visual performance.
Step 3: Install the Projector Mount Securely
Installing your projector mount requires precision, patience, and careful preparation. This critical stage transforms your planning into a tangible home theater setup, demanding meticulous attention to detail and safety protocols.
Preparation and Tools
Before beginning installation, gather essential tools that will streamline the process. Recommended equipment includes:
- Stud finder
- Electric drill
- Level
- Measuring tape
- Pencil
- Mounting hardware kit
- Ladder or stable stepping platform
- Safety glasses
Check out our comprehensive guide for Malaysian home theater setups to understand local installation nuances. Begin by locating robust mounting points using a stud finder. Ceiling mounts require attachment to structural ceiling joists, not just drywall, to ensure maximum stability and weight distribution.
Precision Installation Process
Marking your mounting points demands mathematical accuracy. Measure and re-measure mounting locations, ensuring symmetry and alignment with your room's architectural lines. Use a level to guarantee horizontal positioning, preventing future image distortion. When drilling pilot holes, select drill bits marginally smaller than your mounting bolts to create secure, tight connections.
Installation depth matters significantly. Fully seat each mounting bolt, but avoid over tightening, which could compromise the mount's structural integrity or damage ceiling materials. Many professional installers recommend using torque-specific tools to achieve perfect tension.
Cable management represents another crucial consideration during installation. Route power and signal cables through mounting hardware's integrated cable channels, preventing potential tangling or strain. Some advanced mounting systems include removable cable management clips, allowing flexible positioning and future adjustments.
After physical installation, conduct a comprehensive stability test. Gently apply pressure to the mounted bracket, checking for any unexpected movement or weakness. A properly installed mount should feel rock solid, with zero perceptible wobbling or flexing. Your careful preparation ensures a secure foundation for your projector, protecting your valuable equipment and guaranteeing optimal home theater performance.
To streamline your installation process, here is a quick-reference table summarizing the essential tools and their main purposes for securing a projector mount.
| Tool/Equipment | Purpose |
|---|---|
| Stud finder | Locate robust mounting points and ceiling joists |
| Electric drill | Drill secure pilot holes for mounting hardware |
| Level | Ensure mount is installed horizontally to avoid image tilting |
| Measuring tape | Measure distances for accurate placement |
| Pencil | Mark precise mounting locations |
| Mounting hardware kit | Secure projector mount to ceiling or wall |
| Ladder/step platform | Safely reach ceiling or high mounting points |
| Safety glasses | Protect eyes during drilling and installation |
![]()
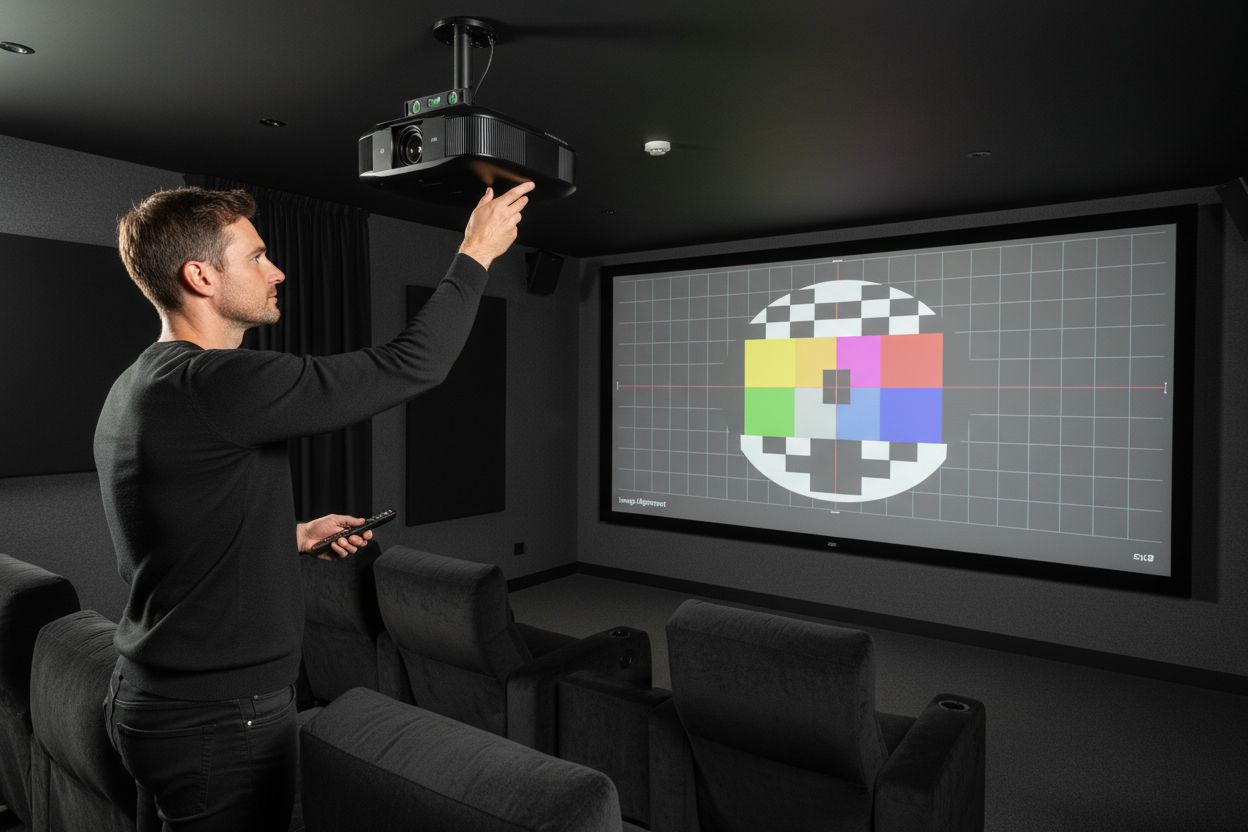
Step 4: Adjust and Align the Projector Image
Precision image alignment represents the culmination of your projector mounting journey, transforming technical setup into visual perfection. After carefully installing your mount, you now enter the crucial phase of fine tuning your projection for optimal viewing experience.
Image Alignment Fundamentals
Begin by powering on your projector and displaying a test pattern or calibration image. Key adjustment points involve keystone correction, zoom functionality, and focus precision. Most modern projectors include built in alignment tools that help streamline this process. Learn advanced calibration techniques to maximize your visual performance.
Recommended Alignment Steps:
- Position projector perpendicular to screen surface
- Activate built in alignment grid
- Adjust horizontal and vertical keystone
- Fine tune zoom and focus settings
- Check corner sharpness and edge alignment
Keystone correction allows compensation for angular projection, ensuring rectangular image integrity when your projector cannot be perfectly centered. Digital keystone adjustments work best in moderation excessive correction can degrade image quality and reduce overall resolution.
Focus represents another critical aspect of image alignment. Start from the screen center, gradually expanding your focus check towards screen edges. Some projectors benefit from manual focus rings, while others provide digital focus assist features. Professional calibrators recommend using high contrast test patterns to achieve maximum clarity.
Color balance and brightness settings significantly impact overall image quality. Experiment with preset picture modes like cinema, sports, or dynamic, understanding that each mode optimizes different visual characteristics. Rooms with varying ambient light conditions might require periodic recalibration to maintain optimal viewing experience.
Verification involves systematic visual assessment. Project standard test images featuring fine text, geometric patterns, and color gradients. A perfectly aligned projector will display crisp edges, uniform color saturation, and minimal distortion across the entire screen surface. Take your time during this process precision now prevents frustration later.
Step 5: Test the Projector Setup Thoroughly
The final testing phase transforms your meticulous projector mounting efforts into a reliable home theater experience. Comprehensive verification ensures that every technical detail translates into stunning visual performance across various content types and viewing conditions.
Systematic Performance Evaluation
Begin your testing sequence by evaluating the projector's performance under different scenarios. Critical testing elements include:
- Image stability during movement
- Color consistency across various media types
- Sound synchronization
- Heat dissipation
- Connectivity reliability
Explore our comprehensive projector maintenance guide to understand long term performance considerations. Start by running extended projection tests using diverse content like sports broadcasts, movie scenes, gaming sequences, and detailed documentaries. Each media type challenges different projection capabilities, revealing potential alignment or technical limitations.
Thermal management represents a crucial testing parameter. Monitor your projector's temperature during prolonged use, checking for any unexpected heating patterns or ventilation issues. Well mounted projectors should maintain consistent temperature levels without excessive fan noise or performance throttling. Position your hand near ventilation points to sense heat distribution and ensure proper airflow around the mounting hardware.
Connectivity testing demands equal attention. Verify HDMI, wireless, and auxiliary connection stability by switching between multiple input sources. Intermittent connection issues often indicate mounting related interference or cable routing problems. Ensure cable paths remain unobstructed and free from potential strain points that might compromise signal transmission.
Sound synchronization provides another critical verification metric. Play content with complex audio visual elements, carefully observing any lag between projected images and accompanying sound. Modern projectors should maintain near perfect audio visual alignment. Discrepancies might indicate mounting angle issues affecting internal sensor calibration.
Ultimately, comprehensive testing transforms technical installation into a reliable home entertainment solution. Patience during this verification process prevents future frustrations, guaranteeing that your carefully mounted projector delivers consistently exceptional visual experiences across different viewing scenarios. Remember that minor adjustments during initial testing can dramatically enhance your long term viewing satisfaction.
Unlock Flawless Home Theater Setups With the Right Projector Solutions
Struggling to achieve that perfect movie night because of tricky projector placement or subpar visual performance? You are not alone. As the article shows, mounting your projector is not just about drilling holes. It demands accuracy, the right hardware, and reliable products that match your unique room and projector requirements. Missing the ideal mount or the perfect screen can leave your home theater feeling incomplete. To truly optimize your setup, you need solutions that blend quality, compatibility, and trusted support.
Explore our Projector Screens and see how the right display can elevate your visuals to cinema quality.

Find everything you need for a professional-grade home theater, from innovative mounting options to state-of-the-art projectors and screens. Shop confidently at ProjectorDisplay.com, Malaysia's leading choice for projection solutions. Do not settle for compromised viewing. Take action today and experience the full potential of your home theater space.
Frequently Asked Questions
How do I assess my room for optimal projector placement?
Start by mapping out the total available space, measuring the distance from potential mounting points to the projection screen, ceiling height, wall material composition, and ensuring unobstructed wall or ceiling space.
What should I consider when selecting projector mounting hardware?
Consider factors such as the projector's weight capacity, adjustability range, material durability, compatibility with your specific projector model, and cable management capabilities to ensure a secure and effective mounting solution.
How do I securely install a projector mount?
Begin by gathering essential tools, locating robust mounting points with a stud finder, and marking your mounting points accurately. Ensure the mount is installed horizontal to avoid image distortion, and check the stability after installation.
What steps should I follow to adjust and align the projector image?
Power on the projector and display a test pattern, then adjust key points such as keystone correction, zoom, and focus. Use alignment tools in the projector and verify image quality with test images to ensure optimal viewing experience.
Recommended
- Best Projector and Screen for Home Theater in Malaysia 2025 – Projector Display
- 7 Best Home Theater Projector Tips for Ultimate Viewing – Projector Display
- How to Build Home Theater: Create Your Ultimate Setup – Projector Display
- How to Mount a Projector: Step-by-Step Guide for Malaysia 2025 – Projector Display