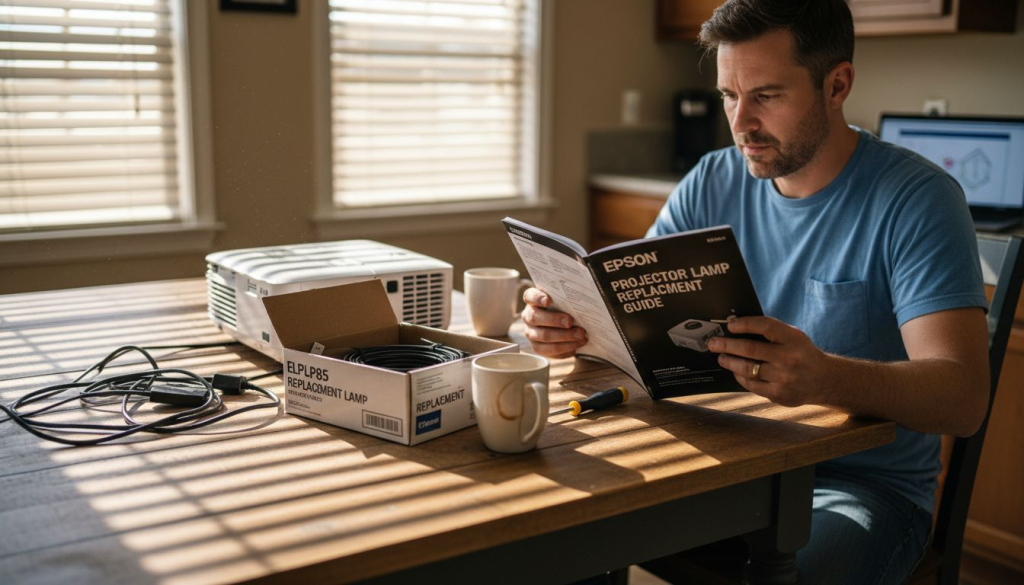
You're settling in for movie night or about to start an important presentation when your projector suddenly dims or flickers. The culprit? A worn out lamp that's reached the end of its lifespan. Replacing your ELPLP85 projector lamp might sound intimidating, but this comprehensive guide walks you through every step to safely restore your projector's brightness and image quality. Whether you use your projector for home entertainment, business presentations, or classroom teaching in Malaysia, you'll learn the preparation, replacement process, testing procedures, and maintenance tips to keep your display equipment running smoothly.
Table of Contents
- Understanding The ELPLP85 Projector Lamp And Why Replacement Matters
- Preparing For Your ELPLP85 Projector Lamp Replacement: Tools, Safety, And Setup
- Step By Step Replacement Process For Your ELPLP85 Projector Lamp
- After Replacement: Testing Your Projector And Troubleshooting Common Issues
- Find Authentic ELPLP85 Lamps And Expert Support At Projector Display Malaysia
- Frequently Asked Questions
Key takeaways
| Point | Details |
|---|---|
| Replacement timing | Replace your ELPLP85 lamp when you notice dimming, color shifts, or flickering to maintain optimal image quality. |
| Safety first | Always unplug your projector and allow at least 30 minutes cooling time before starting the replacement process. |
| Simple process | Follow the step by step removal and installation instructions to safely replace the lamp without professional help. |
| Post replacement testing | Power on your projector and reset the lamp timer to verify successful installation and maximize lamp lifespan. |
| Genuine parts matter | Use authentic ELPLP85 lamps to ensure compatibility, safety, and the best performance for your projector. |
Understanding the ELPLP85 projector lamp and why replacement matters
The ELPLP85 projector lamp serves as the light source that creates the images you see on screen. This lamp is compatible with various Epson projector models commonly used in Malaysian homes, offices, and schools. The ELPLP85 lamp plays a vital role in maintaining projector brightness and image clarity, directly impacting your viewing or presentation experience. Understanding when and why to replace this component helps you maintain optimal projector performance.
Several clear indicators signal when your ELPLP85 lamp needs replacement:
- Image brightness decreases noticeably compared to when the projector was new
- Colors appear washed out or shifted from their original vibrancy
- The projected image flickers or shows unusual patterns
- Your projector displays warning messages about lamp life
- The lamp has operated for 2000 to 3000 hours based on your usage tracking
Delaying lamp replacement creates multiple problems beyond poor image quality. A dying lamp forces your projector to work harder, potentially damaging internal components and shortening the overall device lifespan. The projector may overheat as it attempts to compensate for reduced light output, stressing cooling systems and electronic circuits. In extreme cases, a lamp that's used well beyond its rated life can shatter inside the projector housing, creating a safety hazard and requiring expensive repairs.
Pro Tip: Track your projector's operating hours through its menu system to anticipate lamp replacement before image quality degrades noticeably.
Typical ELPLP85 lamp lifespan ranges from 2000 hours in standard mode to 3000 hours in eco mode, but several factors influence actual durability. Operating your projector in high temperature environments accelerates lamp degradation. Frequent power cycling (turning the projector on and off repeatedly) reduces lamp life more than extended continuous use. Power surges and voltage fluctuations common in some Malaysian areas can also shorten lamp lifespan, making surge protection worthwhile.
Safety considerations matter when handling projector lamps. These components generate intense heat during operation and remain dangerously hot for 30 minutes or more after shutdown. The lamp bulb contains pressurized gases and fragile glass that can shatter if dropped or mishandled. Never attempt lamp replacement immediately after use, and always handle the lamp assembly by its plastic housing rather than touching the glass envelope directly.
Preparing for your ELPLP85 projector lamp replacement: tools, safety, and setup
Successful lamp replacement starts with proper preparation. Proper preparation with the right tools and safety precautions minimizes risk and prevents projector damage. Gathering everything you need before starting ensures a smooth process without interruptions or scrambling for missing items.
Essential tools and materials for ELPLP85 replacement:
- Phillips head screwdriver (typically #2 size for most projector models)
- Clean cotton gloves to handle the new lamp without leaving fingerprints
- Soft cloth for wiping dust from the lamp compartment
- Your replacement ELPLP85 lamp in its original packaging
- Projector manual for model specific instructions if available
- Small container to hold screws during the process
Safety gear and environmental conditions protect both you and your equipment. Work in a well lit area with stable temperature, avoiding direct sunlight or humid conditions. Wear the cotton gloves to prevent skin oils from transferring to lamp surfaces, which can create hot spots and reduce lamp life. Clear your workspace of clutter, liquids, and static generating materials like certain fabrics. Ground yourself by touching a metal object before handling electronic components to discharge static electricity.
| Preparation Step | Time Required | Why It Matters |
|---|---|---|
| Power down projector | 1 minute | Prevents electrical shock and allows cooling cycle to complete |
| Cooling period | 30-45 minutes | Lamp and internal components reach safe handling temperature |
| Workspace setup | 5 minutes | Organized area prevents lost parts and accidental damage |
| Tool gathering | 3 minutes | Having everything ready avoids mid process interruptions |
Properly powering down your projector follows a specific sequence. Use the projector's power button to initiate shutdown rather than simply unplugging it. This allows the cooling fan to run through its cycle, protecting internal components. Wait for all indicator lights to stop blinking and the fan to cease operation. Only then should you unplug the power cord from both the projector and wall outlet. Disconnecting from the wall outlet, not just the projector, eliminates any residual electrical current.
Pro Tip: Set a timer for 30 minutes after unplugging to ensure adequate cooling time, especially if your projector was running at high brightness before shutdown.
Workspace organization prevents common mistakes. Place your projector on a stable, flat surface with adequate lighting to see small screws and connectors clearly. Lay out a clean towel or mat to set the lamp housing on once removed. Position your new ELPLP85 lamp nearby but safely away from the work area to avoid accidental contact. Keep the screwdriver and screw container within easy reach. This systematic approach reduces the chance of dropping components or losing critical hardware.
Step by step replacement process for your ELPLP85 projector lamp
With preparation complete, following stepwise instructions ensures safe and effective ELPLP85 lamp replacement without damaging your projector. This detailed process covers every action from opening the lamp compartment to final reassembly.
- Locate the lamp cover on your projector, typically on the top or side panel marked with a lamp icon or warning label.
- Remove the securing screw from the lamp cover using your Phillips head screwdriver, turning counterclockwise.
- Slide or lift the lamp cover away from the projector body and set it aside in your designated clean area.
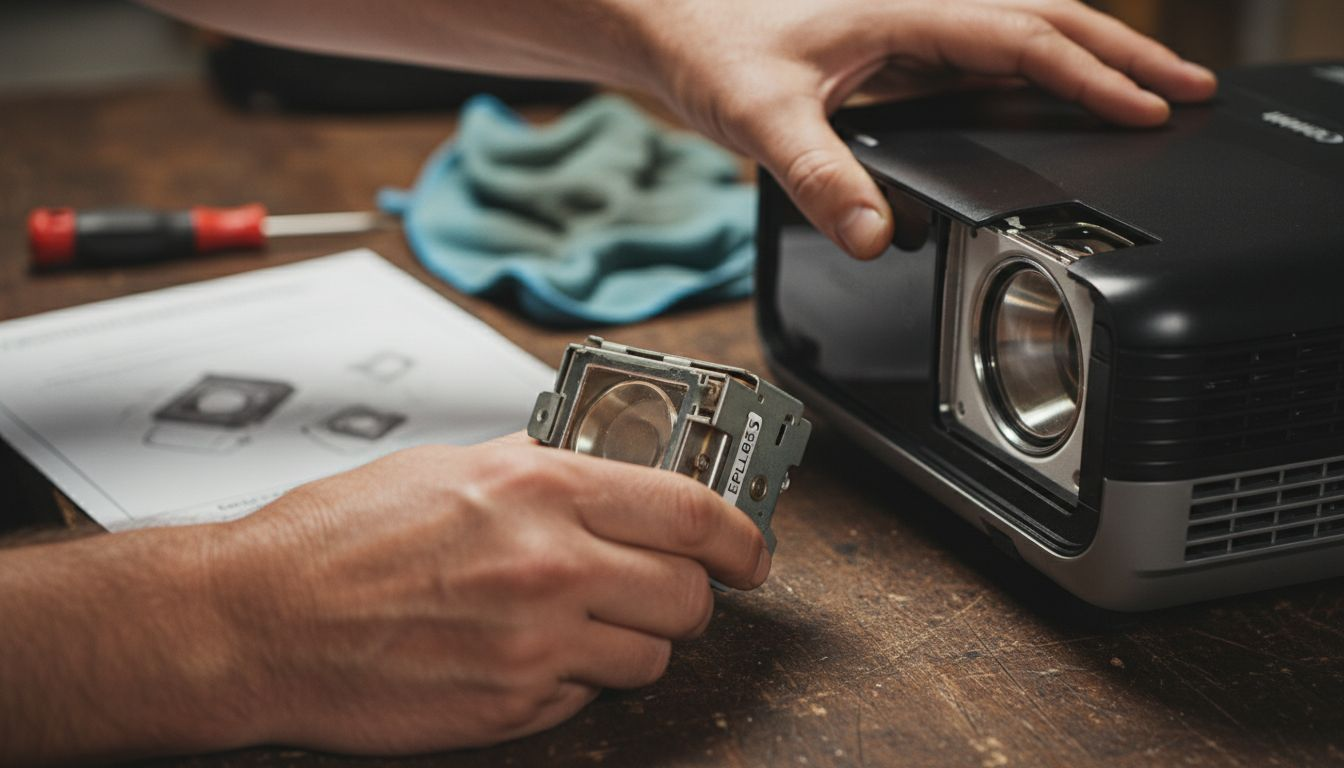
- Identify the lamp housing inside the compartment, a rectangular module with a handle and typically two securing screws.
- Loosen both lamp housing screws by turning counterclockwise, but do not remove them completely as they're often captive screws.
- Grasp the lamp housing handle firmly and pull straight out, using steady even pressure without twisting.
- Set the old lamp housing aside and unpack your new ELPLP85 lamp, removing all protective packaging materials.
- Inspect the new lamp for any shipping damage before installation, checking that the glass envelope is intact.
- Hold the new lamp housing by its plastic frame, carefully aligning it with the slot in the projector.
- Slide the new lamp housing into position until it seats completely, ensuring proper alignment with mounting points.
- Tighten both lamp housing screws by turning clockwise, applying firm but not excessive pressure.
- Replace the lamp cover by sliding or positioning it back onto the projector body.
- Install and tighten the lamp cover screw to secure everything in place.
Pro Tip: Never touch the lamp's glass surface with bare hands, as skin oils create hot spots that dramatically shorten lamp life and can cause premature failure.
Different Epson projector models compatible with the ELPLP85 lamp may have slight variations in lamp compartment location and cover design:
| Projector Model | Lamp Cover Location | Removal Method | Special Notes |
|---|---|---|---|
| Epson PowerLite 825 | Top panel | Single screw, slide forward | Cover slides toward front of projector |
| Epson PowerLite 826W | Top panel | Single screw, lift up | Cover lifts straight up after screw removal |
| Epson PowerLite 84 | Side panel | Two screws, slide right | Requires projector rotation for access |
| Epson PowerLite 85 | Top panel | Single screw, slide forward | Identical to 825 model process |
The lamp housing itself follows a universal design across these models, but always consult your specific projector manual if you encounter resistance during removal or installation. Forcing components that don't align properly can break mounting tabs or strip screw threads. If the lamp housing doesn't slide in smoothly, remove it and check for proper orientation. Most lamp housings only fit one way, with alignment guides or asymmetric shapes preventing incorrect installation.
Handle the old lamp carefully even after removal. Although no longer functional, it still contains glass and pressurized components that require proper disposal. Many electronics retailers and waste management facilities in Malaysia accept used projector lamps for recycling. Never throw projector lamps in regular trash where they could break and create hazards. Keep the old lamp in its replacement's packaging box for safe transport to a disposal facility.
After replacement: testing your projector and troubleshooting common issues
Installing a new lamp is only part of the process. Testing after lamp replacement ensures the projector functions optimally and prolongs lamp life through proper initialization and settings adjustment. Systematic verification catches potential issues before they become problems.
Power on your projector using the normal startup procedure. Connect the power cord to both the projector and wall outlet, then press the power button. The projector should complete its startup sequence, displaying the manufacturer logo and reaching normal operating temperature. Watch for any unusual sounds, excessive fan noise, or error messages during this initial power up. A successful installation produces the same startup behavior as before lamp replacement, but with noticeably brighter and more vibrant images.
Checklist of normal projector indicators after lamp replacement:
- Power LED shows solid green (not blinking or red)
- Lamp indicator light remains off or shows green status
- Temperature warning light stays off during operation
- Projected image appears bright and evenly lit across the entire screen
- Colors look vivid and properly balanced without yellow or blue tints
- No flickering, dimming, or unusual patterns appear in the projected image
Common post replacement issues usually have simple solutions. If the projector displays a lamp error message despite correct installation, the lamp housing may not be fully seated. Power down, allow cooling, and verify the lamp is pushed completely into position with screws tightened. Flickering images sometimes indicate the lamp timer wasn't reset, causing the projector to operate in a protective mode. Access your projector's menu system to find the lamp hours counter and reset it to zero.
No image after lamp replacement typically points to loose connections. Verify the lamp housing screws are tight and the cover is properly secured. Check that you removed all packaging materials from the new lamp before installation. Some replacement lamps include protective films or spacers that must be removed. If the projector powers on but produces no light, the lamp may be defective and require exchange under warranty.
Pro Tip: Reset your projector's lamp timer immediately after successful replacement to ensure accurate tracking of the new lamp's operating hours and timely future replacement reminders.
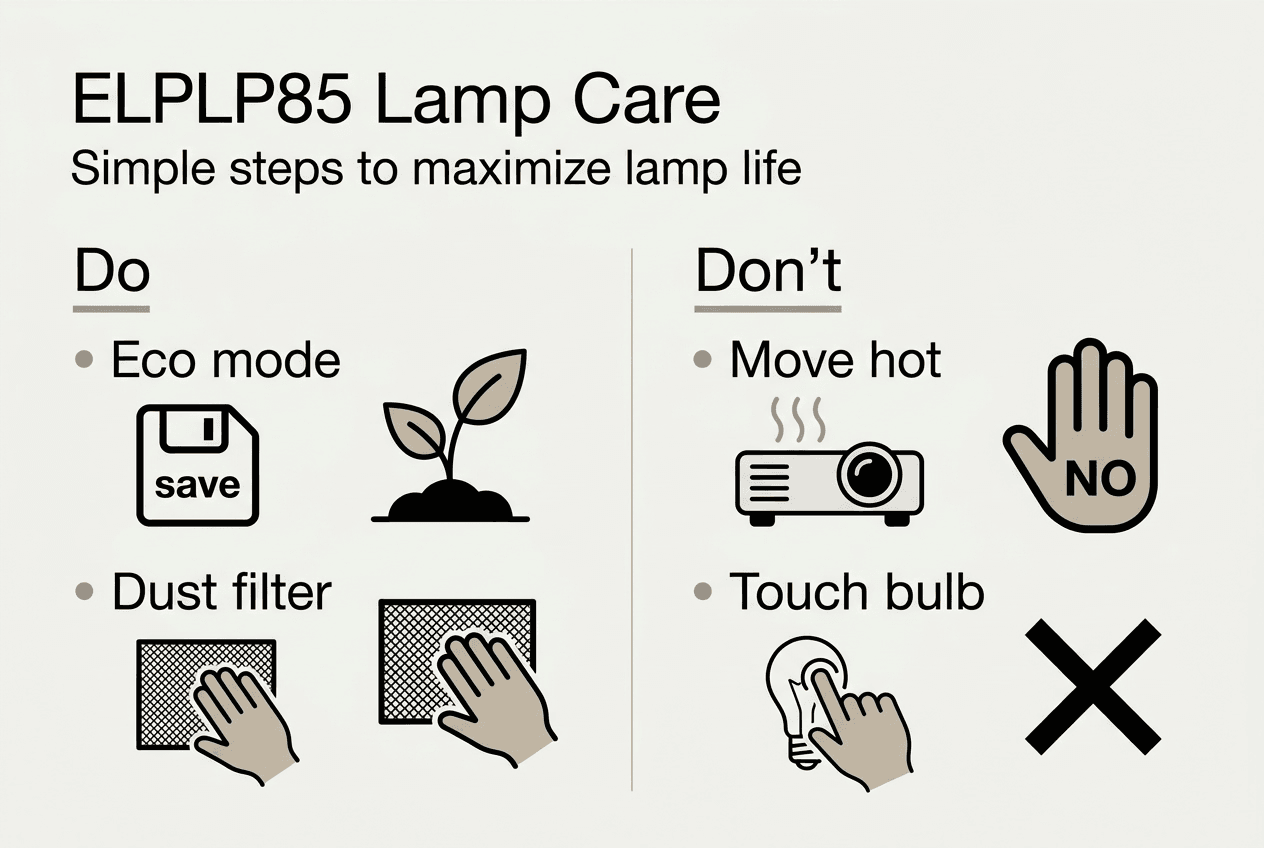
Maintenance tips maximize your new ELPLP85 lamp's lifespan. Use eco mode when maximum brightness isn't necessary, as this reduces lamp stress and can extend life by 50% or more. Allow proper cooling time before moving the projector after use, as jostling a hot lamp increases failure risk. Keep air filters clean by checking them monthly and replacing when visibly dirty, since restricted airflow forces the lamp to run hotter. Position your projector in well ventilated areas away from heat sources, dusty environments, or locations where it might be bumped during operation.
Calibrating your projector optimizes the new lamp's performance. Access the picture settings menu and adjust brightness, contrast, and color temperature to your preference. Some projectors automatically detect new lamp installation and run calibration routines. If your model offers this feature, allow the calibration to complete for best results. Consider creating custom picture profiles for different content types like presentations, movies, or gaming to get the most from your refreshed projector.
Find authentic ELPLP85 lamps and expert support at Projector Display Malaysia
Now that you understand the complete ELPLP85 replacement process, sourcing genuine components ensures your projector performs reliably for years. Counterfeit lamps flood the market with inferior quality that risks projector damage and disappointing performance. Projector Display stands as Malaysia's top projector seller, offering authentic ELPLP85 replacement lamps backed by manufacturer warranties and expert guidance.

Our extensive inventory includes genuine Epson lamps, compatible projector models, and all the accessories you need for maintenance and upgrades. Browse current projector lamp sale products for special pricing on replacement lamps and projection equipment. Access detailed resources like our ELPLP85 replacement lamp guide for model specific instructions and troubleshooting support. Fast shipping throughout Peninsular Malaysia means you'll receive your replacement lamp quickly, minimizing projector downtime. Our customer support team via WhatsApp provides personalized assistance for installation questions or product selection, ensuring you get exactly what your projector needs.
Frequently asked questions
How long does the ELPLP85 projector lamp typically last?
The ELPLP85 lamp delivers 2000 to 3000 hours of operation depending on your usage mode and maintenance practices. Standard brightness mode provides approximately 2000 hours, while eco mode extends life to 3000 hours by reducing lamp intensity. Replacing the lamp when it reaches these hour thresholds or shows dimming prevents image quality loss and potential projector damage from an overworked lamp assembly.
What safety precautions should I follow when replacing the ELPLP85 lamp?
Always unplug your projector from the power outlet and wait at least 30 minutes for complete cooling before attempting lamp removal. Handle the lamp housing by its plastic frame only, never touching the glass bulb surface which is both fragile and sensitive to skin oils. Wear clean cotton gloves and work in a static free environment to protect both yourself and the sensitive electronic components inside your projector.
Can I replace the ELPLP85 lamp myself, or should I hire a professional?
Most projector owners successfully replace ELPLP85 lamps by following detailed guides and taking proper safety precautions. The process requires only basic tools and careful attention to instructions, making it accessible for home users, educators, and business professionals. However, if you feel uncomfortable working with electronic equipment or your projector model has an unusually complex lamp access design, professional installation services ensure correct replacement without risk.
What are the signs that my ELPLP85 lamp needs replacement?
Watch for noticeably dimmer projected images compared to when your projector was new, as this indicates declining lamp output. Flickering images, color shifts toward yellow or blue tints, and on screen warning messages about lamp life all signal replacement time. Additionally, if your projector's hour counter shows 2000 to 3000 operating hours, plan for lamp replacement even if image quality hasn't degraded noticeably, as preventive replacement avoids sudden failure during important use.
Recommended
- How to Replace Your elplp85 Replacement Projector Lamp Easily – Projector Display
- How to Replace Elplp88 Replacement Projector Lamp Easily – Projector Display
- Replace Your elplp95 Replacement Projector Lamp Easily – Projector Display
- How to Install an elplp78 Replacement Projector Lamp Easily – Projector Display