Setting up a projector can feel overwhelming, especially when you're aiming for a crisp, vibrant image in your home theater or classroom. Many Malaysian users struggle with blurry visuals, incorrect positioning, and frustrating keystone distortion. This guide walks you through every step, from gathering tools to mounting your projector, ensuring you achieve optimal viewing quality whether you're creating an immersive home entertainment space or an engaging educational environment.
Table of Contents
- Gathering Your Tools And Understanding Your Space
- Calculating The Optimal Projector Placement And Throw Distance
- Step-By-Step Installation Process And Mounting Options
- Troubleshooting Common Projector Issues And Optimizing Viewing Experience
- Explore Top Projectors And Accessories At Projector Display Malaysia
- Frequently Asked Questions About Installing Projectors In Malaysia
Key takeaways
| Point | Details |
|——-|———||
| Follow a systematic setup process | Proper preparation and step-by-step installation ensure sharp, bright images without distortion. |
| Calculate throw distance accurately | Using the correct projector-to-screen distance prevents blur and minimizes keystone correction needs. |
| Control ambient light effectively | Managing room lighting and choosing the right screen surface dramatically improves image clarity and color. |
| Choose suitable mounting methods | Ceiling mounts, wall brackets, or table placement each offer stability and viewing flexibility for different spaces. |
Gathering your tools and understanding your space
Before you start drilling holes or connecting cables, you need the right equipment and a solid understanding of your room layout. Having everything ready saves time and prevents installation mistakes.
For a successful installation, gather these essential items:
- Projector mount (ceiling or wall bracket depending on your choice)
- Power drill and appropriate screws (concrete anchors for solid walls)
- Measuring tape and level tool
- HDMI or VGA cables for video connection
- Power extension cord if outlets are far from mounting location
- Projector screen or prepared wall surface
- Cable management clips or conduit
Your room dimensions directly impact where you can place your projector. Measure the length, width, and ceiling height carefully. Consider window locations and light sources, as ambient light will wash out your image quality. Malaysian homes often have bright natural light during the day, so plan for curtains or blinds to control illumination.
Selecting the right projection surface is crucial for image quality. A dedicated projector screen placement malaysia guide helps you understand viewing angles and optimal positioning. While plain white walls can work, textured surfaces cause distortion and reduce sharpness. Projector screens provide uniform reflection and better color accuracy.
Understanding throw distance early prevents frustrating repositioning later. Throw distance is the measurement between your projector lens and the screen surface. This distance, combined with your projector's throw ratio, determines your final image size. Setting up a projector requires planning this measurement before mounting anything permanently.
You have three main placement options: ceiling mount offers permanent installation and keeps floors clear, tripod stands provide portability for classrooms that need flexibility, and table placement works for temporary setups or spaces where drilling isn't permitted.
| Placement Type | Best For | Advantages | Considerations |
|---|---|---|---|
| Ceiling Mount | Home theaters, permanent classrooms | Stable, out of the way, professional look | Requires drilling, fixed position |
| Tripod Stand | Mobile classrooms, multi-use spaces | Portable, adjustable height, no installation | Takes floor space, less stable |
| Table Placement | Temporary setups, rentals | No installation needed, easy to move | Requires furniture, cables visible |
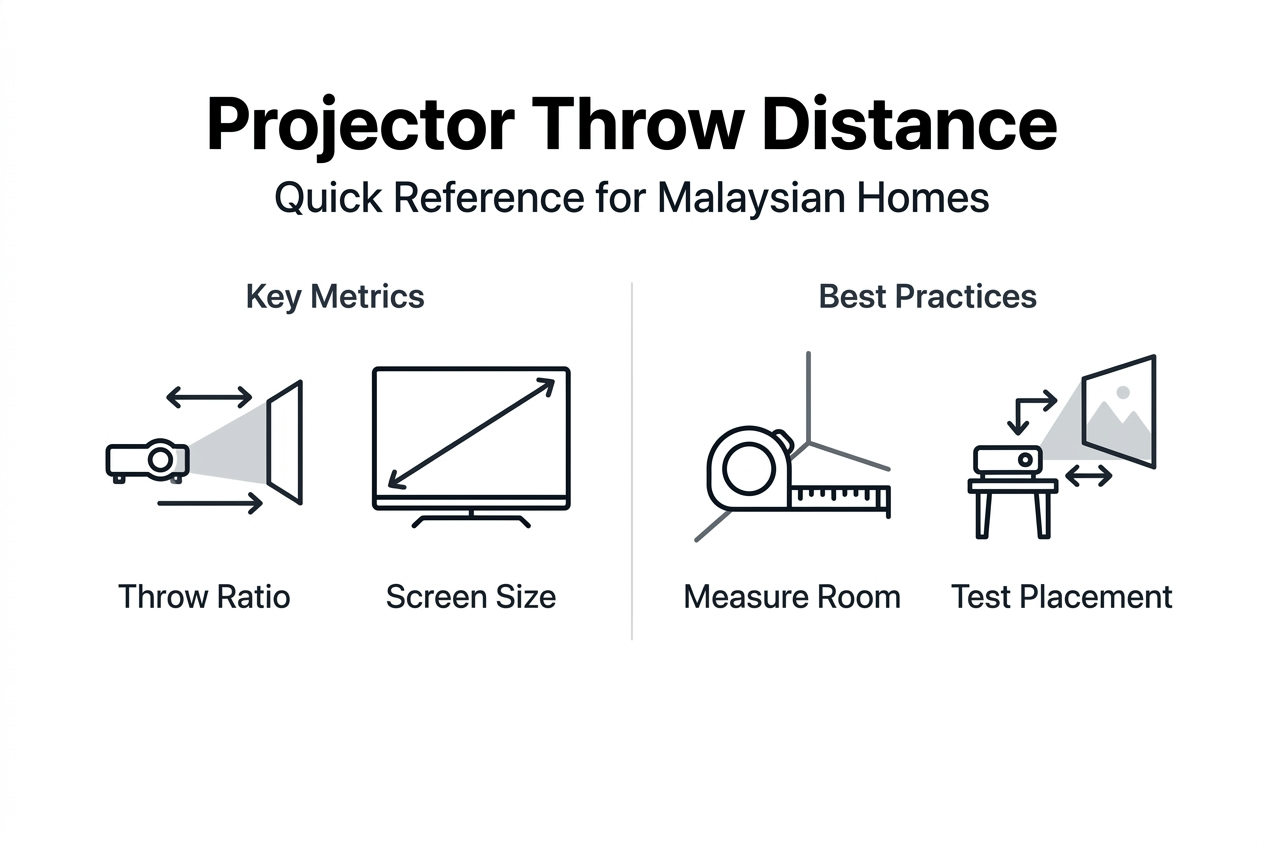
Calculating the optimal projector placement and throw distance
Getting your projector distance right is the difference between a sharp, properly sized image and a blurry, distorted mess. This step requires precision but isn't complicated once you understand the basics.
Throw distance is the space between your projector lens and screen. Throw ratio is a specification that shows how far back your projector needs to be for each unit of screen width. For example, a 1.5:1 throw ratio means your projector needs to be 1.5 meters away for every meter of screen width. These measurements determine whether your image fits your screen perfectly or spills over the edges.
Measure your room from potential mounting points to your screen location. If you want a 100-inch diagonal screen, you need to know how far back your specific projector model must sit. Check your projector's manual for its throw ratio specifications. Most home theater projectors have ratios between 1.3:1 and 2.0:1, while short-throw models can go as low as 0.5:1.
Calculating throw distance prevents blurry images and eliminates the need for excessive keystone correction during installation. Manual calculations are prone to measurement errors, especially when converting between diagonal screen size and width measurements. Even small miscalculations result in images that don't fit your screen properly.
An automated projector throw distance calculator removes guesswork and saves significant time. These tools account for your specific projector model, desired screen size, and mounting options. Simply input your projector brand and model, enter your target screen dimensions, and the calculator provides exact placement distances. The understanding projector throw distance calculator resource explains how these tools work and which measurements you need.
Correct distance prevents keystone distortion, which happens when your projector isn't perpendicular to the screen. While digital keystone correction exists, it reduces image quality by cropping and stretching pixels. Physical alignment always produces better results than digital fixes.
Pro Tip: Position your projector as perpendicular to the screen as possible during mounting to minimize keystone correction needs and maintain maximum image sharpness and brightness.
| Screen Size (Diagonal) | Typical Throw Distance (1.5:1 ratio) | Short-Throw Distance (0.5:1 ratio) |
|---|---|---|
| 80 inches | 2.4 meters | 0.8 meters |
| 100 inches | 3.0 meters | 1.0 meters |
| 120 inches | 3.6 meters | 1.2 meters |
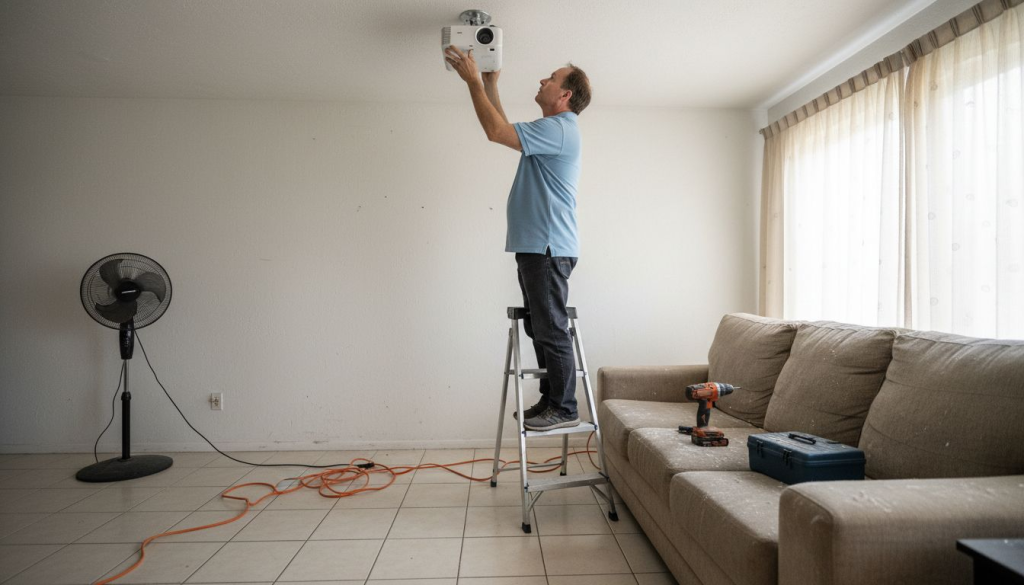
Step-by-step installation process and mounting options
Now that you've measured and calculated, it's time to physically install your projector. Following the correct sequence prevents damage to your equipment and ensures a stable, long-lasting setup.
-
Unbox your projector carefully and verify all components are present. Check for the power cable, remote control, lens cap, and any included mounting hardware. Setting up your projector starts with confirming you have everything needed before climbing ladders or drilling.
-
Mark your mounting position on the ceiling or wall using the measurements from your throw distance calculation. Use a level tool to ensure your marks are straight. For ceiling mounts in Malaysian homes with concrete construction, you'll need a power drill with concrete bits and appropriate anchors.
-
Install the mounting bracket securely. Ceiling mounts typically attach to ceiling joists or concrete. Tighten all screws firmly but don't overtighten, as this can crack mounting plates. The how to mount a projector malaysia guide 2025 provides detailed instructions for different ceiling and wall types common in Malaysian construction.
-
Attach your projector to the mounted bracket. Most mounts use a plate system where you screw a plate to the projector body, then slide or lock it into the ceiling bracket. Have someone help support the projector weight during this step to prevent drops.
-
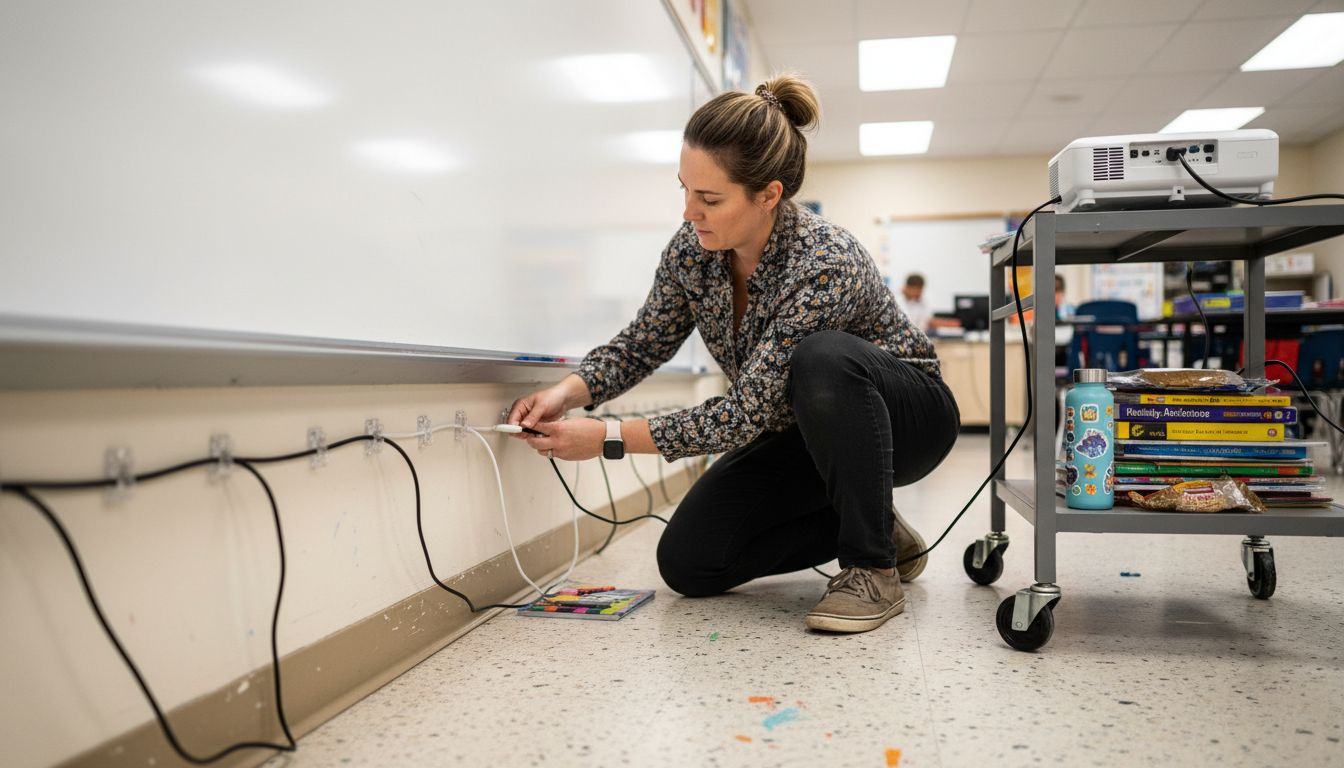
Connect your video source and power. Run HDMI cables from your media player, laptop, or set-top box to the projector's input ports. For ceiling installations, use cable conduit or clips to keep wires organized and safe. The how to connect projector malaysia 2025 guide covers different connection types and smart projector Wi-Fi setup.
-
Power on your projector and test the initial projection. You should see your input source displayed on the screen or wall. The image might not be perfectly focused or aligned yet.
-
Adjust the focus and zoom using the rings on your projector lens. Some models have motorized focus controlled by the remote. Start with focus first to get sharp edges on text or images. Then adjust zoom to fit your screen dimensions exactly.
-
Fine-tune keystone correction if your projector isn't perfectly perpendicular to the screen. Access the settings menu and use minimal correction to square up the image. Remember that less correction preserves better image quality.
-
Select the appropriate projector mode for your environment. Most projectors offer cinema, bright, or dynamic modes. Cinema mode provides accurate colors for dark rooms, while bright mode increases lumens output for rooms with ambient light.
Pro Tip: Clean your projector lens with a microfiber cloth before final focus adjustment, and ensure no furniture or objects block the light path between projector and screen for optimal brightness.
Manage cables neatly to prevent tripping hazards and maintain a professional appearance. Use adhesive cable clips along walls and ceilings, or install plastic conduit for a cleaner look. Keep power and video cables separated when possible to reduce electromagnetic interference.
Troubleshooting common projector issues and optimizing viewing experience
Even with careful installation, you might encounter image quality problems. Understanding common issues helps you fix them quickly and optimize your setup for the best possible viewing experience.
Blurry projector images typically result from a few fixable causes. Dust accumulated on the lens reduces sharpness, so clean it regularly with proper lens cleaning solution and microfiber cloths. Textured wall surfaces scatter light and create fuzzy edges, which is why dedicated screens provide superior results. Incorrect throw distance causes focus problems that can't be fixed by adjusting the focus ring alone. Double-check your measurements against your projector's specifications.
Projection surface quality matters more than many users realize. Smooth, matte white surfaces reflect light evenly without hotspots or color shifts. Glossy walls create bright spots and uneven illumination. Colored walls tint your image and reduce color accuracy. If you can't use a dedicated screen, paint a section of wall with projector screen paint for better results. The projector screen placement malaysia guide explains how surface choice impacts image quality.
Ambient light is your biggest enemy for image visibility. Even projectors with high lumen ratings struggle against direct sunlight or bright room lighting. Light control significantly impacts your viewing experience quality. Install blackout curtains or blinds on windows. Turn off overhead lights and use indirect lighting behind viewers instead. For classrooms that need some visibility, position your screen away from windows and use higher-lumen projectors rated for bright environments.
Common quick fixes include:
- Refocus your lens if text appears soft or blurry at the edges
- Adjust zoom to eliminate black bars or image overflow beyond screen boundaries
- Realign projector angle if image appears tilted or trapezoidal
- Reduce keystone correction in settings to minimize pixel distortion
- Switch to a brighter projector mode if image appears washed out
- Check cable connections if you see flickering or signal drops
Excessive keystone correction creates image skew and reduces sharpness by digitally manipulating pixels. Physical repositioning always beats digital correction. If your image requires more than 10 degrees of keystone adjustment, consider remounting your projector in a better position.
Maintenance checklist for long-term performance:
- Clean lens monthly with microfiber cloth
- Check and clean air filters every three months
- Ensure proper ventilation around projector body
- Verify cable connections remain secure
- Update firmware when manufacturers release improvements
- Replace lamp or laser module according to manufacturer schedule
- Keep room temperature moderate to prevent overheating
Explore top projectors and accessories at Projector Display Malaysia
Now that you understand proper installation, finding the right equipment makes your setup even better. Projector Display Malaysia offers a comprehensive selection of projectors designed specifically for Malaysian homes and classrooms, with models optimized for different room sizes and lighting conditions.

Browse portable projectors perfect for flexible classroom setups, laser projectors with extended lamp life for long-term installations, and short-throw models ideal for smaller Malaysian living rooms. Each product listing includes detailed throw distance specifications, lumen ratings, and resolution information to help you choose the right match for your space. Explore various projector screen options including motorized, fixed-frame, and portable models that complement your installation method. Take advantage of current projector sale products featuring special discounts on popular brands with fast shipping throughout Peninsular Malaysia and dedicated WhatsApp customer support for installation questions.
Frequently asked questions about installing projectors in Malaysia
What is the ideal distance between my projector and screen in a typical Malaysian room?
The ideal distance depends on your projector's throw ratio and desired screen size. For a standard 100-inch screen with a 1.5:1 throw ratio projector, you need approximately 3 meters of distance. Use your projector's specific throw ratio and an online calculator to determine the exact measurement for your model and screen size.
Can I install a projector without mounting it on the ceiling?
Absolutely. Table placement works well for temporary setups or rental properties where drilling isn't allowed. Tripod stands offer portability for classrooms that serve multiple purposes. Wall mounts provide stability without ceiling installation. Each method has tradeoffs in stability and cable management, but all can produce excellent image quality when properly aligned.
How do I reduce image blur after installation?
Start by cleaning your projector lens thoroughly with a microfiber cloth. Verify your throw distance matches your projector's specifications for your screen size. Adjust the focus ring carefully while displaying text or detailed images. Check that you're projecting onto a smooth, flat surface rather than a textured wall. If blur persists at the edges, your projector might not be perpendicular to the screen.
Is it necessary to use a projector screen rather than a wall?
While plain white walls can work, dedicated projector screens provide significantly better image quality. Screens offer uniform reflection, accurate color reproduction, and defined borders for your image. Walls with texture create distortion and reduce sharpness. If budget is a concern, projector screen paint applied to a smooth wall section offers a middle-ground solution between bare walls and dedicated screens.
How does ambient light affect projector image quality?
Ambient light washes out colors and reduces contrast, making dark scenes nearly invisible. Even high-lumen projectors struggle against direct sunlight or bright overhead lighting. Control ambient light with blackout curtains, blinds, or by scheduling viewing during evening hours. For classrooms requiring visibility, position screens away from windows and use projectors rated for bright environments with at least 3,000 lumens output.
Recommended
- How to Mount a Projector: Step-by-Step Guide for Malaysia 2025 – Projector Display
- How to Mount a Projector: Step-by-Step Guide for Malaysia 2025 (Repost) – Projector Display
- Projector Screen Placement Guide for Malaysia Users 2025 – Projector Display
- 2025年马来西亚教室投影仪配置指南:选择与安装实用技巧 – Projector Display