TL;DR:
- A dedicated projection screen significantly improves image quality over painted walls.
- Proper projector placement using correct throw distance and lens shift ensures a sharp, distortion-free picture.
- Managing ambient light and humidity is essential for optimal home theater performance in Malaysia.
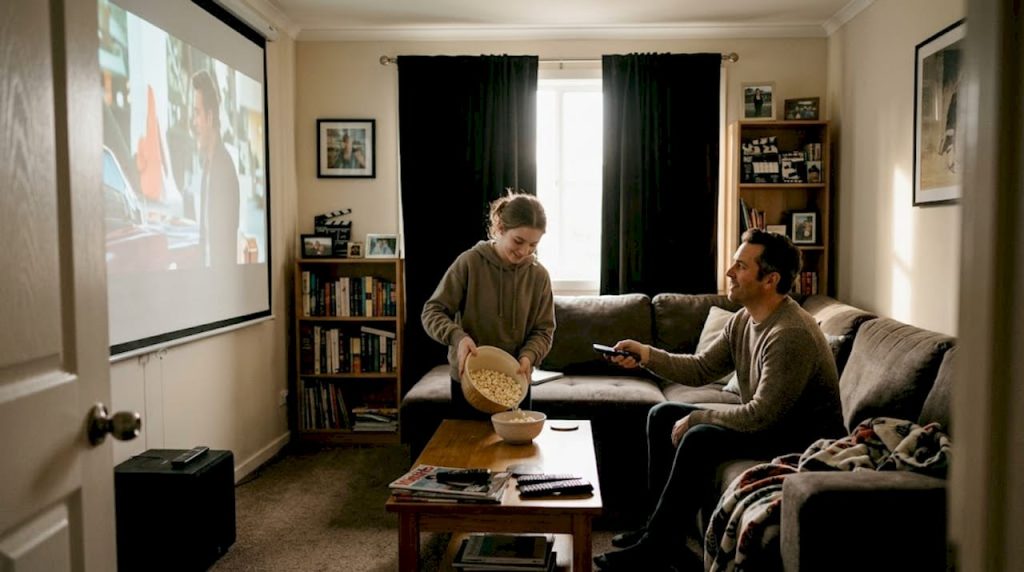
Most Malaysian home theater setups are quietly underperforming. Not because of the projector model, but because of the setup around it. A sharp, bright projector pointed at a textured wall, placed at the wrong distance, in a room flooded with afternoon light will always disappoint. The good news is that you do not need to spend a fortune to fix it. The tips in this guide cover everything from screen choice and projector placement to calibration and protecting your gear from Malaysia's humidity, giving you a clear roadmap to a genuinely cinematic experience at home.
Table of Contents
- Choose the right screen for vivid images
- Projector placement: Distance, alignment, and mounting
- Selecting the ideal projector for your space and needs
- Optimize picture quality: Calibration and environment
- Our expert take: Small changes, big leaps for home cinema
- Level up your home theater with Projector Display
- Frequently asked questions
Key Takeaways
| Point | Details |
|---|---|
| Invest in a real screen | A dedicated projector screen will give you a significantly better image than any painted wall. |
| Perfect projector placement | Use the throw ratio and screen width to position your projector for the largest, sharpest picture. |
| Match projector to your room | Choose brightness and projector technology to fit your room size, lighting, and climate in Malaysia. |
| Calibrate and control light | Fine-tune settings and block out stray light to get the best contrast, color, and detail. |
| Regular maintenance prevents problems | Clean filters and allow enough ventilation to help your projector last longer in Malaysia's humidity. |
Choose the right screen for vivid images
With the intent to maximize picture quality established, let's start by tackling your viewing surface, where most home theaters fall short.
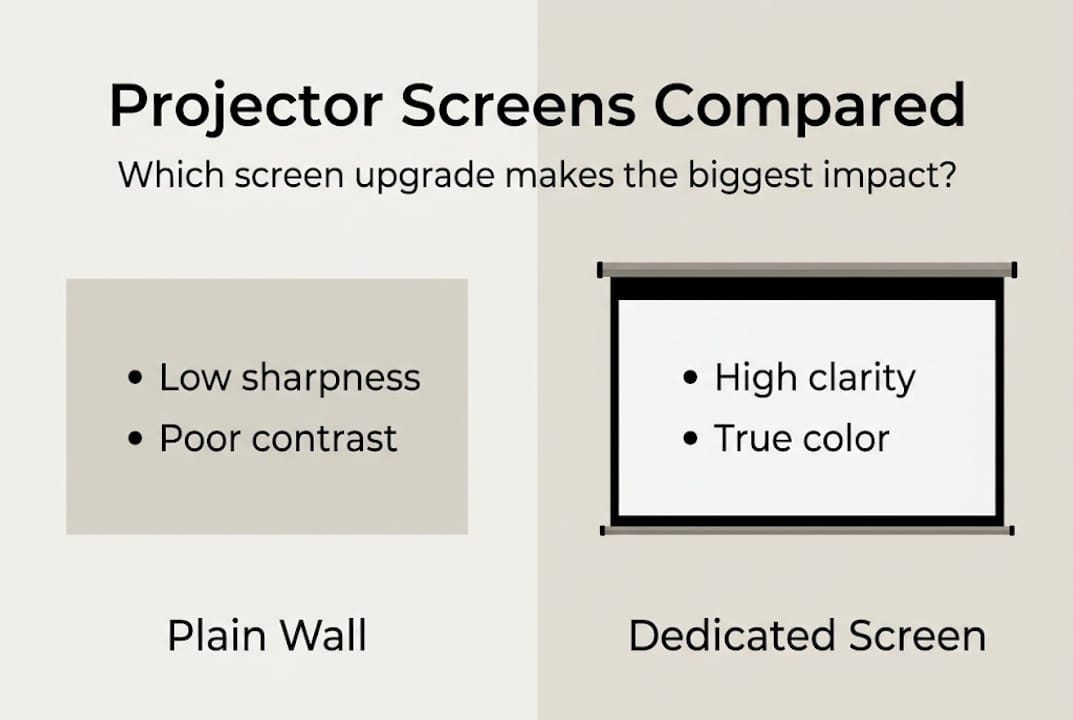
The single biggest upgrade most Malaysian home theater owners overlook is the screen itself. Painting a wall white and calling it a screen is tempting, especially when it saves money. But the surface matters enormously. A wall has texture, uneven paint absorption, and no gain optimization. A dedicated projection screen, as recommended for optimal quality, is engineered to reflect light uniformly, boost contrast, and reproduce accurate colors.
Here is how the two surfaces compare side by side:
| Feature | Plain wall | Dedicated screen |
|---|---|---|
| Image sharpness | Low to moderate | High |
| Color accuracy | Inconsistent | Optimized |
| Contrast ratio | Poor | Significantly better |
| Ambient light handling | Very poor | Good (with ALR) |
| Long-term durability | Fades and chips | Purpose-built |
For Malaysian homes, you have four main screen types to consider. Fixed frame screens deliver the flattest surface and best picture consistency, ideal for dedicated rooms. Pull-down screens retract when not in use, great for multipurpose living rooms. ALR (Ambient Light Rejecting) screens are a game changer in bright Malaysian spaces because they filter out side light while reflecting the projector's beam directly to your eyes. Portable screens suit renters or those who move frequently.
Browsing through the best projector screens for home theaters will show you just how wide the options are at different price points. If you are still weighing whether to replace your TV entirely, reading up on using a projector screen instead of a TV can help you decide.
When shopping for a screen, look for these key qualities:
- Gain rating: 1.0 to 1.3 is ideal for most home theaters
- Aspect ratio: 16:9 for movies and streaming
- Material quality: Matte white for dark rooms, ALR for bright rooms
- Frame quality: Tensioned frames prevent wrinkles and light leaks
- Size compatibility: Match screen size to your throw distance and seating
For those interested in creative builds, front surface mirrors for DIY screens offer an interesting alternative, though a commercial screen still wins on consistency.
Pro Tip: Even a budget-tier pull-down screen from a reputable brand will outperform a freshly painted wall on contrast and vividness. The texture difference alone is worth the switch.
Projector placement: Distance, alignment, and mounting
Once your screen is sorted, achieving a cinema-worthy image relies heavily on placing your projector at the perfect spot.
Throw distance is the gap between your projector's lens and the screen. Get it wrong and your image will be too small, too large, or distorted. The formula is straightforward: distance = throw ratio x screen width. The Projection Calculator Pro makes this quick and accurate for any projector model.
Here is a practical reference for common Malaysian living room setups:
| Screen width | Throw ratio 1.5 | Throw ratio 0.8 (short-throw) |
|---|---|---|
| 80 inches (1.78m) | ~2.67m | ~1.42m |
| 100 inches (2.21m) | ~3.32m | ~1.77m |
| 120 inches (2.66m) | ~3.99m | ~2.13m |
To set up your projector correctly, follow these steps:
- Measure your available wall space and decide your screen size first.
- Calculate throw distance using your projector's throw ratio and chosen screen width.
- Mark the lens position on the ceiling or shelf, centered horizontally with the screen.
- Adjust vertical alignment using lens shift, not keystone, to avoid softening the image.
- Mount or secure the projector firmly to prevent vibration during playback.
- Test with a full-screen image and fine-tune lens shift until the image fills the screen cleanly.
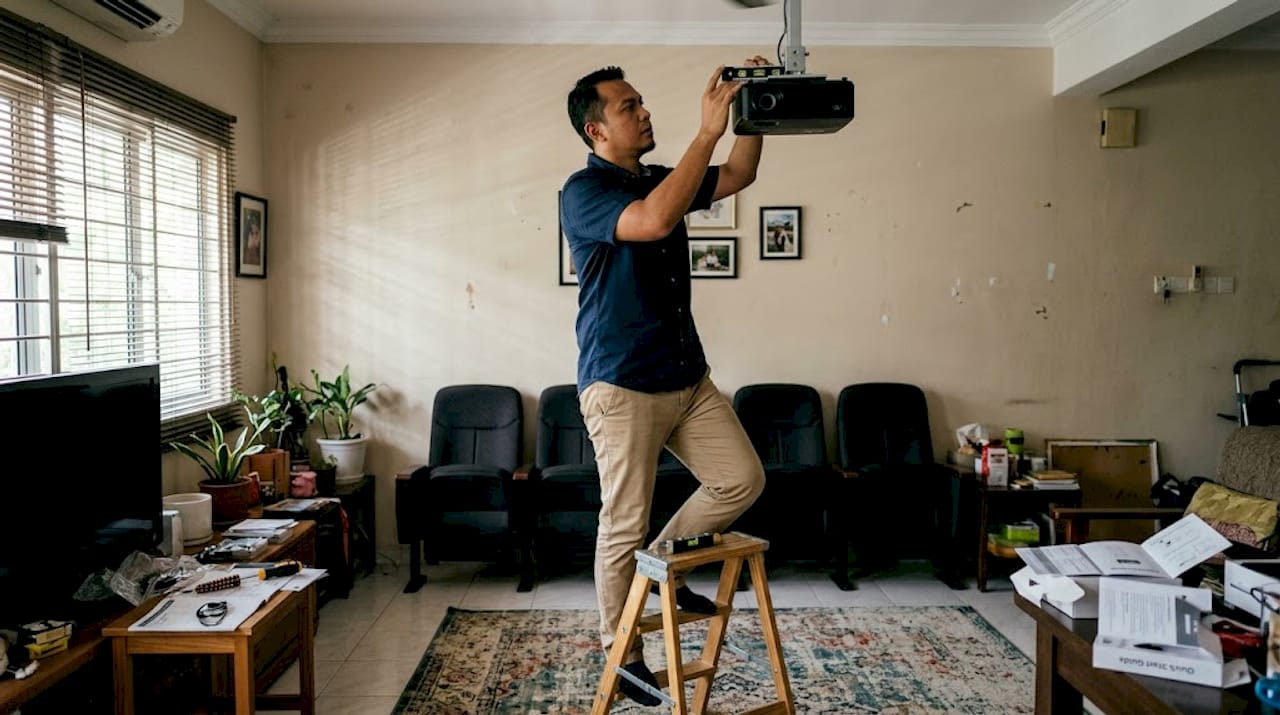
Ceiling mounting behind your seating area is often the best solution in Malaysian living rooms. It keeps the projector out of the way, reduces heat exposure near people, and eliminates desk shadows. Using a dedicated projector throw distance calculator before purchasing any unit will save you from buying the wrong hardware entirely.
If you are working with a compact space, checking out best small room projectors will steer you toward models designed for shorter distances.
Pro Tip: Always use lens shift instead of keystone correction when adjusting image position. Keystone correction is a digital fix that crops and scales the image, reducing resolution and sharpness. Lens shift moves the optical path without touching pixel quality.
Selecting the ideal projector for your space and needs
After mastering where to put your projector, the next step is choosing hardware that matches your room and expectations.
The two dominant projector technologies are DLP and LCD/3LCD, and each has a clear use case. As noted in small room projector comparisons, DLP excels in dark home theaters while LCD/3LCD performs better in brighter environments.
| Feature | DLP | LCD/3LCD |
|---|---|---|
| Contrast ratio | Excellent | Good |
| Color brightness | Moderate | High |
| Motion blur | Very low | Low |
| Rainbow effect risk | Present in single-chip | None |
| Best for | Dark rooms | Bright/mixed rooms |
For more side-by-side detail, the DLP vs LCD projector comparison breaks down which suits your specific setup.
Short-throw projectors, those with a throw ratio below 1.0, are particularly well suited to the smaller living rooms common across Malaysian apartments and terraced homes. They sit close to the screen and still project a large image, reducing shadow interference and freeing up floor space.
Light source is another critical factor. Laser projectors cost more upfront but shine in Malaysia's heat. Lamp-based projectors require bulb replacements every 3,000 to 5,000 hours and are more sensitive to heat and humidity. Laser models typically last 20,000 hours or more and maintain consistent brightness throughout their lifespan.
For home theater, aim for 1,500 to 3,500 ANSI lumens. Dark, light-controlled rooms work fine at 1,500 lumens. Rooms with ambient light or daytime use benefit from 2,500 lumens and above.
Key specs to evaluate when buying:
- Resolution: Full HD (1080p) minimum; 4K for larger screens
- Contrast ratio: 10,000:1 or higher for deep blacks
- Lumens: Matched to your room's ambient light level
- Inputs: HDMI 2.0, USB, and wireless connectivity
- Noise level: Below 30dB for quiet movie environments
Pro Tip: If you are sensitive to the rainbow effect (brief flashes of red, green, blue you may notice on fast-moving content), test a DLP model in person before buying. If it bothers you, 3LCD is the safer choice.
Optimize picture quality: Calibration and environment
Now that you've chosen your equipment, the finishing touch is getting the picture as clear and beautiful as possible while adapting to Malaysia's unique environment.
Calibration is where most setups leave performance on the table. Follow these steps to dial in your image:
- Set brightness so the darkest scene details are visible without looking washed out
- Adjust contrast until bright whites look natural, not blown out
- Set color temperature to 6500K for the most accurate, cinematic look
- Dial gamma to 2.4 for dark room viewing, as recommended by calibration experts
- Use test patterns (available free online) to verify alignment, sharpness, and uniformity
- Use lens shift, not keystone, to preserve resolution when repositioning the image
Malaysia's bright daylight makes ambient light management essential. As one expert principle goes: "Ambient light kills contrast; use blackout curtains and ALR screens to reclaim picture depth." This is especially true for homes facing west or with large windows.
Malaysia's humidity is also a real threat to projector longevity. Proper humidity protection measures include maintaining 30 to 50cm of clearance around all vents, cleaning air filters every 2 to 3 months, and favoring DLP or sealed laser projectors that resist moisture and dust ingress.
For additional light management strategy, ambient light management advice from projector experts outlines curtain placement, room paint choices, and ALR screen selection in detail. Pairing this with the home theater system tips from our own guides will help you build a coherent, optimized viewing room.
Pro Tip: For serious movie lovers, an ISF (Imaging Science Foundation) certified professional calibration session is worth every ringgit. It can unlock color accuracy and shadow detail that even experienced enthusiasts cannot achieve manually.
Our expert take: Small changes, big leaps for home cinema
With core strategies covered, here is what most guides forget and what we have seen transform average setups into true cinemas.
After observing hundreds of Malaysian home theater installs over the years, the pattern is unmistakable. Enthusiasts chase new projector models when their biggest problem is a white-painted wall, unblocked afternoon sun pouring in from the side, and a projector sitting on a coffee table pointed slightly upward. A RM5,000 projector in that environment will always disappoint. A RM2,000 model in a properly controlled room will impress every guest.
The DIY wall myth persists because it sounds logical. White surface, bright image, done. But the data from dedicated screen tests consistently shows 20 to 40 percent improvement in perceived contrast when switching from painted drywall to even a budget screen. That is not a minor tweak. That is a fundamentally different image.
Humidity and ambient light are, without question, the top two image quality killers we see in Malaysian setups. Dust-clogged filters dim images slowly without you noticing. Side-light washing out the left half of your screen is something you get used to, which is worse because you stop noticing the problem.
Our recommendation: consult the home theater screen buying guide and get your room fundamentals right before you spend anything on a projector upgrade. Screens, seating position, blackout curtains, and clean airflow will do more for your viewing experience than a specification bump.
Level up your home theater with Projector Display
Ready to create a remarkable home cinema experience? Here is where you can find everything you need and get expert support.
At Projector Display Malaysia, we stock a curated range of home theater projectors, screens, and accessories specifically chosen for Malaysian homes and climates. Whether you need guidance on which model fits your room or you want to browse dedicated projector screens for ambient light control, our team is ready to help via WhatsApp.

For a step-by-step setup process from unboxing to first movie night, our projector installation guide covers every detail. Fast shipping across Peninsular Malaysia means your setup upgrade could be complete sooner than you think.
Frequently asked questions
What's the ideal brightness (lumens) for a home theater projector in Malaysia?
Aim for 1,500 to 3,500 ANSI lumens; use the lower end for dark, light-controlled rooms and the higher end for spaces with daylight or ambient light.
How should I position my projector for the best picture?
Align the projector with the screen center using lens shift and calculate the distance using your throw ratio multiplied by the screen width.
Do I really need a special projector screen?
Yes. A dedicated projection screen improves image clarity, color accuracy, and contrast significantly compared to any painted wall surface.
How do I protect my projector from Malaysia's humidity?
Maintain 30 to 50cm clearance around all vents, clean filters every 2 to 3 months, and choose DLP or sealed laser projectors that resist moisture and dust.
Which projector type is best for small living rooms?
Short-throw projectors with a throw ratio below 1.0 are ideal for compact Malaysian living rooms where space between the projector and screen is limited.
Recommended
- 7 Best Home Theater Projector Tips for Ultimate Viewing – Projector Display
- Home Theater Projector Setup: Achieve the Ultimate Viewing Experience – Projector Display
- Projector installation tips for perfect images in any room – Projector Display
- 7 Top Home Theater Projectors for Immersive Viewing – Projector Display
- Outdoor Movie Rental Oahu: What to Know