
Designing a home theater projector setup can feel overwhelming and technical. Most people skip the basics and end up with washed out images or awkward angles that ruin movie night. But a single overlooked detail can make or break your entire setup. In fact, room lighting can drop your projected image contrast by over 50 percent if not managed correctly. Getting it right means transforming an ordinary room into a private cinema. Ready to see what actually matters before you press power?
Table of Contents
- Step 1: Assess Your Viewing Environment
- Step 2: Choose The Right Projector And Screen
- Step 3: Install And Position The Projector
- Step 4: Connect Your Devices And Configure Settings
- Step 5: Test The Setup And Optimize Image Quality
- Step 6: Secure Cables And Finalize The Setup
Quick Summary
| Key Point | Explanation |
|---|---|
| 1. Assess Your Viewing Environment | Measure room dimensions, wall color, and surface texture for optimal image quality. |
| 2. Select Quality Projector and Screen | Choose projectors based on resolution and brightness according to your room's light. |
| 3. Properly Install the Projector | Use the correct mounting techniques and calculate throw distance for best image alignment. |
| 4. Connect Devices Wisely | Utilize HDMI connections for clear audio and video; calibrate settings for the best output. |
| 5. Manage Cables for Efficiency | Organize and conceal cables to enhance aesthetics and prevent technical issues. |
Step 1: Assess Your Viewing Environment
Creating the ultimate home theater projector setup begins with a critical first step: thoroughly understanding and evaluating your viewing environment. This foundational assessment will determine every subsequent decision in your projection system design. Your room's characteristics directly impact image quality, screen placement, projector performance, and overall viewing experience.
Start by carefully measuring your available space. Focus on the wall or screen area where you plan to project, noting its dimensions, color, and surface texture. Light colored walls with minimal texture work best, reflecting projected images more cleanly and uniformly. Measure the distance between potential projector mounting locations and your intended screen position, which will help determine the throw distance required for your specific setup.
Light management represents another crucial factor in your environment evaluation. Natural and artificial light sources can dramatically reduce projected image contrast and clarity. Walk through your space at different times of day, observing how sunlight enters through windows, how overhead lights cast reflections, and which areas experience the most significant glare. You might need to consider light-blocking solutions like blackout curtains or strategic furniture positioning to optimize your viewing conditions.
Room depth and ceiling height also play significant roles in projector placement and performance. Deeper rooms provide more flexible mounting options, while limited vertical space might require specialized short-throw projectors. Read our comprehensive guide on projector screen placement to understand how room dimensions influence your ideal setup.
Consider potential acoustic properties as well. Hard surfaces like tile floors, glass windows, and bare walls can create unwanted sound reflections. Soft furnishings such as carpets, curtains, and upholstered furniture help absorb sound, creating a more immersive audio experience that complements your visual setup.
By meticulously assessing these environmental factors, you establish a solid foundation for a remarkable home theater projector system that will deliver stunning visual experiences tailored precisely to your unique space.
Step 2: Choose the Right Projector and Screen
Selecting the ideal projector and screen is a pivotal moment in creating your home theater experience. This decision transforms your carefully assessed viewing environment into a cinematic sanctuary. Your choices will determine image quality, immersion, and overall viewing satisfaction.
Projector selection requires careful consideration of multiple technical specifications. Resolution stands as a critical factor, with 4K Ultra HD offering the most detailed and crisp imagery. Lumens measure brightness, which becomes crucial depending on your room's light conditions. For spaces with ambient light, seek projectors delivering 2500 to 3500 lumens. Darker rooms can work with lower lumen ratings around 1500. Native contrast ratio impacts image depth and richness, with higher ratios producing more vibrant and nuanced visuals.
Screen selection complements your projector choice and room characteristics. Fixed screens provide the most professional appearance and optimal image alignment. Motorized screens offer flexibility, allowing you to conceal the projection surface when not in use. Material selection matters significantly screen surfaces include white matte for balanced reflection, high contrast gray for improved black levels, and acoustically transparent options that allow speaker placement behind the screen.
The table below highlights popular projector screen material options and their key benefits to help you choose the best fit for your setup.
| Screen Material Type | Best For | Key Benefit |
|---|---|---|
| White Matte | Most environments | Balanced light reflection |
| High Contrast Gray | Rooms with ambient light | Improved black levels, contrast |
| Acoustically Transparent | Speaker placement behind screen | Audio invisibility, cinematic feel |
| Motorized Screens | Multipurpose/media rooms | Conceals when not in use |
| Fixed Frame Screens | Dedicated home theaters | Optimal alignment, professional look |
Explore our curated guide to the best projector and screen combinations to understand how different technologies interact. Consider throw distance ratios that match your room dimensions. Short throw projectors work excellently in compact spaces, while standard throw models suit larger rooms with greater mounting flexibility.
Technical compatibility represents another crucial selection criterion. Ensure your chosen projector supports HDMI 2.0 or higher for modern gaming and entertainment systems. Check input lag specifications for gamers, seeking rates under 30 milliseconds for responsive gameplay. Wireless connectivity and smart features like built in streaming platforms add convenience and versatility to your home theater setup.
Remember that your projector and screen are investments in your entertainment experience. Prioritize quality and compatibility over immediate cost savings. A well chosen system will provide years of exceptional visual enjoyment, transforming ordinary movie nights into extraordinary cinematic adventures.
Step 3: Install and Position the Projector
Projector installation represents the critical transition point where your careful planning transforms into tangible home theater magic. This step demands precision, patience, and strategic thinking to achieve optimal visual performance. Your goal is creating a perfectly aligned projection system that maximizes image quality and minimizes potential technical complications.
Begin by gathering necessary mounting equipment: sturdy ceiling mount, robust mounting bracket, reliable stud finder, level, measuring tape, and electric drill. Ceiling mounting typically provides the most stable and aesthetically pleasing installation method. Locate ceiling joists using a stud finder, ensuring your mount connects to structural supports rather than merely drywall. Mark mounting points meticulously, double checking horizontal alignment to prevent image distortion. When drilling, use drill bits slightly smaller than mounting screws to prevent structural damage and ensure secure attachment.
Projector positioning requires careful mathematical calculation. Throw distance determines your projector's ideal placement relative to the screen. Most projectors include built in distance calculators or online calculators to help determine precise positioning. Generally, maintain a perpendicular angle between projector lens and screen surface to prevent keystoning distortions. Some projectors offer lens shift capabilities that allow minor angle adjustments without physically moving the entire unit.
Learn advanced techniques for perfect projector mounting to refine your installation approach. Consider ventilation during placement protecting your expensive equipment from heat buildup. Ensure at least several inches of clearance around the projector's air intake and exhaust ports. Avoid enclosed spaces that might restrict airflow and potentially damage internal components.
Verification represents the final crucial step in your installation process. Power on the projector and project a test grid or calibration image.
This table summarizes essential tools and their purposes for safely and accurately mounting a home theater projector.
| Tool/Material | Purpose |
|---|---|
| Ceiling Mount | Securely fixes projector to ceiling |
| Mounting Bracket | Supports projector alignment |
| Stud Finder | Locates ceiling joists for mounting |
| Level | Ensures horizontal/vertical alignment |
| Measuring Tape | Confirms correct throw distance/placement |
| Electric Drill | Drills holes for mounting screws |
| Mounting Screws | Attaches mount to structural supports |
Remember that patience during installation pays significant long term dividends. Take time to measure twice, adjust carefully, and test thoroughly. Your meticulous approach will reward you with a professional grade home theater projection system that delivers stunning visual experiences.
Step 4: Connect Your Devices and Configure Settings
Device connectivity transforms your projector from a standalone piece of hardware into a dynamic entertainment hub. This step bridges your carefully installed projection system with the multimedia ecosystem that will bring your home theater to life. Systematic connection and intelligent configuration are key to achieving seamless audio visual performance.
Start by identifying the input ports on your projector and planning a strategic connection approach. HDMI remains the gold standard for digital connections, offering superior video and audio transmission. If your projector features multiple HDMI ports, designate specific inputs for consistent device categories like gaming consoles, streaming devices, cable boxes, and media players. Consider using HDMI switches or receivers to expand connection capabilities if your projector has limited input options.
Audio configuration requires equal attention to detail.
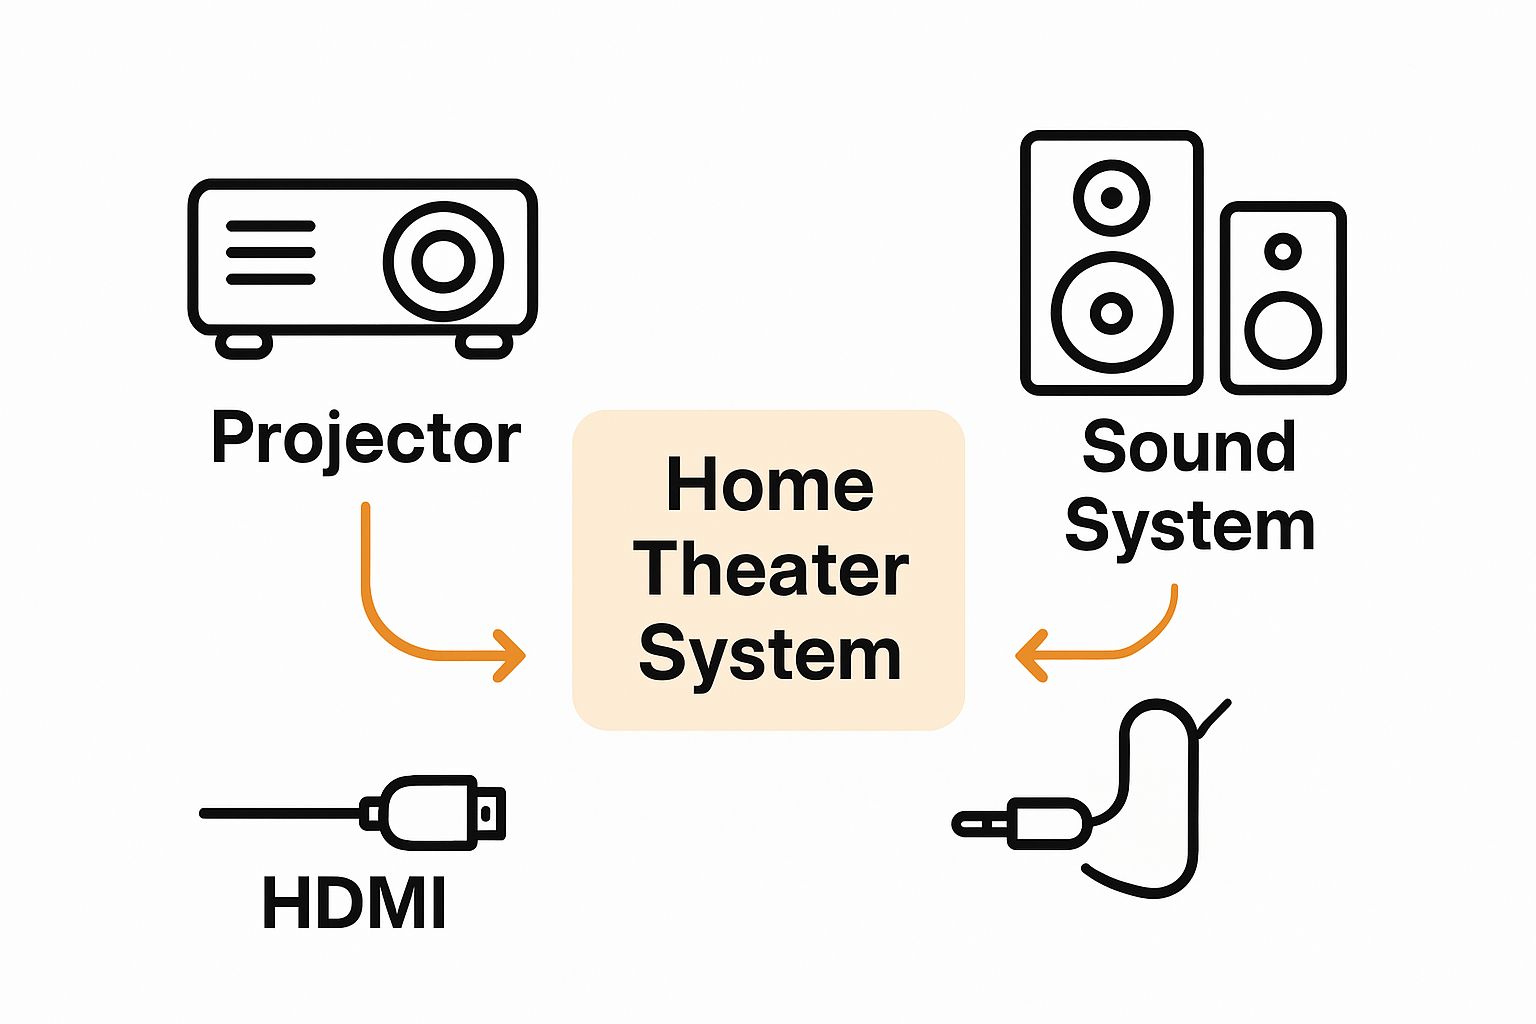 While many projectors include built in speakers, dedicated sound systems dramatically enhance your viewing experience. Surround sound receivers, soundbars, or multi speaker setups can be connected through optical audio, HDMI ARC (Audio Return Channel), or wireless bluetooth connections. Ensure your audio devices synchronize perfectly with your projected image by adjusting audio delay settings in both projector and sound system menus.
Explore our comprehensive guide to optimizing home theater device connections to refine your setup strategy. Modern projectors often include smart features like wireless screen mirroring, built in streaming apps, and network connectivity. Take time to connect your projector to home wifi networks, enabling firmware updates and expanding entertainment options.
Color calibration and picture settings represent the final crucial configuration stage. Most projectors include preset modes like cinema, sports, and gaming, but manual adjustments provide the most refined results. Use test patterns or calibration discs to fine tune brightness, contrast, color temperature, and gamma settings. Pay special attention to color accuracy, ensuring skin tones appear natural and details remain crisp across different lighting conditions.
Verification involves systematic testing across multiple input sources. Connect various devices, switch between inputs, and confirm consistent performance. Check for clean signal transmission, minimal input lag, and synchronized audio. A well configured home theater projector system should deliver a seamless, immersive experience that makes technology disappear behind stunning visual storytelling.
Step 5: Test the Setup and Optimize Image Quality
With your home theater projector system physically installed and connected, the critical phase of testing and optimization begins. This step transforms technical setup into a refined visual experience, revealing the true potential of your carefully planned projection environment. Systematic testing allows you to fine tune every aspect of image quality and performance.
Start by selecting comprehensive test materials that expose different visual challenges. Professional calibration discs provide precise test patterns designed to assess color accuracy, contrast, sharpness, and geometric alignment. High quality 4K movie trailers, nature documentaries, and video game sequences offer real world scenarios to evaluate performance. Pay special attention to skin tones, intricate details in shadowy scenes, and rapid motion transitions which often reveal subtle display limitations.
Color calibration represents a nuanced but crucial optimization process. Modern projectors include built in color management systems allowing granular adjustments to primary and secondary color zones. Use test patterns featuring color bars, grayscale ramps, and skin tone reference charts to systematically adjust color temperature, saturation, and hue. White balance and gamma settings dramatically impact overall image perception, so invest time in careful tweaking.
Learn advanced image optimization techniques for home theater projectors to elevate your visual experience. Consider using professional calibration tools or hiring an audio visual specialist for precise measurements. Many enthusiasts find that minor adjustments can transform acceptable image quality into truly exceptional visual performance.
Geometric correction requires meticulous attention. Keystone adjustment tools help square image edges, but manual screen positioning often provides superior results. Use a laser level to ensure perfect perpendicular alignment between projector lens and screen surface. Check for uniform focus across the entire projected image, making incremental lens adjustments to eliminate soft spots or blurred regions.
Final verification involves extended viewing across multiple content types. Watch a full movie, play a video game, and stream varied video content. Note any persistent image artifacts, color inconsistencies, or performance anomalies. A perfectly optimized home theater projector setup should deliver image quality that makes technology disappear, allowing you to lose yourself completely in the visual experience.
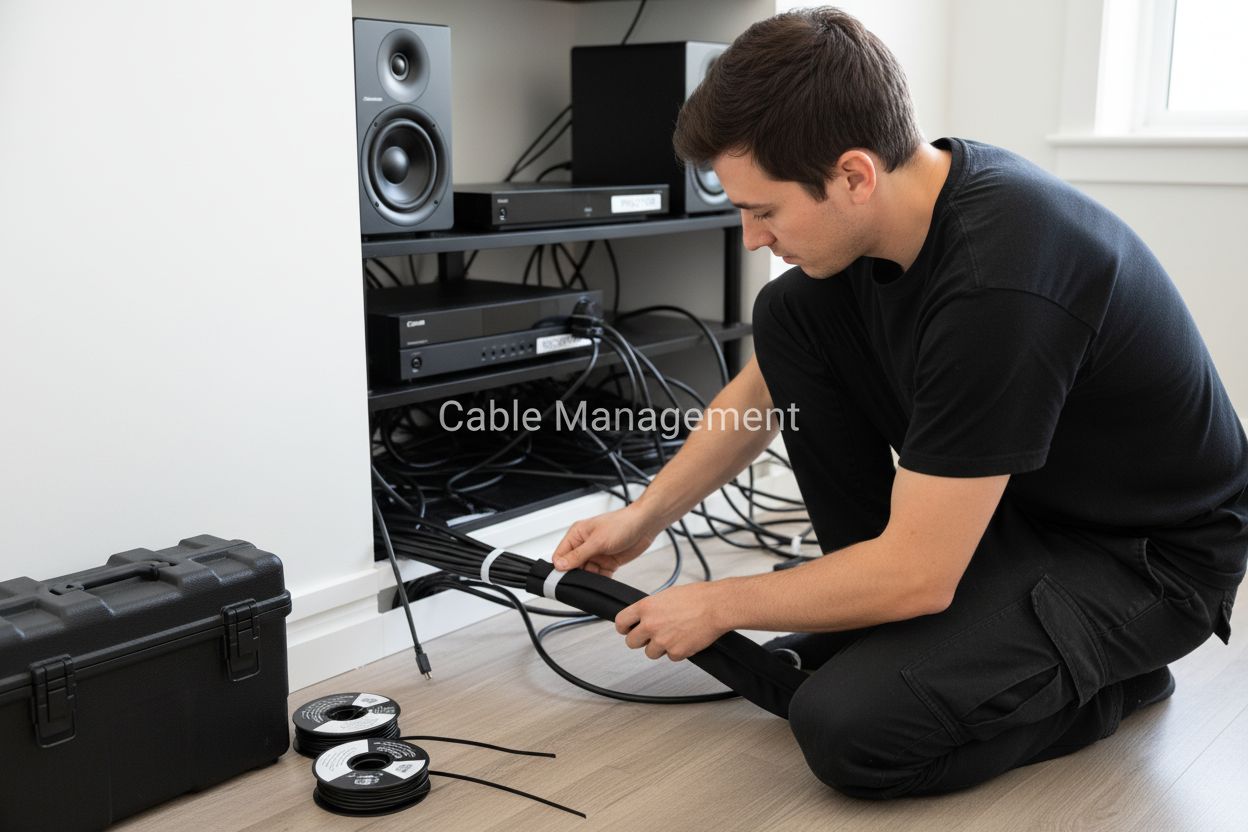
Step 6: Secure Cables and Finalize the Setup
Cable management represents the final transformation of your home theater projector setup from a technical installation to a polished, professional entertainment space. Proper cable routing and securing not only enhances aesthetic appeal but also prevents potential technical issues and safety hazards. This critical step requires patience, strategic planning, and attention to detail.
Begin by organizing your cables before permanent installation. Group similar cables together using velcro cable ties or specialized cable management sleeves. Select solutions that allow flexibility for future equipment adjustments. Separate power cables from signal cables to minimize electromagnetic interference that could degrade audio and video quality. Consider color coding or labeling cables to simplify future maintenance and troubleshooting.
Ceiling and wall routing provides the most elegant cable management solution for home theater projector systems. Utilize cable raceways or conduit systems that blend seamlessly with your room's architectural elements. When drilling holes for cable passage, use a stud finder to avoid electrical wiring and structural components. Maintain sufficient slack in cable runs to prevent tension that might damage connectors or limit future equipment repositioning.
Discover professional cable management techniques for home theater setups to elevate your installation's sophistication. Invest in high quality cable clips, cord covers, and cable management boxes that conceal connection points while maintaining easy access for maintenance. Consider wireless solutions like bluetooth audio transmitters or wifi enabled streaming devices to minimize physical cable requirements.
Electrical safety demands careful consideration during final setup. Use surge protectors or uninterruptible power supplies to protect expensive projection equipment from voltage fluctuations. Ensure all connections are secure and free from potential moisture or heat sources. Create a dedicated circuit for your home theater system if possible, preventing potential power interference from other household electronics.
Final verification involves a comprehensive system walkthrough. Test every cable connection, confirm secure mounting, and assess the overall aesthetic integration of your projector system. A perfectly executed cable management strategy should render technological infrastructure invisible, allowing your stunning visual experience to take center stage. Your meticulous approach transforms a complex technical setup into a seamless, professional home entertainment environment.
Bring Your Ultimate Home Theater to Life with ProjectorDisplay.com
You have read about the challenges of building the perfect home theater projector setup. Maybe you are struggling to find a screen that matches your room size, or you want professional-grade image quality but lack the right equipment. At each step, small mistakes with projection screens or sound systems can prevent you from truly enjoying immersive viewing. Make your next movie night unforgettable by exploring our wide range of Projector Screens, optimally designed to fit any home theater environment.

Why settle for ordinary when your living room can become a cinematic escape right now? Shop at ProjectorDisplay.com for everything you need, from full HD projectors to Sound Systems that complete the experience. Secure your gear, get expert support, and turn your dream setup into reality today. Don't just imagine the ultimate viewing experience—create it with our trusted solutions.
Frequently Asked Questions
What should I consider when assessing my viewing environment for a home theater projector setup?
To create an optimal home theater experience, measure the room dimensions, evaluate wall color and texture, assess light sources, and consider acoustic properties. Light-colored walls with minimal texture reflect images better, while managing light and sound through curtains and soft furnishings can enhance viewing quality.
How do I choose the right projector for my home theater?
Select a projector based on resolution (with 4K Ultra HD providing the best detail), brightness in lumens suitable for your room (2500-3500 lumens for brighter spaces), and contrast ratio for rich visuals. Make sure the projector supports HDMI 2.0 or higher for the best compatibility.
What techniques should I use for proper projector installation?
Ensure accurate installation by using a sturdy ceiling mount, calculating throw distance for proper placement, and maintaining a perpendicular angle to prevent keystoning. Verify alignment and focus using test grids and adjust as necessary for optimal image quality.
How can I optimize image quality once my projector is set up?
Optimize image quality by using calibration discs for adjusting color temperature, contrast, and brightness. Test various content types and fine-tune your settings to ensure accurate color reproduction and a sharp, clear image for all viewing scenarios.