
Messy cables can quickly turn a projector setup from sleek to stressful. With over half of home users reporting frequent issues from tangled or poorly managed wires, organizing your system is not just about looks—it also protects your investment and makes troubleshooting easier. Whether you want a clutter-free living room or a reliable boardroom display, learning the right cable management steps will help keep your tech running safely and smoothly.
Table of Contents
- Step 1: Assess Existing Cable Layout And Needs
- Step 2: Gather Essential Cable Management Tools
- Step 3: Sort And Label All Relevant Cables
- Step 4: Route And Conceal Cables Strategically
- Step 5: Secure, Bundle, And Protect Cables Firmly
- Step 6: Test Setup For Accessibility And Reliability
Quick Summary
| Key Point | Explanation |
|---|---|
| 1. Assess your current cable layout | Review existing connections and routing paths to identify areas of potential improvement and clutter reduction. |
| 2. Gather essential cable management tools | Collect necessary tools like cable ties and adhesive clips to enable efficient organization and protection of cables. |
| 3. Sort and label cables systematically | Organize cables by type and label each clearly to simplify future troubleshooting and maintenance tasks. |
| 4. Route and conceal cables strategically | Plan direct cable paths and conceal them using clips and sleeves to enhance visual appeal and signal integrity. |
| 5. Test setup for signal reliability | Ensure all connections are secure and signal quality is strong by testing each cable and adjusting as needed. |

Step 1: Assess Existing Cable Layout and Needs
Before diving into cable management for your projector setup, you need to understand your current cable infrastructure. This initial assessment will help you map out an efficient and clean wire routing strategy that minimizes visual clutter and potential signal interference.
Start by conducting a comprehensive visual inspection of your existing setup. According to University of the West of England, it is crucial to plan direct cable routes from control points to displays while avoiding unnecessary complexity. Take detailed notes about your current cable connections noting the types of cables you have (HDMI, VGA, power, ethernet) and their current routing paths. Measure the distances between your projector, media source devices, power outlets, and control points.
Pay special attention to potential obstacles or challenges in your current layout. Look for areas where cables are currently tangled, stretched unnaturally, or creating potential tripping hazards. Check the proximity of power sources and consider whether your current setup allows for clean and safe cable management. Some key questions to ask yourself include: Are my cables long enough? Do I have sufficient slack for flexible positioning? Are there potential sources of electromagnetic interference near my current cable routes?
As a pro tip grab a digital camera or smartphone and photograph your existing setup. These visual references will be incredibly helpful when you start planning your cable management strategy. They will provide a clear baseline for comparison and help you track your improvements step by step.
Step 2: Gather Essential Cable Management Tools
Now that you have assessed your current cable setup, it is time to collect the right tools to transform your tangled mess into a streamlined system. Your goal is to select versatile cable management solutions that will help you organize, protect, and optimize your projector installation.
According to Electricove, there are several essential tools you will want to have on hand. Start with a basic kit that includes hook-and-loop cable ties, which allow for easy repositioning and adjustment. Adhesive cable clips will help you secure cables along walls or surfaces without causing damage. Cord labels are crucial for identifying different cables quickly especially when you have multiple devices connected to your projector.
Beyond basic ties and clips, consider investing in some more advanced solutions. Cable sleeves can bundle multiple cables together creating a cleaner look and reducing potential signal interference. Cinestore recommends gaffer tape for temporary cable management in professional settings where you might need quick and secure cable placement. A good pair of wire cutters and scissors will also help you trim cable ties and manage excess cable length precisely.
Pro tip: Before purchasing any cable management tools, measure your cable lengths and count the number of cables you need to organize. This will help you buy the right quantities and avoid multiple trips to the store. Your future self will thank you for being prepared.
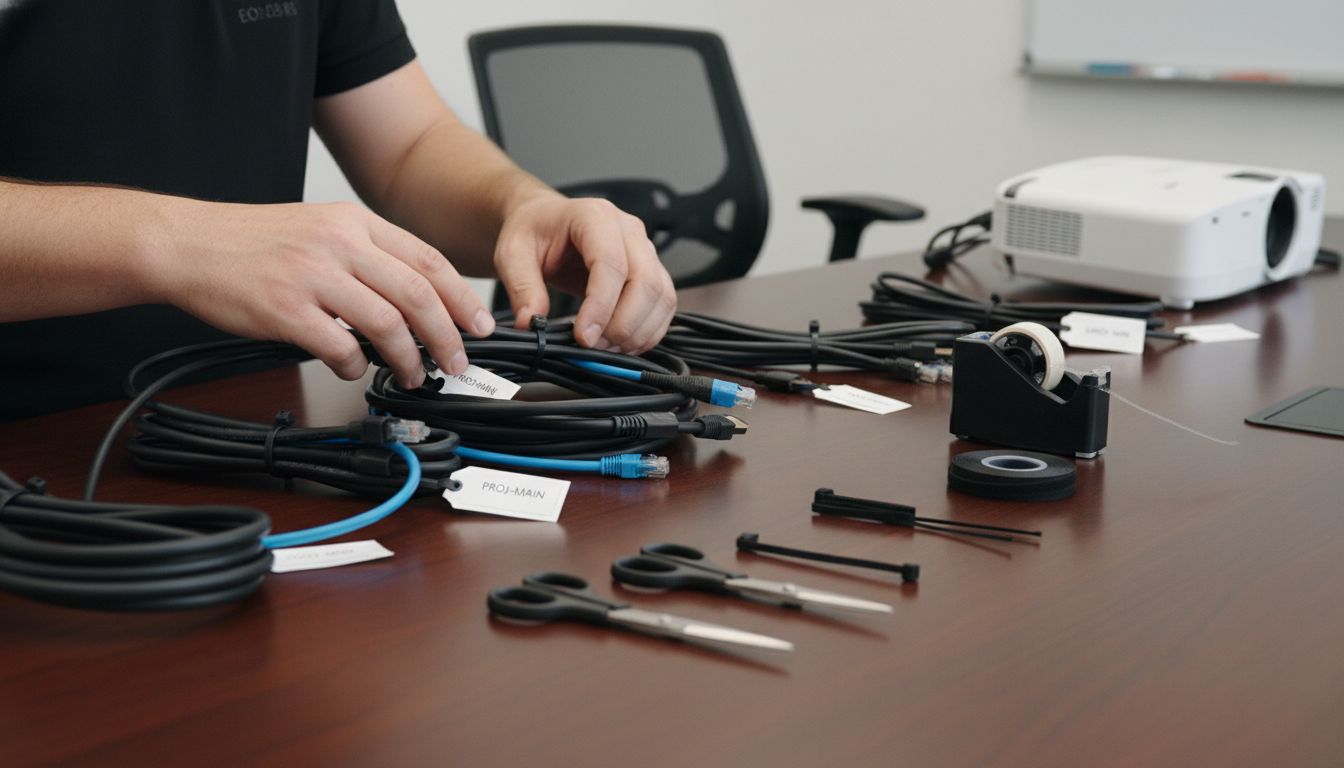
Step 3: Sort and Label All Relevant Cables
With your cable management tools ready, it is time to tackle the crucial task of sorting and labeling your cables. This step transforms a chaotic wire nest into a clear and manageable system that will make future troubleshooting and maintenance significantly easier.
According to Improveworkspace, proper cable organization involves systematic documentation and regular inspections. Begin by unplugging all cables and laying them out on a clean surface. Group cables by device type power cables, video cables, audio cables, and control cables. Use color coded or printed labels to mark each cable with its specific purpose and destination. Electricove recommends using durable cord labels that can withstand handling and remain legible over time.
Create a simple labeling system that anyone can understand. For your projector setup, consider labels like Source 1 HDMI, Control Ethernet, Power Input, Audio Line Out. Make sure your labels are placed near connection points and are easily readable. Take a moment to inspect each cable for signs of wear fraying insulation, loose connections, or visible damage. Replace any cables that show significant wear to prevent potential signal interruptions or electrical hazards.
Pro tip: Take a quick smartphone photo of your labeled cable layout. This visual reference will be invaluable if you need to reconfigure your setup or troubleshoot connection issues in the future.
Step 4: Route and Conceal Cables Strategically
With your cables sorted and labeled, it is time to create a clean and professional cable routing strategy that minimizes visual clutter and potential signal interference. Your goal is to create a seamless cable management solution that looks intentional and organized.
According to University of the West of England, effective cable routing requires careful consideration of room infrastructure and potential containment options. Start by identifying the most direct path between your projector, media sources, and power outlets. Use cable clips and adhesive mounts to secure cables along walls and baseboards. Keep cables as close to walls as possible and maintain consistent spacing. For longer cable runs, consider using cable sleeves or conduits to bundle multiple cables together creating a unified and professional appearance.
Pay special attention to potential stress points and cable bend radius. Avoid sharp angles or tight turns that could potentially damage cable insulation or reduce signal quality. Where possible, create gentle curves and provide enough slack to prevent tension. If you are routing cables near electrical sources, maintain some distance to minimize potential electromagnetic interference. Consider using cable management solutions like cord covers or raceway systems that can be painted to match your wall color for an even more seamless look.
Pro tip: Always leave a small amount of slack in your cable runs. This extra length allows for future adjustments and prevents unnecessary strain on connection points. Your careful routing will not only look great but also protect your valuable audiovisual equipment.
Step 5: Secure, Bundle, and Protect Cables Firmly
With your cables routed strategically, it is time to ensure they remain secure, organized, and protected. This critical step will prevent accidental disconnections, reduce strain on connection points, and maintain a clean professional appearance for your projector setup.
According to Cinestore, professional cable management relies on selecting the right bundling tools. Hook-and-loop cable ties are your best friend for creating flexible and adjustable cable bundles. Start by grouping similar cables together using these reusable ties. Electricove recommends using cable sleeves for longer cable runs to create a unified and professional appearance. These sleeves not only look clean but also provide additional protection against potential environmental damage.
Take extra care when securing cables near connection points. Avoid pulling cables too tightly which can cause stress and potential signal degradation. Create gentle loops with minimal tension and use adhesive cable clips to anchor bundles in place. For temporary installations or live events, gaffer tape can provide quick and secure cable management. Remember to leave small amounts of slack at connection points to prevent unnecessary strain on your projector and peripheral devices.
Pro tip: Consider color coding your cable ties or using different colored cable sleeves to quickly identify cable types and improve your overall cable management system. This small step can save you significant time during future maintenance or reconfiguration.
Step 6: Test Setup for Accessibility and Reliability
With your cables meticulously managed, it is time to verify that your projector setup functions flawlessly. This final testing phase will ensure all connections are secure, signals are strong, and your system operates smoothly across different scenarios.
According to Improveworkspace, systematic testing and regular inspections are fundamental to maintaining a reliable cable system. Begin by powering on your equipment and checking each connection point. Test every cable by playing content from multiple sources such as laptops, streaming devices, and media players. Verify video quality, audio clarity, and signal stability. Look for any intermittent signal drops or visual artifacts that might indicate a loose connection or cable damage.
Carefully examine the physical routing of your cables during testing. Ensure that no cables are accidentally pinched, stretched, or creating potential tripping hazards. Move your connected devices around to confirm that your cable management solution provides enough flexibility. Check the temperature of cables and connection points after extended use to confirm there are no signs of excessive heat or potential electrical issues. Document any observations or potential weak points in your setup for future reference and potential improvements.
Pro tip: Keep a small troubleshooting kit nearby with spare cables, cable ties, and basic tools. This preparation allows you to quickly address any unexpected connection issues during your testing or future use.
Achieve Flawless Cable Management with Quality Projector Solutions
Tangled wires and cluttered cables can ruin any projector setup experience, making it frustrating to troubleshoot or adjust your system. This article highlights common pain points like maintaining slack, preventing interference, and securing cable routes to keep your installation safe and clean. If you want to elevate your space with an organized setup that works seamlessly, the right projector and accessories make all the difference.

Explore a wide selection of high-quality projectors and essential accessories at ProjectorDisplay.com. Whether you need a portable model, a laser projector, or a short-throw solution, our offerings help you build a projection setup that not only performs brilliantly but also simplifies cable management. Start transforming your viewing space today with easy-to-use products and expert support only a click away. Don't wait – visit our store and experience hassle-free cable organization combined with top-notch projection technology.
Frequently Asked Questions
How can I assess my existing cable layout for a projector setup?
To assess your existing cable layout, conduct a comprehensive visual inspection of your current setup. Take detailed notes about your cables, measuring distances between the projector and other devices, and identifying potential obstacles or hazards.
What essential tools do I need for effective cable management in projector setups?
Gather the essential tools such as hook-and-loop cable ties, adhesive cable clips, and cord labels. These tools will help you organize, secure, and identify cables easily during setup and maintenance.
How do I sort and label cables for my projector setup?
Sort all cables by type, such as power, HDMI, and audio cables, and use color-coded or printed labels for easy identification. Ensure your labels are clear and placed near connection points to facilitate future adjustments or troubleshooting.
What are the best practices for routing and concealing cables?
Route cables along the most direct paths between devices, using cable clips and sleeves to secure them neatly. Maintain consistent spacing and avoid sharp bends to minimize strain, encouraging a clean and professional appearance.
How can I test the reliability of my projector setup after cable management?
Test your setup by powering on the equipment and verifying all connections with different content sources. Look for any signal issues or loose connections, and ensure cables are not pinched or creating hazards, documenting any observations for future reference.
What steps can I take to secure and protect my cables?
Use hook-and-loop cable ties to bundle similar cables together, and avoid pulling them too tightly to prevent strain. Leave a small amount of slack at connection points, and consider using cable sleeves to enhance organization and protection against wear.