Building your own projector screen sounds like a project reserved for techies or movie fanatics. Yet the reality is far more accessible. You can create a massive, high quality screen for a fraction of store prices, sometimes spending less than $30 using household materials. Most people assume they need fancy gear or expert knowledge. The real secret is that careful planning and smart material choices matter way more than expensive equipment—anyone can turn their living room into a home theater with the right steps.
Table of Contents
- Step 1: Determine Your Space And Needs
- Step 2: Choose Your Materials And Tools
- Step 3: Design The Projector Screen Layout
- Step 4: Construct The Projector Screen Frame
- Step 5: Install Your Projector Screen
- Step 6: Test And Adjust The Setup
Quick Summary
| Key Point | Explanation |
|---|---|
| 1. Measure your space accurately | Ensure precise measurements of room dimensions and wall space for optimal projector screen placement and viewing experience. |
| 2. Choose appropriate materials | Select screen materials that best fit your budget and desired visual quality, ranging from vinyl to specially designed paints. |
| 3. Design for optimal viewing angles | Position your screen at eye level for comfort, considering height and angle to enhance your overall viewing experience. |
| 4. Construct a sturdy frame | Use durable materials like wood or aluminum and ensure precise measurements for a stable and professional-looking screen. |
| 5. Test and fine-tune your setup | After installation, project test patterns to adjust projector settings, optimizing image quality for various content types and lighting conditions. |
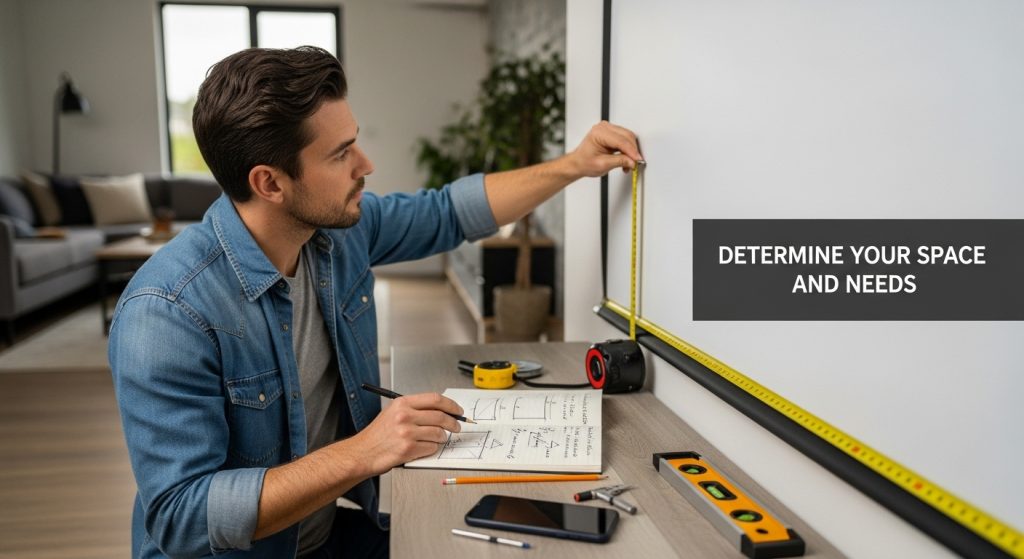
Step 1: Determine Your Space and Needs
Creating a DIY projector screen starts with understanding your specific space and requirements. This crucial first step determines the success of your entire home entertainment or presentation setup. Careful assessment prevents frustrating mistakes and ensures your projection experience meets expectations.
Begin by measuring the room where you plan to install your projector screen. Room dimensions, wall space, and ambient lighting are critical factors that will influence your screen design and projector placement. A small living room requires different considerations compared to a spacious home theater or classroom environment.
Consider the primary purpose of your projection setup. Are you creating a home cinema experience, setting up a business presentation area, or designing an educational display? Each scenario demands unique screen characteristics. For home entertainment, you might prioritize a larger screen with optimal viewing angles. In a business context, you may need a more compact, professional looking screen that can be easily rolled up or mounted discretively.
Evaluate your wall or mounting surface carefully. Smooth, light colored walls work best for basic projections, but dedicated screens offer superior image quality. Flat, unobstructed surfaces without significant texture or shadows are ideal. If your wall has windows, artwork, or irregular surfaces, you might need to plan alternative mounting strategies.
Lighting conditions play a significant role in projection quality. Dark rooms enhance image clarity and contrast, while rooms with significant ambient light require screens with specialized reflective properties. Natural light from windows can dramatically impact your viewing experience, so consider using blackout curtains or selecting screen materials that perform well in varied lighting conditions.
Take time to map out potential projector locations. Measure the throw distance – the space between your projector and the screen surface. Different projector types (standard, short throw, ultra short throw) have varying placement requirements. Projection technology experts recommend calculating your throw ratio to ensure optimal image size and clarity.
By methodically assessing your space and needs, you create a solid foundation for an exceptional DIY projector screen project. Your careful planning now will translate into a stunning visual experience later.
This table summarizes the main steps for building a DIY projector screen, outlining the purpose of each step and the key considerations to keep in mind for a successful project.
| Step | Purpose | Key Considerations |
|---|---|---|
| Determine Space and Needs | Assess room, usage, and mounting options | Room size, wall condition, lighting |
| Choose Materials and Tools | Select screen surface and frame materials | Budget, durability, image quality |
| Design Projector Screen Layout | Plan screen size, aspect ratio, and placement | Viewing angle, eye level, obstructions |
| Construct Projector Screen Frame | Build a sturdy support structure | Material choice, tension, frame stability |
| Install Projector Screen | Mount or set up finished screen properly | Accurate alignment, secure fixing, adjustments |
| Test and Adjust the Setup | Calibrate image and make final corrections | Projector angle, lighting, image focus |
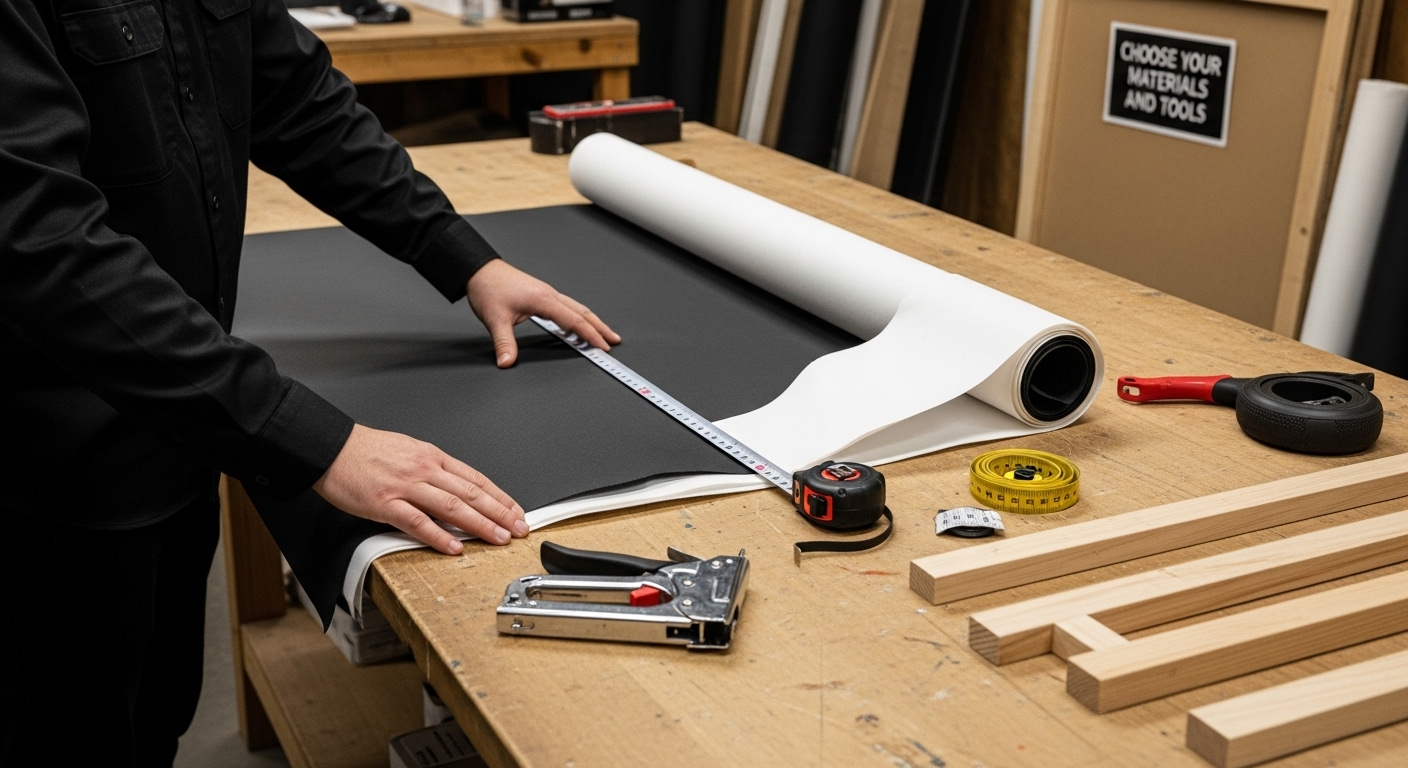
Step 2: Choose Your Materials and Tools
Selecting the right materials and tools is a pivotal moment in your DIY projector screen journey. Your choices will directly impact the screen's performance, durability, and overall visual quality. Understanding the available options empowers you to create a customized solution that perfectly matches your space and budget.
Screen Material Selection requires careful consideration. Professional grade projection surfaces include specialized fabrics like white matte vinyl, tensioned polyester, and acoustically transparent materials. However, budget conscious creators can achieve excellent results with household alternatives. White blackout cloth, specialized projection paint, or even a smooth white wall can serve as effective screen surfaces.
For those seeking a more structured approach, projection screen experts recommend selecting materials with specific light reflection properties. Matte white surfaces provide balanced color reproduction and wide viewing angles. Slight texture can enhance image clarity by minimizing hot spots and improving light distribution across the screen surface.
Your tool collection will depend on your chosen construction method. Basic DIY screens require fundamental tools like a measuring tape, staple gun, scissors, and a straightedge. More advanced designs might necessitate power tools such as a drill, saw, or electric stapler. Precision is key – accurate measurements and clean cuts determine the professional appearance of your final product.
Frame construction offers multiple approaches. Lightweight wooden frames provide sturdy support and can be easily customized to your specific dimensions. PVC pipes offer a budget friendly alternative that is lightweight and simple to assemble. Aluminum frames represent a more premium option, delivering exceptional tension and a sleek modern appearance.
Consider additional materials that enhance screen performance. White matte paint specifically formulated for projection can transform an ordinary wall into a high quality screen surface. Some DIY enthusiasts create custom paint mixtures combining white base paint with subtle reflective elements to optimize image brightness and contrast.
Budget plays a significant role in material selection. While professional grade screens can cost hundreds of dollars, creative DIY approaches allow you to construct a high quality projection surface for a fraction of the price.
Below is a summary table of popular DIY projector screen materials mentioned in the guide, including their type, estimated cost, and key characteristics to help you select the right option.
| Material | Type | Estimated Cost | Key Characteristics |
|---|---|---|---|
| White Matte Vinyl | Professional | Higher | Great image quality, durable, wide viewing angle |
| Blackout Cloth | DIY/Budget | Low | Inexpensive, easy to source, good image quality |
| Tensioned Polyester | Professional | Higher | Acoustically transparent, smooth surface |
| Projection Paint | DIY/Budget | Low-Moderate | Paints directly on wall, seamless look |
| Smooth White Wall | DIY/Budget | Minimal | Easiest setup, depends on wall quality |
| PVC or Aluminum Frame | DIY/Budget | Moderate | Lightweight, customizable, structural support |
| Acoustically Transparent Fabric | Professional | Higher | Allows for hidden speakers, premium option |
Verify your material selections by testing small samples under your specific lighting conditions. Hold potential screen materials against your wall, project a test image, and assess color accuracy, brightness, and overall visual performance. This simple step ensures your chosen materials will deliver the immersive viewing experience you desire.
Step 3: Design the Projector Screen Layout
Designing your projector screen layout transforms a simple DIY project into a professional visual experience. This critical step bridges your initial space assessment with practical implementation, requiring strategic planning and creative problem solving.
Screen positioning determines your entire viewing experience. Consider the optimal height and angle for comfortable viewing. Generally, the screen center should align with seated eye level, creating an immersive and ergonomic setup. If mounting on a wall, aim to center the screen approximately 24 to 36 inches above the floor, which accommodates most seating arrangements.
Visual composition matters significantly. Our projector screen placement guide for Malaysian users recommends utilizing the rule of thirds to create visually appealing screen layouts. Imagine dividing your potential screen area into nine equal sections using two horizontal and two vertical lines. Position key visual elements at the intersection points to create natural visual interest and balance.
Measure your available space meticulously. Precise measurements prevent costly mistakes. Use a laser measure or standard measuring tape to document wall dimensions, accounting for potential obstructions like electrical outlets, furniture, or architectural features. Create a detailed sketch or digital mockup that includes exact measurements, helping you visualize the final screen placement before construction begins.
Consider screen aspect ratio carefully. Standard options include 16:9 (widescreen) and 4:3 (traditional). Your choice depends on primary usage – widescreen works brilliantly for movies and modern presentations, while 4:3 remains ideal for older content and business presentations. Some advanced DIY enthusiasts create adjustable screens that can switch between aspect ratios.
Factor in potential mounting methods. Permanent wall mounting requires different considerations compared to retractable or freestanding designs. Tension systems demand precise frame construction, while portable screens need robust yet lightweight frameworks. Your chosen mounting approach will significantly influence screen layout and structural requirements.
Reflective surface orientation plays a crucial role in image quality. Angle your screen to minimize ambient light interference, potentially using strategic positioning or supplementary light-blocking techniques. A slight tilt can dramatically improve contrast and reduce unwanted reflections.
Verify your design by creating a full scale paper or cardboard template. Tape this mockup to your intended wall, step back, and critically evaluate the layout. This simple technique allows you to assess proportions, confirm measurements, and make necessary adjustments before investing time and resources in final construction.
Step 4: Construct the Projector Screen Frame
Constructing a sturdy projector screen frame transforms your DIY project from concept to reality. This pivotal step requires precision, patience, and strategic planning to create a professional looking screen that performs exceptionally.
Material selection sets the foundation for your frame's durability and performance. Wooden frames offer classic stability, while PVC pipes provide lightweight and cost effective alternatives. Aluminum represents a premium option for those seeking ultimate rigidity. Choose materials that complement your specific space requirements and budget constraints.
Learn more about professional mounting techniques to ensure your frame integrates seamlessly with your room's design. Start by cutting your chosen material to precise measurements determined during your layout planning. Use a miter saw for wooden frames to create clean 45 degree angle cuts that form perfect corners. For PVC frames, specialized PVC cutting tools ensure smooth edges that fit together seamlessly.
Tension is critical in frame construction. Your frame must remain absolutely flat and taut to prevent image distortion. Professional DIY enthusiasts recommend using corner brackets or specialized tension systems that maintain uniform stretching across the screen surface. When working with fabric screens, gradually staple or attach material from the center outwards, maintaining consistent tension to avoid wrinkles or sagging.
Consider additional reinforcement techniques. Double bracing your frame provides extra stability, particularly for larger screen sizes. Internal cross supports distribute tension evenly and prevent warping over time. For wooden frames, wood glue combined with corner brackets creates an incredibly strong structure that will withstand years of use.
Specialized tools can elevate your frame construction.
A pneumatic staple gun offers professional grade attachment for screen materials, while digital angle measurers ensure perfect corner alignments. Invest in quality measuring tools like a carpenter's square to guarantee precise right angles and symmetrical frame dimensions.
Testing your frame's structural integrity is crucial. Once constructed, carefully check for any wobbling, uneven surfaces, or potential weak points. Gently apply pressure at multiple points to simulate tension from screen material. A well constructed frame should feel solid and immovable, providing a reliable foundation for your projection surface.
Finish your frame with appropriate surface treatments. For wooden frames, light sanding and a coat of matte black paint can improve visual aesthetics and reduce potential light reflection. Ensure any paint or treatment is completely dry before attaching your screen material to prevent potential interference with image quality.
Step 5: Install Your Projector Screen
Installing your DIY projector screen marks the exciting culmination of your careful planning and construction. This critical phase transforms your meticulously crafted frame into a functional visual centerpiece that will deliver stunning image quality.
Mounting precision determines your entire viewing experience. Begin by locating wall studs using a reliable stud finder, as these provide the most secure anchor points for permanent installations. If studs are not conveniently positioned, use high quality wall anchors rated for the screen's weight. Explore our comprehensive guide on professional mounting techniques to ensure maximum stability and safety.
Careful alignment is crucial during installation. Use a laser level to create perfectly horizontal and vertical reference lines, ensuring your screen sits exactly where planned. Mark mounting points with light pencil marks, double checking measurements from multiple angles. Professional installers recommend placing the screen center approximately 24 to 36 inches above floor level for optimal viewing comfort.
Attachment methods vary depending on your chosen screen design. Tension rod systems require precise bracket placement and consistent tension adjustment. Fixed frame screens demand exact wall mounting, with each bracket securely fastened to support the screen's weight. For retractable screens, consider motorized options that provide seamless deployment with minimal manual intervention.
Fabric installation requires patience and technique. When stretching screen material, start from the center and work outwards, applying gradual and even tension. Use specialized screen stretching tools to minimize wrinkles and ensure a perfectly smooth surface. Staple or clip the material systematically, checking repeatedly for uniform tension and flatness.
Electrical considerations cannot be overlooked. Position your screen to minimize interference with power outlets, light switches, and existing electrical infrastructure. If using an electric or motorized screen, ensure proper electrical connections and consider professional installation for complex wiring requirements.
Verification is the final critical step. Project a test image across the entire screen surface, examining for any imperfections like wrinkles, uneven tension, or alignment issues. Move around the room, checking viewing angles and confirming the screen performs consistently from different positions. Make minor adjustments as needed to achieve a flawless projection surface.
Consider additional finishing touches that enhance functionality. Black velvet border materials can improve contrast and create a professional cinema like appearance.
 Some DIY enthusiasts add subtle lighting around the screen perimeter to create an immersive home theater atmosphere.
Step 6: Test and Adjust the Setup
Testing and adjusting your DIY projector screen setup represents the critical final stage where technical precision meets visual perfection. This phase transforms your carefully constructed screen from a static object into a dynamic visual performance platform.
Projector positioning determines image quality. Learn advanced calibration techniques to maximize your screen's potential. Start by positioning your projector perpendicular to the screen, ensuring a 90 degree angle for optimal image geometry. Use a laser level to confirm perfect horizontal and vertical alignment, which prevents distortion and keystoning.
Image calibration requires systematic adjustment. Begin by projecting a standard test pattern that includes grid lines, color bars, and grayscale sections. These diagnostic images reveal subtle imperfections in screen tension, projection angle, and color reproduction. Carefully adjust your projector's zoom, focus, and keystone correction to achieve a crisp, rectangular image that fills the entire screen surface without warping.
Lighting conditions dramatically impact projection quality. Conduct tests under various lighting scenarios replicating your typical viewing environment. Dark rooms showcase different performance characteristics compared to spaces with ambient light. Consider installing blackout curtains or strategically placed light blockers to create an ideal viewing atmosphere. Pay close attention to how different light sources interact with your screen material, potentially causing glare or reduced contrast.
Color and brightness settings require meticulous fine tuning. Most projectors offer multiple preset modes like cinema, standard, and dynamic. Experiment with these settings, observing how they affect color temperature, saturation, and overall image warmth. Use a color calibration tool or professional color reference chart to ensure accurate color reproduction across different content types.
Acoustic considerations complement visual performance. If creating a home theater setup, verify that your screen material does not interfere with speaker sound transmission. Acoustically transparent screens allow speakers to be positioned directly behind the projection surface, creating a more immersive audio visual experience.
Verification involves comprehensive testing across multiple content types. Project photographs, movies, presentations, and gaming content to assess performance consistency. Move around the viewing area, checking image quality from different angles. A truly successful DIY projector screen maintains image integrity regardless of viewer position.
Final adjustments might involve subtle screen material re-tensioning or minor projector repositioning. Document your calibration settings for future reference, creating a personalized setup guide that ensures repeatability and convenience in future projection sessions.
Ready to Elevate Your DIY Projector Screen Experience?
Building your own projector screen solves problems like expensive installations and tightly fitted commercial solutions. As highlighted in the article, many people face challenges such as finding the right screen material, getting perfect frame tension, and achieving immersive visuals at home or in the office. You might feel overwhelmed by all the choices or worried your final setup will not meet your expectations.
Before you spend time and money sourcing DIY materials, explore our wide selection of professional-grade Projector Screens that suit every room and budget.

Skip the hassle and transform your space instantly with equipment designed for sharp visuals and easy installation. Visit ProjectorDisplay.com now for proven solutions, smart deals, and fast local shipping. If you want a complete home theater, check out our Sound Systems to complete your visual upgrade. Shop today and create an unforgettable entertainment zone effortlessly.
Frequently Asked Questions
What materials can I use for a DIY projector screen?
You can use a variety of materials for a DIY projector screen, including professional-grade fabrics like white matte vinyl, tensioned polyester, or acoustically transparent materials. For budget-friendly options, consider white blackout cloth, projection paint, or even a smooth, light-colored wall.
How do I determine the best height for my projector screen?
The optimal height for your projector screen should align with seated eye level. Generally, the screen center should be approximately 24 to 36 inches above the floor, which accommodates most seating arrangements for comfortable viewing.
What aspects of lighting should I consider for my projector screen setup?
Lighting conditions greatly affect projection quality. Dark rooms enhance clarity and contrast, while ambient light can wash out images. Consider using blackout curtains or selecting screen materials designed for high performance in bright environments.
How can I ensure my projector screen remains taut and free from wrinkles?
To maintain a smooth projection surface, stretch the screen material carefully during installation. Start from the center and work outward, applying consistent tension. Using corner brackets or specialized tension systems can also help keep the screen taut and flat.