TL;DR:
- Proper image scaling, matching source resolution to native resolution, is crucial for sharp, vibrant images.
- Physical projector setup avoids digital correction drawbacks like pixel loss and artifacts, ensuring better image quality.
- Disabling digital corrections and optimizing source content significantly enhances viewing experience in both home and educational settings.
Most people assume that buying a high-resolution projector automatically means sharp, vibrant images. It doesn't. The real culprit behind blurry, washed-out, or distorted projections is almost always poor image scaling, not the projector itself. Whether you're building a home theater in Petaling Jaya or setting up a multi-media classroom in Penang, understanding how scaling works and how to get it right will transform your viewing experience far more than upgrading to the latest hardware.
Table of Contents
- Understanding projector image scaling
- Digital scaling vs. physical projector setup
- Expert tips for flawless scaling in home theaters and classrooms
- Troubleshooting common scaling problems
- Our take: Why projector image scaling should be a top priority
- Upgrade your projector setup for stunning results
- Frequently asked questions
Key Takeaways
| Point | Details |
|---|---|
| Native resolution is key | Always use input sources that match your projector's native resolution for sharp image quality. |
| Physical placement first | Prioritize positioning your projector correctly to reduce the need for image-damaging digital corrections. |
| Avoid digital keystone | Steer clear of heavy keystone or zoom adjustments as they cause pixel loss and may add input lag. |
| Lens presets help flexibility | Lens memory is ideal for switching between screen sizes without introducing scaling artifacts. |
Understanding projector image scaling
Image scaling is the process a projector uses to match incoming video signal resolution to its own native resolution. Think of it like resizing a photo on your phone. If the original image is smaller than the display area, the projector stretches it to fill the screen. If it's larger, the projector compresses it. Either way, the result is never quite as sharp as feeding the projector content that matches its native resolution exactly.
Native resolution is the actual number of pixels built into the projector's imaging chip. When the input matches this number perfectly, every pixel maps one-to-one and the image is as crisp as the hardware allows. The moment you feed in a different resolution, the projector's processor has to interpolate, meaning it guesses at pixel values to fill or reduce the image. This guessing introduces softness, color shifts, and sometimes visible artifacts.
Here are the most common sources of scaling issues you'll encounter:
- Connecting a 1080p laptop to a 4K projector
- Playing standard definition content on a Full HD projector
- Using a streaming device that outputs at a different resolution than your projector's native spec
- Mixing content from multiple sources (HDMI laptop, USB drive, wireless casting) in a classroom
- Running older game consoles through modern high-resolution projectors
One surprising trap involves pixel shifting projectors. These projectors use a technique where the imaging chip rapidly shifts pixels to simulate a higher resolution. They're popular because they offer near-4K quality at a lower price point. But scaling lower resolutions like 1080p on a DLP projector with a 0.47-inch chip can actually show more softness or distortion than a native 1080p projector displaying the same content. The pixel-shifting process amplifies scaling errors rather than hiding them.
Poor image scaling doesn't always announce itself with obvious blurring. Often it shows up as a subtle softness that makes text harder to read, colors that look slightly off, or fine details in movies that never quite resolve. Most viewers blame the projector. The real problem is almost always the scaling.
Getting scaling right starts with understanding your projector's native resolution and making sure your content source matches it as closely as possible. Everything else builds from there.
Digital scaling vs. physical projector setup
With a basic understanding of scaling, it's vital to compare how the way you set up your projector impacts the final display. There are two broad approaches: digital correction and physical positioning. Most people default to digital fixes because they're convenient. This is almost always the wrong call.
| Feature | Digital correction | Physical positioning |
|---|---|---|
| Pixel loss | Up to 13% or more | None |
| Artifacts introduced | Yes (keystone, zoom) | None |
| Input lag added | Yes | No |
| Image sharpness | Reduced | Maximum |
| Setup complexity | Low (quick fix) | Medium (one-time effort) |
| Long-term quality | Degrades with heavy use | Consistent |
Digital corrections like keystone or zoom lose 13% or more pixels in off-angle setups, introduce visible artifacts, and add measurable input lag. For a home theater or classroom where you're watching movies or playing games, that lag and softness is genuinely noticeable. You can read more about the specific effects in our keystone correction guide and learn how to reduce input lag for smoother display performance.
Keystone correction, specifically, works by digitally warping the image to compensate for an angled projection. The projector is essentially throwing away pixels and recalculating the image geometry. For a PowerPoint slide, this might be acceptable. For a 4K movie or a fast-paced game, it's a real problem.
Here are the steps for achieving perfect physical alignment:
- Measure your screen position first. Mark the exact center of your screen horizontally and vertically before mounting or placing the projector.
- Set the projector height. Most projectors have a vertical offset built in. Align the projector lens with the screen's center or bottom edge according to your model's spec sheet.
- Ensure the projector is perpendicular to the screen. Use a laser level or a simple plumb line to confirm the projector is not angled left or right.
- Adjust throw distance. Use your projector's throw ratio specification to calculate the exact distance needed for your screen size. Don't guess.
- Use optical zoom only. If you need minor size adjustments, use the projector's optical zoom lens rather than digital zoom. Optical zoom doesn't lose pixels.
- Lock the position. Once aligned, secure the mount or mark the projector's feet positions so it doesn't shift over time.
Pro Tip: Always position the projector perpendicular to the screen surface. Even a few degrees of horizontal angle forces you to use keystone correction, which immediately degrades image quality. A one-time physical setup investment pays off every single time you use the projector.
Expert tips for flawless scaling in home theaters and classrooms
Physical setup matters, but what practical steps can ensure you're always getting the sharpest, most vibrant image? Here are the strategies trusted by experts.
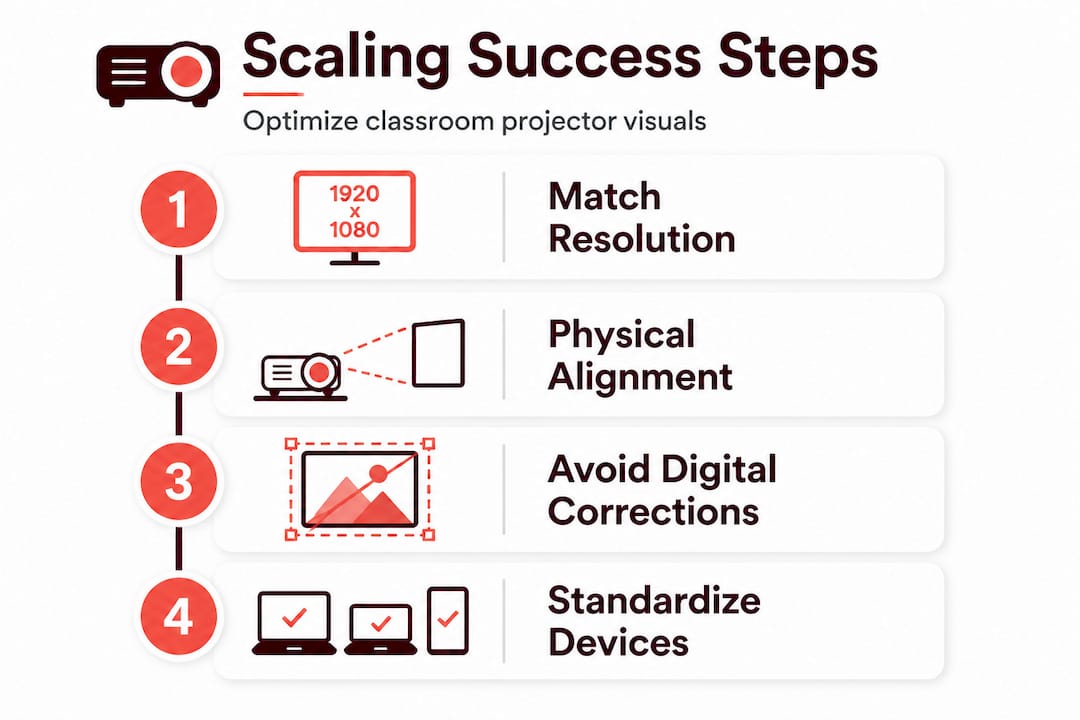
The five most impactful things you can do for optimal scaling:
- Match your source resolution to your projector's native resolution. Feed a 1080p projector 1080p content and a 4K projector 4K content whenever possible.
- Use native content formats. Blu-ray discs, 4K streaming at maximum quality settings, and locally stored high-resolution files all outperform compressed or upscaled alternatives.
- Enable lens memory presets for multi-use rooms. If your projector supports lens memory and advanced lenses, program different presets for different screen sizes or aspect ratios. This lets you switch between a 2.35:1 cinemascope setup and a 16:9 standard setup without touching the physical projector.
- Choose the right HDMI input. On projectors with multiple HDMI ports, one is often rated for 4K HDR while others are limited to 1080p. Always check your manual and use the correct port.
- Avoid digital zoom for content. Reserve digital zoom for setup calibration only, then return to 100% digital zoom for actual viewing.
Lens memory is genuinely underrated. In a home theater, you might watch a standard 16:9 TV show one evening and a widescreen movie the next. Without lens memory, you either accept black bars or use digital zoom (which hurts quality). With lens memory, the projector physically adjusts its lens to fill the screen perfectly for each format. It's the kind of feature that separates a great home theater from a merely good one.
Pro Tip: Always aim for native resolution input. If your streaming service offers a 4K option and your projector is native 4K, use it. The difference between upscaled 1080p and true 4K input on a properly set up projector is immediately visible, especially on a large screen above 100 inches.
For educators in Malaysian classrooms, the challenge is different. You're often dealing with multiple input sources, including student laptops, teacher workstations, USB drives, and wireless casting devices, all potentially outputting different resolutions. Home theater enthusiasts and educators alike should avoid heavy digital scaling and keystone for movies and presentations because the lag and artifact issues compound when you're switching between sources frequently.
The practical solution for classrooms is to standardize your input resolution. Set every connected device to output at the projector's native resolution before the lesson starts. Most operating systems let you lock display output resolution in settings. This five-minute preparation step eliminates the majority of scaling problems for the entire session. Our home theater projector setup guide covers resolution matching in detail, and the same principles apply directly to educational environments.
Troubleshooting common scaling problems
Even with the best setup, issues can arise. Here's how to quickly recognize and resolve the most common scaling mishaps.
| Problem | Symptom | Fix |
|---|---|---|
| Resolution mismatch | Soft or blurry overall image | Match source output to native projector resolution |
| Keystone distortion | Trapezoidal image shape | Physically reposition projector; disable digital keystone |
| Aspect ratio error | Black bars on all four sides | Set source to correct aspect ratio (16:9 or 4:3) |
| Pixel-shifting softness | Fine detail looks mushy | Use native 4K source; avoid 1080p input on 4K chip |
| Input lag | Delayed response in games | Disable digital corrections; use Game Mode if available |
| Overscan | Image edges cut off | Disable overscan in projector menu and source device |
| Color banding | Visible color steps in gradients | Set source to full color range (0-255 RGB) |
Scaling lower resolutions on pixel-shifting 4K projectors produces the kind of softness that's easy to misdiagnose as a lens focus problem. Before you spend time adjusting focus, check whether your source resolution matches the projector's native spec. Nine times out of ten, a resolution mismatch is the real issue.
Follow this troubleshooting workflow when something looks wrong:
- Identify the symptom clearly. Is the image soft overall, or only in certain areas? Is it distorted in shape, or just lacking detail?
- Check your source resolution. Go into your playback device or laptop display settings and confirm the output resolution.
- Check the projector's input info screen. Most projectors show the detected input signal in a menu. Compare it to the native resolution.
- Disable all digital corrections temporarily. Turn off keystone, digital zoom, and any image enhancement modes. See if the base image improves.
- Physically adjust the projector if needed. If disabling corrections reveals a misaligned image, reposition the projector rather than re-enabling the corrections.
- Test with a known-good source. A native resolution test pattern or a Blu-ray disc at the correct resolution confirms whether your setup is working properly.
For educators, the most frequent issue is a laptop connected via HDMI that outputs at a resolution the projector doesn't handle cleanly. The keystone correction guide addresses this specifically. The fix is almost always to change the laptop's display output settings rather than adjust the projector. When digital corrections add 13% or more pixel loss to an already compromised signal, text in presentations becomes genuinely hard to read from the back of the room. Check out our home theater system tips for more detailed guidance on managing multiple input sources effectively.
When should you call in professional help? If you've worked through every step above and the image still looks wrong, the issue may be with the projector's internal scaler or a hardware fault. Professional calibration services can also optimize color, gamma, and white balance in ways that significantly improve perceived sharpness beyond just resolution matching.
Our take: Why projector image scaling should be a top priority
Here's something most buying guides won't tell you. A mid-range projector with a perfectly matched source, proper physical alignment, and zero digital corrections will consistently outperform a top-tier projector running mismatched content through keystone correction. We've seen this play out repeatedly in real setups across home theaters and classrooms.
The obsession with specifications, lumens, and resolution numbers misses the point. A 4K laser projector running 1080p content through digital keystone correction is delivering a worse image than a well-set-up 1080p projector showing native 1080p content. The hardware ceiling only matters when you've already maximized your setup quality.
The hidden cost of digital corrections is cumulative. Every layer of processing, keystone, digital zoom, image enhancement modes, adds latency and introduces artifacts. Stack two or three of these together and you've turned a capable projector into a frustrating experience. This is especially painful for gaming, where the lag becomes physically disruptive, and for classrooms, where text legibility directly affects learning outcomes.
Our honest advice: before you spend money on a projector upgrade, spend an afternoon optimizing your current setup. Match your source resolution, physically align the projector, disable every unnecessary digital correction, and test with high-quality native content. Follow our projector movie night tips as a practical starting point. The improvement will likely surprise you. If after doing all of this you still want more, then you'll know exactly what specification to target in your next purchase because you'll understand what your current hardware is actually capable of.
Scaling is not a secondary concern. It is the foundation. Get it right first.
Upgrade your projector setup for stunning results
Ready to see the difference for yourself? Getting scaling right is only half the equation. The screen you project onto, the cables you use, and the accessories you choose all multiply the gains from a properly scaled image.

At ProjectorDisplay.com, we stock a full range of projectors, from portable and smart models to laser and short-throw units, all suited for home theaters and Malaysian classrooms. You'll also find the right screen for your space, because even a perfectly scaled image loses quality on a poor surface. Browse our top projector deals for current offers, and check our projector installation tips for step-by-step guidance on getting your setup dialed in from day one. Fast shipping across Peninsular Malaysia and WhatsApp support mean you're never setting up alone.
Frequently asked questions
What is projector image scaling and why does it matter?
Projector image scaling adjusts the incoming signal resolution to match the projector's native display, directly affecting sharpness, clarity, and lag. Scaling lower resolutions on pixel-shifting 4K projectors can produce noticeable softness or distortion even on premium hardware.
How can I prevent image loss or artifacts when scaling with a projector?
Physically align your projector with the screen and feed it native resolution content to avoid quality loss. Digital corrections lose 13% or more pixels and introduce artifacts that degrade the image significantly.
Are lens presets useful for classrooms or multi-purpose rooms?
Yes, lens memory presets let you switch between different screen sizes or aspect ratios instantly with no scaling artifacts. Using lens memory presets eliminates the need for heavy digital scaling when your room serves multiple purposes.
Can scaling affect input lag for gaming or fast-paced visuals?
Yes, digital scaling adds measurable input lag that makes gaming feel sluggish and unresponsive. Digital corrections add input lag alongside artifacts, which is why physical alignment and native resolution input are always preferred for gaming setups.
Recommended
- Understanding Optimal Projector Distance for Effective Viewing – Projector Display
- Home theater projector tips for perfect movie nights – Projector Display
- Projector Screen Size Chart: Achieve Ideal Viewing – Projector Display
- Projector installation tips for perfect images in any room – Projector Display
- How To Present 3D Visuals For Impactful Client Engagement
- Sharp P721Q Projector Proyector para grandes espacios 7200 lúmenes ANSI DLP UHD 4K (3840×2160) 3D Blanco – Kipmion Tecnología