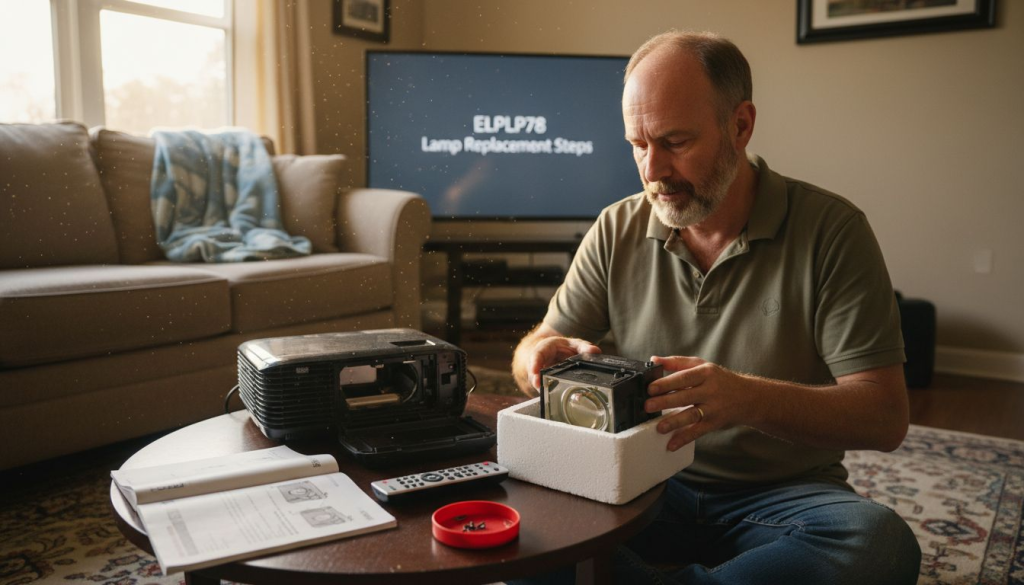
Projectors are a staple in Malaysian classrooms, but when the elplp78 lamp starts to fade, lessons can grind to a halt. Reliable lamp replacements are crucial for IT managers who want to avoid unexpected downtime and keep instructional technology running smoothly. This guide walks you through safe projector preparation and lamp installation so you can maintain peak performance without risking damage to your valuable equipment.
Table of Contents
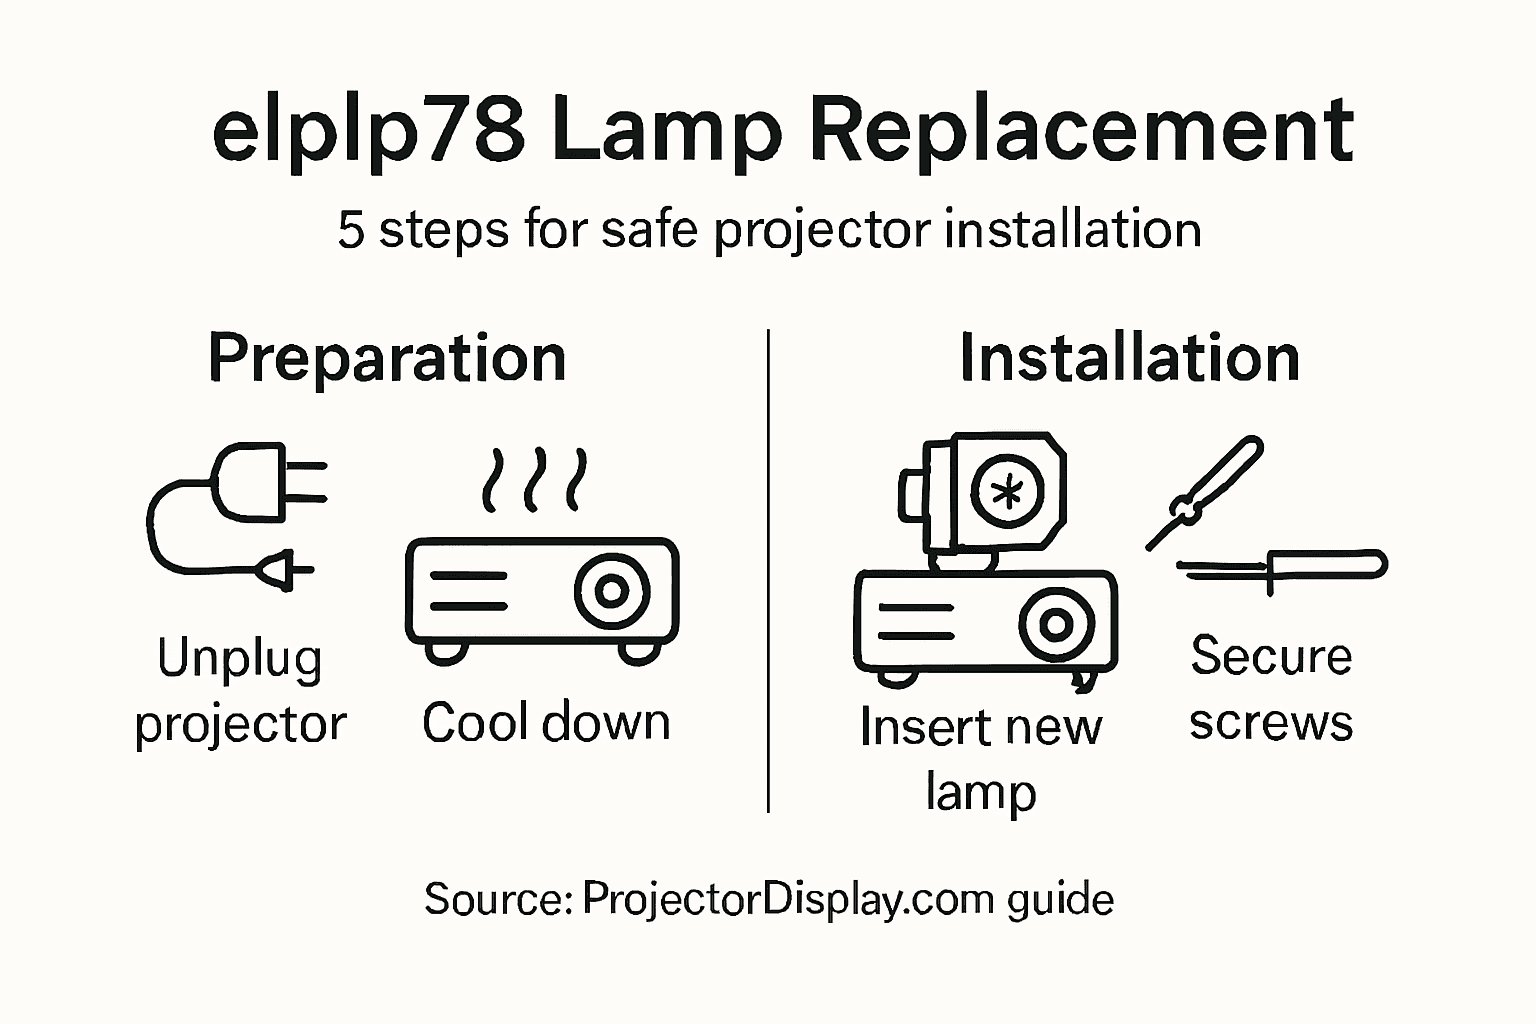
- Step 1: Prepare the Projector for Lamp Replacement
- Step 2: Remove the Old elplp78 Projector Lamp Safely
- Step 3: Install the New elplp78 Replacement Projector Lamp
- Step 4: Secure the Lamp and Reassemble the Projector
- Step 5: Test the Projector for Proper Function
Quick Summary
| Essential Takeaway | Explanation |
|---|---|
| 1. Prepare the Projector Safely | Unplug and cool down your projector for safety before replacing the lamp. |
| 2. Handle the Lamp Carefully | Avoid touching the glass part of the lamp to prevent damage from oils. |
| 3. Ensure Proper Lamp Alignment | Verify that the new lamp is aligned correctly to avoid functionality issues. |
| 4. Reassemble with Precision | Check all connections and secure the lamp access panel to prevent future problems. |
| 5. Test Projector After Replacement | Power on and check for even brightness and normal operation to ensure successful installation. |
Step 1: Prepare the Projector for Lamp Replacement
Replacing a projector lamp requires careful preparation to ensure a safe and successful installation. This step focuses on getting your projector ready for the lamp replacement process, minimizing potential damage and ensuring a smooth transition.
Before beginning, you'll need to complete several critical preparatory tasks. Projector safety protocols recommend powering down and unplugging your device completely. Here are the key steps:
- Unplug the projector from any electrical outlets
- Allow the projector to cool down completely (minimum 30-45 minutes)
- Work in a clean, static-free environment
- Gather necessary tools like screwdrivers and replacement lamp
Ensure you're working on a stable, flat surface with ample lighting. Position yourself comfortably with enough space to maneuver around the projector. Handling electronic components requires patience and precision.
Proper preparation prevents potential damage to sensitive projection equipment.
Each projector model might have slight variations in lamp replacement procedures, so consulting your specific model's manual is recommended. Pay close attention to the exact location of lamp access panels and any specific manufacturer guidelines.
Pro tip: Wear anti-static wrist straps or work on an anti-static mat to prevent accidental electrical discharge that could damage internal components.
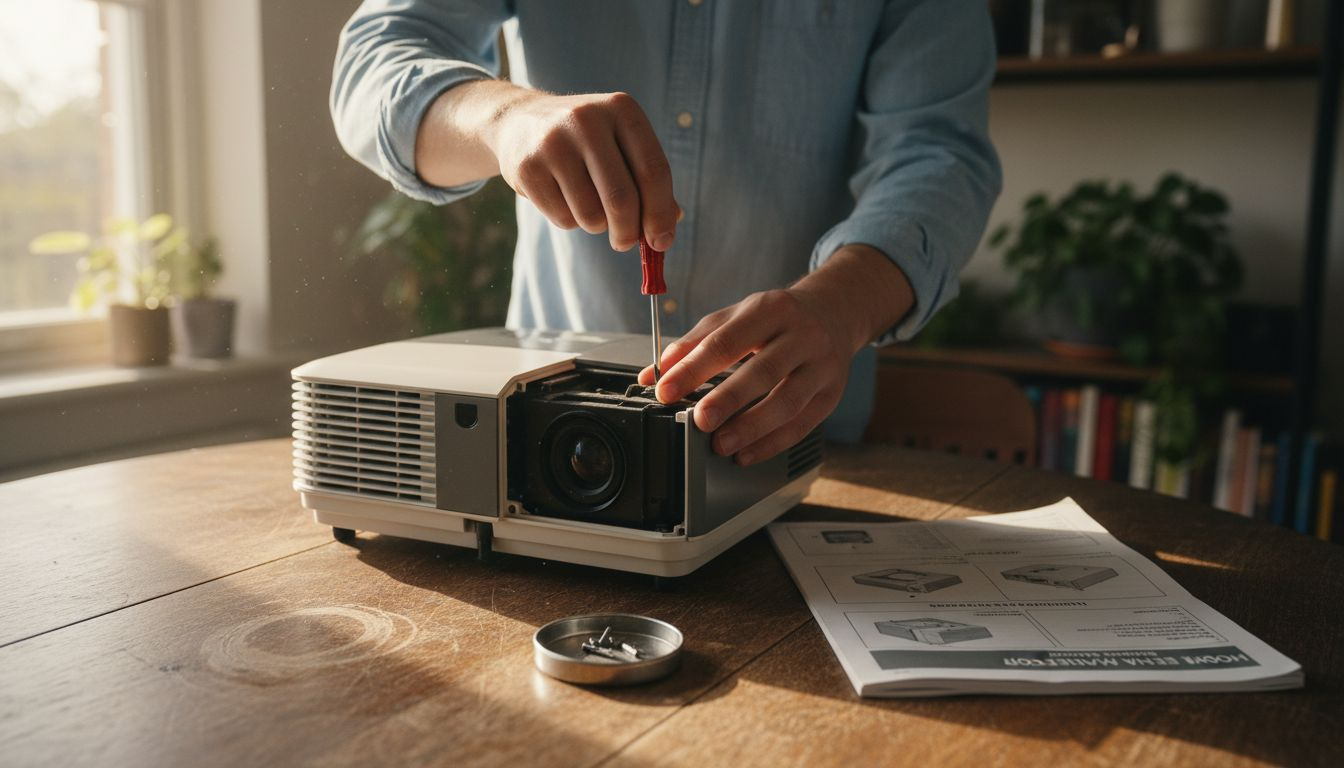
Step 2: Remove the Old elplp78 Projector Lamp Safely
Removing the old projector lamp requires careful attention to detail and strict safety protocols. Your primary goal is to extract the worn lamp without damaging the delicate internal components of your projector.
Safe lamp removal techniques emphasize the importance of methodical disassembly. Before starting, ensure you have the following tools:
- Precision screwdriver set
- Clean, soft lint-free cloth
- Anti-static wrist strap (recommended)
- Work surface with good lighting
- Original projector manual
- Locate the lamp access panel on your specific elplp78 projector model
- Remove the panel screws carefully using the appropriate screwdriver
- Gently slide out the lamp module
Handling electronic components requires patience and precision.
Inspect the lamp module carefully before removal. Look for any signs of damage or excessive wear. Some projectors have specific release mechanisms, so consulting your specific model's manual is crucial. Avoid touching the glass portion of the lamp, as oils from your skin can cause premature failure.
Pro tip: Place removed screws in a magnetic parts tray to prevent losing these small but critical components during the replacement process.
Step 3: Install the New elplp78 Replacement Projector Lamp
Installing your new elplp78 projector lamp is a precise process that requires careful handling and attention to detail. The goal is to ensure your replacement lamp fits perfectly and functions optimally in your projector.
Precise lamp installation techniques emphasize the importance of compatibility and correct positioning. Before beginning, verify that you have the exact elplp78 lamp model matching your projector specifications.
Prepare for installation by following these critical steps:
- Confirm the replacement lamp matches your projector model exactly
- Handle the new lamp by its edges, avoiding direct contact with glass
- Align the lamp module with the projector's mounting brackets
- Check orientation marks on the lamp and projector housing
- Gently slide the new lamp module into the designated compartment
- Ensure the lamp is seated firmly and evenly
- Secure the lamp using the original mounting screws
Precision matters more than speed when installing projection equipment.
Avoid forcing the lamp if it does not slide smoothly. Each projector model has unique mounting requirements, so consulting your specific manual is crucial. Double-check all connections before fully closing the lamp compartment.
Pro tip: Keep the original packaging of the new lamp until you are completely satisfied with the installation, in case you need to return or exchange it.
Step 4: Secure the Lamp and Reassemble the Projector
The final stage of your elplp78 projector lamp replacement involves carefully reassembling the projector to ensure optimal performance and prevent any potential damage. Precise reassembly techniques are critical for maintaining your projector's functionality and longevity.
To complete the installation process, follow these systematic steps:
- Verify the new lamp is correctly positioned
- Check all mounting points and connections
- Align the lamp access panel precisely
- Ensure no loose tools or components remain inside
- Align the lamp access panel with its original mounting points
- Gently press the panel into place, ensuring a snug fit
- Replace and tighten all panel screws in the correct sequence
- Verify the panel is flush and secure
Careful reassembly prevents future operational issues and potential damage.
Inspect the projector thoroughly before fully closing everything. Test connections gently to confirm everything is seated correctly. If you encounter any resistance while reassembling, stop and double-check the alignment.
Here's a summary of common projector lamp replacement challenges and how to avoid them:
| Challenge | Cause | Prevention Tip |
|---|---|---|
| Lamp damage | Handling bulb by glass | Use gloves or hold by lamp edges |
| Losing small parts | Dropping screws or fasteners | Use a magnetic tray for screws |
| Incorrect installation | Poor alignment or model mismatch | Double-check compatibility and fit |
| Static discharge | Lack of grounding during handling | Wear anti-static wrist strap |
| Overheating issues | Poor reassembly or loose panel | Verify panel and connections secure |
Pro tip: Use a small flashlight to inspect the interior and ensure no tools or debris remain inside the projector during final reassembly.
Step 5: Test the Projector for Proper Function
After successfully replacing your elplp78 projector lamp, thorough testing is essential to ensure everything functions correctly. Systematic projector testing procedures help verify the lamp's performance and overall projector health.
Prepare to conduct a comprehensive functionality test by following these key steps:
- Power on the projector carefully
- Check for even image brightness
- Listen for normal fan and cooling sounds
- Verify consistent color reproduction
- Monitor projector temperature during operation
- Connect the power cable and turn on the projector
- Allow the projector to fully boot and stabilize
- Display a test image or calibration screen
- Check lamp indicator lights
Proper testing prevents potential long-term performance issues.
Watch for warning signs such as flickering, unusual noises, or inconsistent brightness. If you notice anything abnormal, power down immediately and recheck the lamp installation. Some projectors have built-in diagnostic modes that can help identify potential problems.
This table compares projector performance indicators before and after lamp replacement:
| Indicator | Typical Before Replacement | Desired After Replacement |
|---|---|---|
| Image brightness | Dim, uneven | Bright, consistent |
| Fan noise | Normal or increased | Quiet, steady |
| Color accuracy | Faded or distorted | Vivid, accurate |
| Indicator lights | Warning or amber | Normal/green |
Pro tip: Keep your projector's manual nearby during testing in case you need to reference specific troubleshooting guidelines for your exact model.
Upgrade Your Projection Experience with Reliable Equipment and Accessories
Replacing your elplp78 projector lamp can be a delicate and precise task. The article highlights common challenges such as safely handling electronic components and ensuring correct installation to avoid damaging the lamp or your projector. To fully enjoy bright and consistent images without the worry of installation issues, having access to quality parts and supporting accessories is essential.
At ProjectorDisplay.com, we understand the frustration of projector malfunctions and replacement difficulties. That is why we offer a wide selection of projectors, including models compatible with replacement lamps like elplp78. Complement your setup with our premium Projector Screen Archives for optimal viewing and protect your investment with a durable Projector Bag / Case Archives. Our products provide the quality, compatibility, and support you need to avoid common pitfalls during installation and ensure lasting performance.

Don't let complicated lamp replacements disrupt your viewing experience. Visit ProjectorDisplay.com to explore our complete range of projectors and accessories. Take action now to secure reliable equipment that enhances your home theater, classroom, or business presentations with crystal-clear images every time.
Frequently Asked Questions
How do I prepare my projector for elplp78 lamp replacement?
To prepare your projector for elplp78 lamp replacement, unplug the device and allow it to cool down for at least 30-45 minutes. Work in a clean, static-free area and gather necessary tools like screwdrivers and the new replacement lamp to ensure a smooth process.
What tools do I need for installing a new elplp78 projector lamp?
You will need a precision screwdriver set, a clean, soft lint-free cloth, and an anti-static wrist strap for your elplp78 installation. Gather these tools before starting to minimize interruptions during the lamp replacement process.
How can I safely remove the old elplp78 projector lamp?
To safely remove the old elplp78 lamp, locate the lamp access panel, unscrew it carefully, and gently slide out the lamp module. Avoid touching the glass portion of the lamp to prevent damage and ensure a smooth extraction.
What steps should I follow to install the new elplp78 lamp?
To install the new elplp78 lamp, align it with the projector's mounting brackets without touching the glass. Slide it gently into place, secure it with the original screws, and double-check that it fits snugly before closing the lamp access panel.
How can I test my projector after lamp replacement?
After replacing the elplp78 lamp, power on the projector to test for proper function. Check for even brightness, listen for normal fan sounds, and verify consistent color reproduction during operation to ensure everything is working correctly.
What are common issues to watch out for during lamp replacement?
Common issues during lamp replacement include damaging the lamp by touching the glass, losing screws, or incorrect installation. To avoid these problems, handle the lamp by the edges, use a magnetic parts tray for screws, and consult your projector manual for specific installation guidelines.
Recommended
- How to Replace Your elplp85 Replacement Projector Lamp Easily – Projector Display
- How to Replace Elplp88 Replacement Projector Lamp Easily – Projector Display
- Replace Your Projector Bulb With ELPLP96 Lamp Easily – Projector Display
- Replace Your elplp95 Replacement Projector Lamp Easily – Projector Display