Setting up a home theater seems like an exciting project and plenty of people dream about creating that private cinematic escape. But most homeowners do not realize that something as simple as room size can make or break the whole experience. You might expect that expensive equipment is the key to great results, yet it is actually the planning and careful assessment of your space that determines whether your movie nights become legendary or fall flat.
Table of Contents
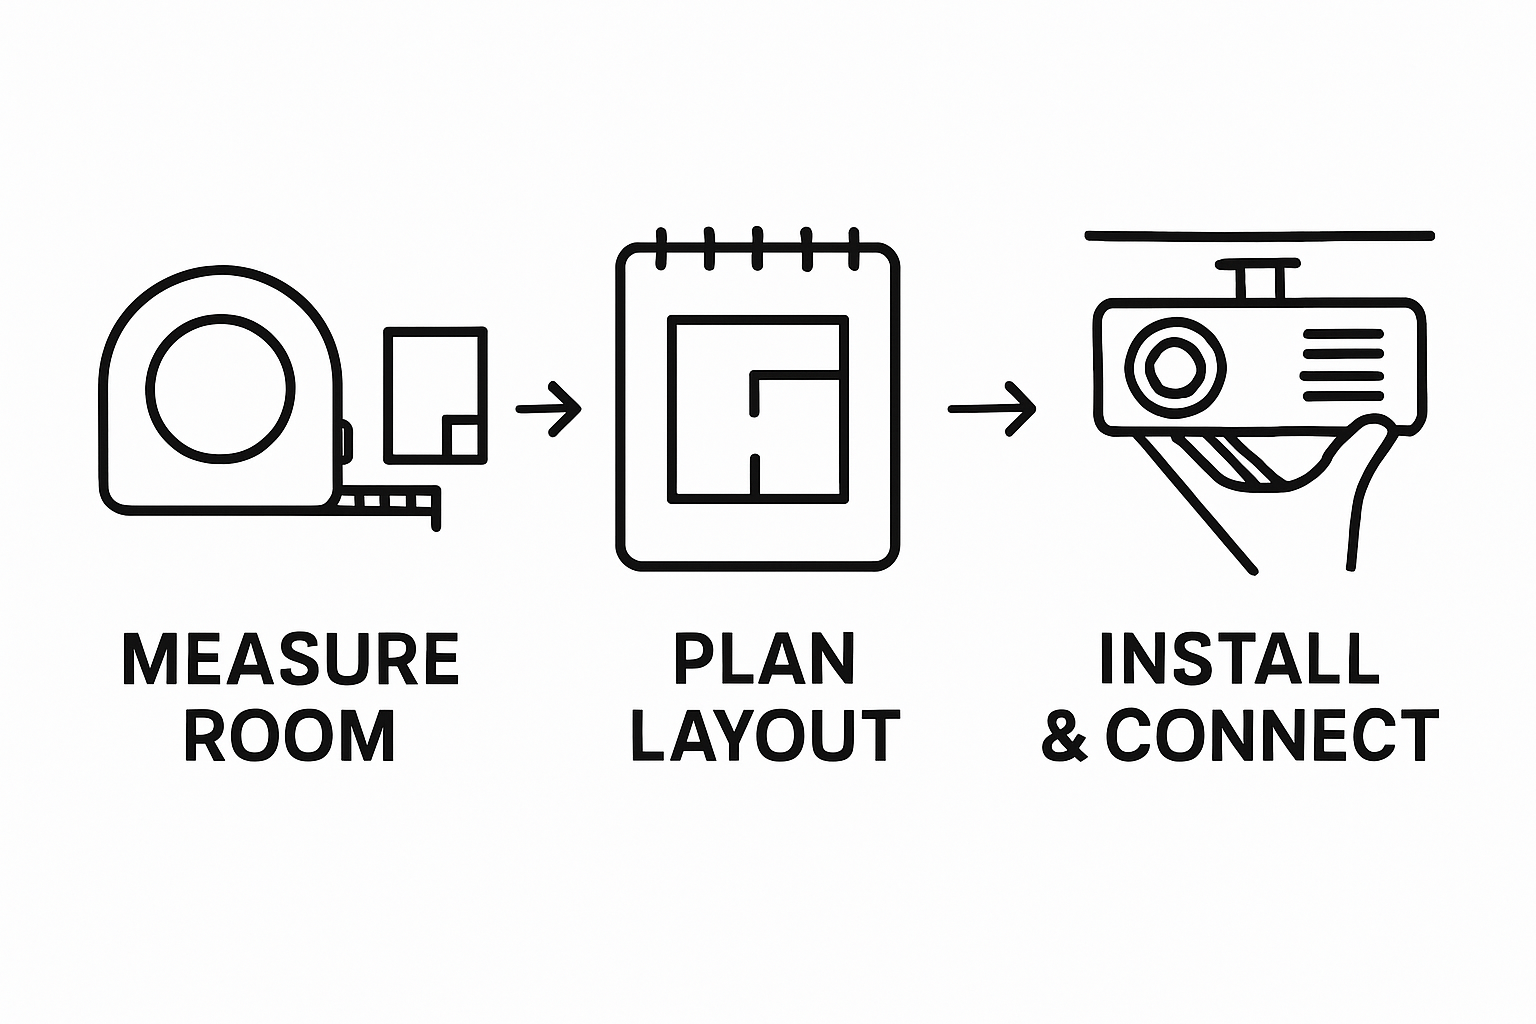
- Step 1: Assess Your Space and Requirements
- Step 2: Select Your Equipment and Components
- Step 3: Design Your Layout and Aesthetics
- Step 4: Install Equipment and Set Up Connections
- Step 5: Calibrate and Tune Your Home Theater System
- Step 6: Test and Enjoy Your Home Theater Experience
Quick Summary
| Key Point | Explanation |
|---|---|
| 1. Assess your room for optimal setup | Measure dimensions and consider layout, lighting, and acoustics to determine ideal equipment placement and overall design. |
| 2. Choose quality, compatible equipment | Select projectors and sound systems that suit your space and viewing purpose, ensuring they work seamlessly together for best performance. |
| 3. Focus on optimal layout and aesthetics | Create a comfortable seating arrangement around a focal point, and use dark colors and ambient lighting to enhance the viewing experience. |
| 4. Properly install and connect devices | Ensure precise mounting and reliable cable connections to enhance system performance and longevity of your home theater setup. |
| 5. Calibrate for visual and audio perfection | Fine-tune projector and audio settings for optimal quality and ensure proper synchronization to create an immersive viewing environment. |
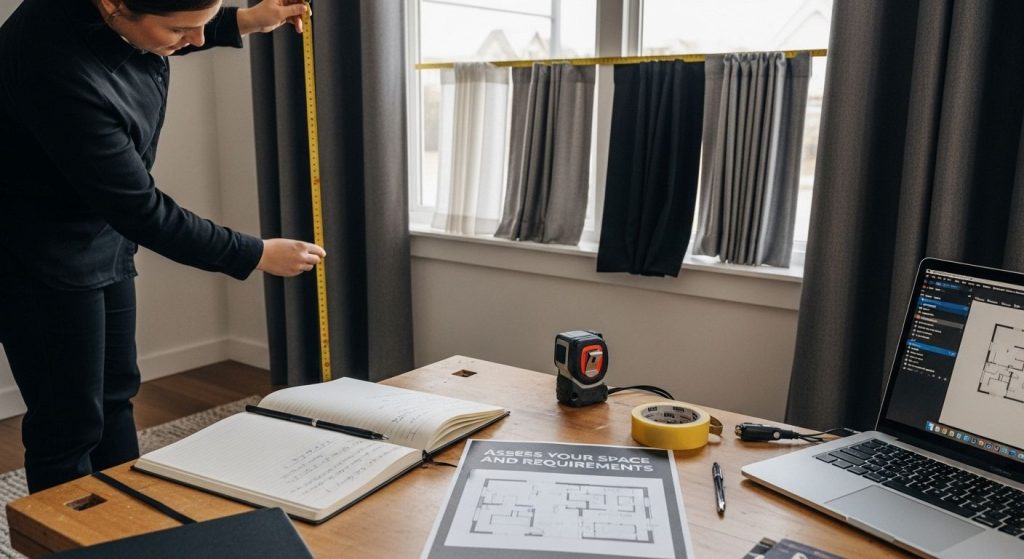
Step 1: Assess Your Space and Requirements
Building an exceptional home theater starts with understanding your specific environment and needs. This crucial first step determines the foundation of your entire audio visual experience. Before purchasing any equipment, you must carefully evaluate your available space, considering room dimensions, layout, lighting conditions, and potential acoustic challenges.
Begin by measuring your room meticulously. Room dimensions are critical for determining projector throw distance, screen size, and speaker placement. Take precise measurements of length, width, and ceiling height. Pay special attention to potential obstructions like windows, doors, and architectural features that might impact your setup. A room with minimal natural light and rectangular shape provides the most optimal home theater configuration.
Consider your primary viewing purposes when assessing requirements. Are you creating a dedicated home cinema space for movie marathons, a multipurpose entertainment area, or a gaming sanctuary? Each purpose influences equipment selection differently. For instance, a dedicated home theater might prioritize high end audio systems and larger projection screens, while a multipurpose room requires more flexible, compact solutions.
Lighting control represents another essential consideration. Dark or easily darkened spaces enhance projected image quality significantly. Evaluate your room's natural light sources and plan accordingly. Rooms with fewer windows or options for light blocking curtains provide superior viewing experiences. If complete darkness isn't possible, consider ambient light rejecting projection screens that maintain image clarity even in partially lit environments.
Learn more about optimizing your home theater space by understanding how room characteristics impact your audio visual performance. Thoughtful preparation ensures you create a personalized entertainment sanctuary that meets your specific needs and expectations.
Step 2: Select Your Equipment and Components
Choosing the right equipment transforms your home theater from a simple room to an immersive entertainment sanctuary. This critical step requires careful consideration of various components that work together to create a seamless audio visual experience. Your equipment selections will define the quality and performance of your home theater setup.
Start with the cornerstone of any home theater: the projection system. Projectors come in multiple technologies including LCD, DLP, and laser, each offering unique advantages. Consider factors like brightness (measured in lumens), resolution, contrast ratio, and throw distance relative to your room measurements. For most home theaters, a full HD or 4K projector with at least 2500 lumens provides excellent image quality. Look for models with multiple HDMI inputs and smart connectivity features that enhance flexibility.
Sound systems represent another crucial component of your home theater. While some projectors include built in speakers, dedicated audio systems dramatically improve the viewing experience. Choose between soundbars, surround sound systems, or advanced home theater receiver setups. Evaluate speaker configurations like 2.1, 5.1, or 7.1 channel systems based on your room size and acoustic characteristics. Wireless speakers offer installation flexibility, while wired systems typically provide more consistent audio performance.
Supporting equipment like media players, streaming devices, and sound processors complete your setup. Consider devices that support 4K content, have multiple input options, and integrate smoothly with your existing technology ecosystem. Compatibility between components ensures smooth performance and reduces technical frustrations.
Below is a comparison table summarizing different projector and sound system options, helping you understand which technologies and configurations best fit your specific home theater needs.
| Component | Options/Technologies | Key Features/Specs | Best For |
|---|---|---|---|
| Projector | LCD, DLP, Laser | Full HD/4K, ≥2500 lumens, HDMI inputs | High image quality, flexible room setups |
| Sound System | Soundbar, 2.1/5.1/7.1 | Wireless/wired, surround/receiver setups | Compact setups, immersive surround sound |
| Media Player | Streaming, Blu-ray, Console | 4K support, network, multiple inputs | Multi-format playback, gaming, flexible use |
| Acoustic Enhancements | Panels, Curtains, Carpets | Sound absorption, echo control | Improving room acoustics, reducing reflections |
| Lighting Control | Blackout curtains, LED | Dimmable, ambient, smart control | Enhancing viewing comfort, reducing glare |
Explore professional mounting solutions for your home theater equipment to maximize space efficiency and aesthetic appeal. Remember that equipment selection is not just about individual component quality, but how seamlessly they work together to create an immersive entertainment experience.
Step 3: Design Your Layout and Aesthetics
Transforming your home theater from a mere technical setup to an immersive entertainment sanctuary requires thoughtful layout and aesthetic design. This step bridges the gap between functional equipment placement and creating a visually stunning, comfortable viewing environment that reflects your personal style and enhances your audiovisual experience.
Begin by establishing a clear focal point centered around your projection screen or display. The seating arrangement is crucial in determining viewer comfort and spatial dynamics. Consider the classic theater approach of tiered or stadium style seating, which ensures unobstructed views for every audience member. For smaller spaces, strategically positioned recliners or modular seating can create a similar effect. Measure precise distances between seats and screen to optimize viewing angles and prevent eye strain. Experts recommend sitting at a distance approximately 1.5 to 2.5 times the screen width for the most immersive experience.
Acoustic design plays a pivotal role in creating a professional home theater atmosphere. Wall treatments like acoustic panels, sound absorbing fabrics, and strategic furniture placement can dramatically improve sound quality. Dark, non reflective colors absorb light and minimize screen glare, while deep colors like navy, charcoal, or burgundy create a cinematic ambiance. Consider incorporating sound dampening elements such as thick curtains, carpets, or specialized acoustic wall coverings that enhance audio performance while adding visual depth to your space.
Lighting design represents the final aesthetic touch that elevates your home theater from functional to extraordinary. Implement layered lighting solutions including dimmable overhead lights, LED strip lighting behind screens or along baseboards, and subtle ambient lighting that can be easily controlled. Motorized blackout curtains or smart lighting systems allow you to create the perfect viewing environment with minimal effort. Soft, indirect lighting prevents eye strain during movie nights while maintaining the immersive theater experience.
Discover professional mounting techniques for optimizing your home theater layout that maximize both aesthetic appeal and functional performance. Remember, a well designed home theater is more than technical equipment it is a personalized entertainment sanctuary that reflects your unique style and passion for immersive audiovisual experiences.
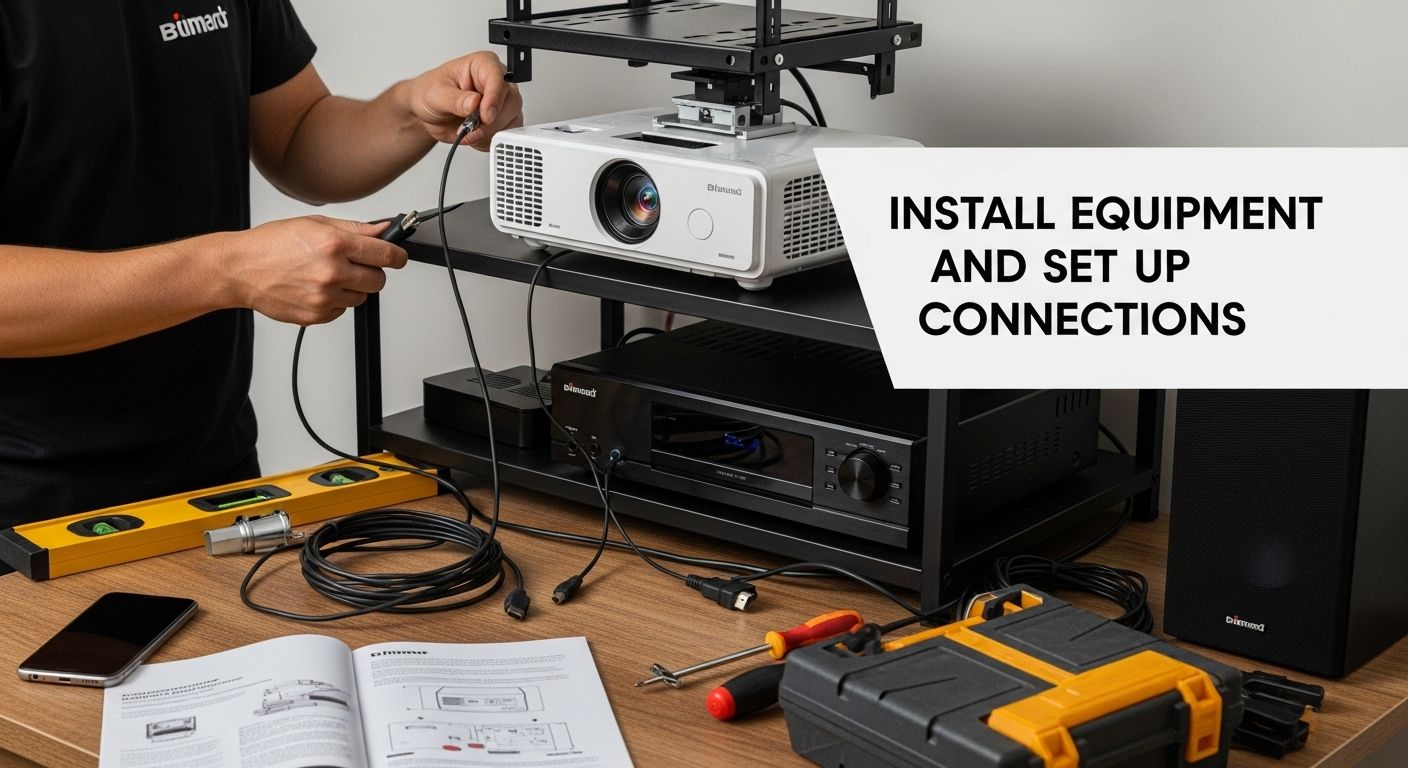
Step 4: Install Equipment and Set Up Connections
Installing your home theater equipment requires precision, patience, and a systematic approach. This critical step transforms your carefully selected components into a functional, integrated entertainment system. Proper installation determines the performance and longevity of your entire home theater setup.
Begin with projector mounting, which forms the centerpiece of your audiovisual experience. Carefully measure and mark mounting locations, ensuring the projector is perfectly aligned with your screen or projection surface. Use a sturdy mount that supports your projector's weight and allows precise angle adjustments. Level and distance are crucial for optimal image quality. Consider using a laser level to guarantee perfect horizontal and vertical alignment. Professional installation might seem daunting, but methodical preparation minimizes potential errors.
Connection management represents the nervous system of your home theater. Start by organizing your cable infrastructure before making any connections. Group cables by type and function using cable management solutions like Velcro ties or cable sleeves. HDMI cables should connect your primary components like projector, media players, and sound systems. Ensure you're using high speed HDMI cables capable of supporting 4K resolution and high bandwidth signals. Utilize surge protectors or dedicated power conditioning units to protect your expensive equipment from electrical fluctuations.
Audio system integration requires careful speaker placement and precise calibration. Position speakers according to standard surround sound configurations, maintaining equal distances from the primary viewing position. Most modern AV receivers include automatic calibration systems that use included microphones to optimize sound output for your specific room. Take time to run these calibration routines, as they significantly enhance your audio experience by compensating for room acoustics and speaker characteristics.
Learn advanced projector mounting techniques for perfect home theater setup to ensure professional results. Remember that patience during installation pays dividends in audiovisual performance and long term equipment reliability. Test each connection systematically, verifying signal quality and synchronization before finalizing your setup.
This troubleshooting table provides quick solutions for common home theater setup issues, helping you resolve problems efficiently during system installation and testing.
| Problem | Possible Cause | Solution |
|---|---|---|
| Poor image clarity/brightness | Incorrect projector settings | Adjust projector focus, brightness, and contrast |
| Distorted or weak sound | Incorrect speaker placement | Reposition speakers, rerun receiver calibration |
| Audio and video out of sync | Signal delay | Adjust AV receivers audio delay setting |
| Connectivity/handshake issues | Faulty/unsupported HDMI cables | Check cables, use high-speed HDMI, update firmware |
| Excessive room echo/noise | Bare walls or floors | Add acoustic panels, curtains, or carpets |
| Washed out screen image | Excess ambient lighting | Use blackout curtains or darker wall colors |
Step 5: Calibrate and Tune Your Home Theater System
Calibration transforms your home theater from a collection of components into a harmonized audiovisual experience. This nuanced process fine tunes every element to deliver optimal performance, ensuring that colors appear accurate, sound resonates perfectly, and visual details emerge with stunning clarity. Precision calibration separates amateur setups from professional grade home theaters.
Start with visual calibration by adjusting your projector's settings. Use professional calibration discs or built in test patterns to optimize brightness, contrast, color balance, and sharpness. Proper color temperature and gamma settings are critical for reproducing images exactly as content creators intended. Most modern projectors include preset modes like cinema, sports, or standard, but manual adjustments provide the most refined results. Consider using a colorimeter or professional calibration tool for the most accurate color reproduction, though careful manual adjustment can also yield excellent results.
Audio calibration requires equally meticulous attention. Modern AV receivers include automated room correction systems using included microphones that measure acoustic characteristics and automatically adjust speaker levels and distances. Place the calibration microphone at your primary viewing position and follow the receiver's on screen instructions. These systems compensate for room acoustics, speaker placement variations, and potential sound reflections. Manual fine tuning might still be necessary, especially in rooms with unique architectural features or complex acoustic environments.
Sound and image synchronization represents the final calibration frontier. Many AV receivers and projectors include audio delay settings to eliminate lip sync issues. Test this by playing content with clear dialogue and adjusting delay incrementally until speech matches on screen mouth movements perfectly. Pay attention to subtle audio details like surround sound positioning and center channel clarity. These refinements transform your home theater from a basic entertainment space into an immersive audiovisual sanctuary.
Discover expert techniques for calibrating your projector to unlock its full potential. Remember that calibration is an iterative process requiring patience and periodic readjustment. Your home theater will continue to improve as you learn its nuances and fine tune its performance.
Step 6: Test and Enjoy Your Home Theater Experience
Reaching the final stage of your home theater journey transforms all your meticulous planning and hard work into pure entertainment bliss. This step is about validation, refinement, and ultimately experiencing the immersive world you've carefully constructed. Testing isn't just a technical checklist it's an opportunity to fine tune and truly appreciate your audiovisual sanctuary.
Begin with comprehensive system testing across multiple content types. Stream 4K movies, play video games, watch live sports, and listen to music to evaluate your system's performance comprehensively. Pay attention to image clarity, color reproduction, sound depth, and overall immersion. Use high quality test content that showcases your system's capabilities. Blu ray discs with Dolby Atmos soundtracks or HDR content provide excellent benchmarks for assessing your home theater's full potential. Be prepared to make minor adjustments to speaker positioning, projector settings, or audio levels based on these initial tests.
Create a systematic approach to troubleshooting any unexpected performance issues. Check cable connections, verify HDMI handshake compatibility, and ensure all devices communicate smoothly. Some problems might require firmware updates for your projector, sound system, or media players. Modern smart devices often include automatic update features that can resolve compatibility challenges. If persistent issues arise, don't hesitate to consult professional installation services or manufacturer support channels.
Consider developing a personalized viewing ritual that maximizes your home theater experience. Dim lights, prepare comfortable seating, and eliminate potential distractions. Experiment with different viewing modes and sound profiles to discover your preferred settings. Some enthusiasts create themed movie nights or gaming sessions that showcase their system's capabilities. Invite friends and family to share in your audiovisual masterpiece, turning your home theater into a social entertainment hub.
Explore expert tips for maximizing your home theater projector performance and unlock the full potential of your investment. Remember that a home theater is a living system it evolves with your preferences, technological advancements, and personal experiences. Enjoy the journey of continuous refinement and immersive entertainment.
Bring Your Home Theater Vision to Life with ProjectorDisplay.com
Is your dream home theater held back by uncertainty in choosing the right projection equipment, achieving vivid images, or creating a cinematic environment? The article highlighted how crucial it is to select the perfect projector, screen, and accessories to match your unique space and audio-visual goals. With so many technical decisions—like room measurement, screen material, brightness needs, and system compatibility—the process can quickly become overwhelming and costly if you make the wrong choice. At ProjectorDisplay.com, we help you move beyond frustration and guesswork by offering quality, full HD projectors, premium projector screens, and the accessories you need. Our curated selections are designed specifically for Malaysian home theaters, ensuring you never have to compromise on image clarity, screen size, or enjoyment.

Stop limiting your home entertainment experience. Shop now at ProjectorDisplay.com for the widest range of projectors and screens, plus expert support that helps you build your ultimate setup. Ready to transform your space into a true cinematic sanctuary? Browse Projector Screens and let your home theater journey begin today.
Frequently Asked Questions
How do I assess my home theater space and requirements?
Begin by measuring your room's dimensions, layout, lighting conditions, and any potential acoustic challenges. Consider the primary usage of the space—whether for movies, gaming, or multipurpose—to guide your equipment selection.
What equipment do I need for a high-quality home theater?
Essential equipment includes a projector (preferably full HD or 4K with at least 2500 lumens), a dedicated audio system (like surround sound or soundbars), and supporting devices such as media players and streaming devices. Ensure compatibility between all components for a seamless experience.
How can I improve the acoustic performance of my home theater?
To enhance acoustics, incorporate wall treatments like acoustic panels, use sound-absorbing fabrics, and carefully position speakers according to standard configurations. Adding thick curtains and carpets can also help manage sound quality in the room.
What are the key steps to calibrate my home theater system?
Start with visual calibration of the projector by adjusting brightness, contrast, and color settings. For audio, utilize automatic calibration systems on modern AV receivers to optimize sound output. Finally, ensure sound and image synchronization by adjusting audio delay settings as needed.