Updating your projector's firmware might sound simple, but the details matter far more than you think. Your projector's model number is the golden ticket to a flawless upgrade, unlocking the exact files and instructions you need. Many people rush through this first step and end up with glitches or bricked devices. Taking just a few minutes to check your exact model and version can save you hours of headaches—or even the entire projector.
Table of Contents
- Step 1: Check Your Projector Model And Firmware Version
- Step 2: Prepare The Firmware Update Files For Download
- Step 3: Connect Your Projector To The Internet
- Step 4: Apply The Firmware Update Via Projector Settings
- Step 5: Verify Successful Installation Of The Firmware Update
Quick Summary
| Key Point | Explanation |
|---|---|
| 1. Check your projector model | Accurately identify your projector's model number to find the correct firmware update suitable for your device. |
| 2. Download the correct firmware | Visit the manufacturer's website to download the exact firmware version that matches your projector model and current firmware. |
| 3. Connect your projector to the internet | Ensure your projector is properly connected to the internet using either a stable wired or wireless connection for a successful update. |
| 4. Follow the update process carefully | Navigate to the update section in the settings and follow on-screen instructions to apply the firmware update without interruption. |
| 5. Verify the update's success | Check the firmware version in the system settings and test all functionalities to confirm the update has been successfully applied. |
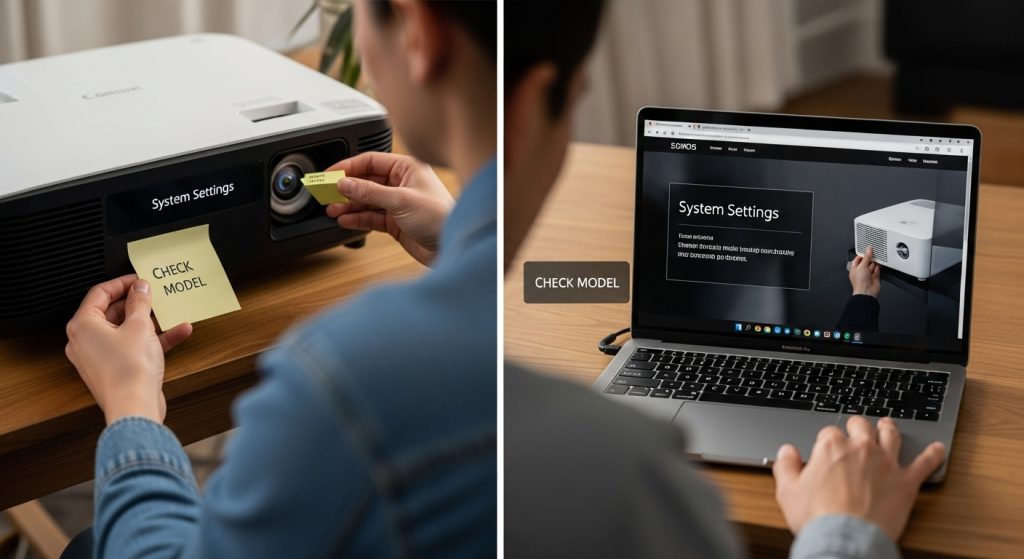
Step 1: Check Your Projector Model and Firmware Version
Before diving into firmware updates, understanding your specific projector model and current firmware version is crucial for a smooth upgrade process. Different projector manufacturers have unique update procedures, making accurate identification essential. Your projector's model number serves as the gateway to finding the right firmware update, ensuring compatibility and preventing potential technical complications.
Locate your projector's model number typically printed on a label attached to the device's exterior, often found on the back panel or underneath the unit. This alphanumeric code provides critical information about your specific device. Some projectors display this information directly through their onscreen menu system, accessible by navigating to the Info or System Settings section. For Epson projectors, you can easily view firmware details by accessing the projector's information menu, which displays the current software version alongside other system specifications.
To precisely determine your firmware version, power on your projector and access its internal menu system. Navigate through the settings, looking for sections labeled Information, System, or About. BenQ projectors with Google TV, for instance, allow users to check both Android TV OS and software versions by selecting Settings > All Settings > System > About. While exploring these menus, take note of the exact firmware version number, as this will be critical when searching for compatible updates.
If you encounter difficulty locating the firmware version, consult your projector's user manual or visit the manufacturer's support website. Many brands provide detailed online resources to help users identify their exact model and current firmware version. Check out our comprehensive guide on home theater projector selection for additional insights into managing your projection equipment.
Prepare a notepad or digital document to record the following key details:
- Exact projector model number
- Current firmware version
- Manufacturer name
- Date of firmware version check
By meticulously documenting these details, you'll streamline the subsequent firmware update process and minimize potential compatibility issues. Remember that firmware versions can vary significantly between different models, even within the same product line, so precision is paramount.
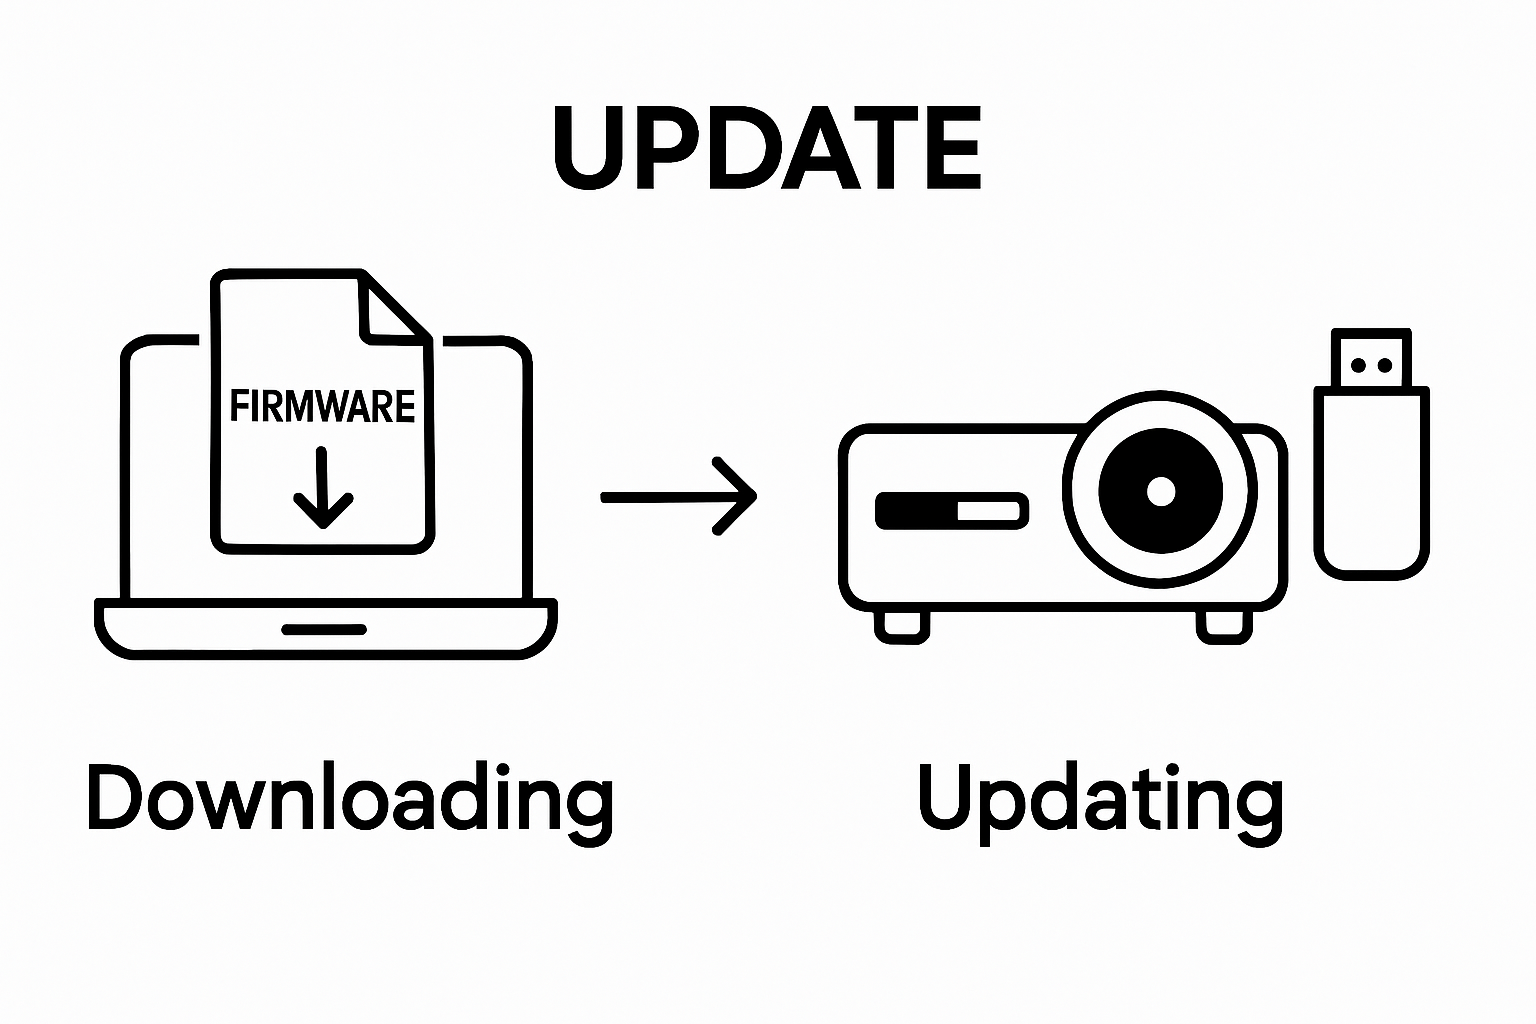
Step 2: Prepare the Firmware Update Files for Download
Downloading the correct firmware for your projector is a critical step that requires precision and careful attention to detail. Firmware files are unique to specific projector models and versions, making it essential to locate the exact match for your device. This preparation stage ensures a smooth, error-free update process that protects your projector's functionality and performance.
Begin by visiting the official manufacturer's website. Navigate to their support or downloads section, which typically requires you to input your specific projector model number. Most manufacturers organize firmware updates in a structured manner, allowing you to filter by product series, model, and current firmware version. Look for the most recent firmware release that matches your exact projector specifications. Pay close attention to any accompanying release notes or update descriptions that provide insights into the improvements or bug fixes included in the update.
Before downloading, verify the firmware file's compatibility by cross-referencing the model number, current firmware version, and any system requirements mentioned. Some manufacturers provide multiple download options, such as direct website downloads or dedicated support portals. Ensure you have a stable internet connection to prevent incomplete or corrupted downloads. Create a dedicated folder on your computer to store the firmware file, using a clear naming convention that includes the model number and firmware version for easy tracking.
Explore our comprehensive guide on selecting the best home theater projectors to understand more about maintaining your projection equipment. When downloading, most firmware files will come in compressed formats like .zip or .bin. Prepare a clean USB drive with sufficient storage space to transfer the firmware file to your projector. Ensure the USB drive is formatted correctly and has no existing files that might interfere with the update process.
Key preparation checklist for firmware download:
- Confirm exact projector model number
- Locate official manufacturer website
- Verify firmware file compatibility
- Check firmware file size and format
- Prepare clean, formatted USB drive
- Ensure stable internet connection
- Create a backup of important projector settings
Remember that firmware updates can be sensitive procedures. Always read the manufacturer's instructions carefully, and if you're uncertain about any step, contact their customer support for guidance. Proper preparation minimizes the risk of update failures and potential device malfunctions.
Step 3: Connect Your Projector to the Internet
Connecting your projector to the internet is a fundamental step in preparing for a firmware update. Wireless and wired connections each offer unique advantages for establishing the network link necessary to download and install the latest firmware. Modern projectors typically support multiple connection methods, providing flexibility for users with different network setups and technical configurations.
For wireless connections, start by accessing your projector's network settings menu. Most contemporary projectors feature built-in WiFi capabilities that allow direct connection to your home or office network. Navigate through the projector's menu system, typically found under Settings, Network, or Connectivity options. Select the WiFi network option and choose your specific network from the available list. You will need to enter the network password, so have this information readily available. Some advanced projectors support dual-band connections (2.4GHz and 5GHz), so select the most stable network frequency for your environment.
Alternatively, a wired ethernet connection provides a more stable and secure network link for firmware updates. If your projector includes an ethernet port, connect a standard network cable directly from the projector to your router or network switch. Wired connections generally offer more consistent data transfer speeds, which can be crucial during firmware downloads. Ensure the ethernet cable is securely connected and that your network infrastructure supports the connection. Some projectors automatically detect and configure wired network settings, while others might require manual IP address configuration.
Explore our comprehensive guide on smart projector technologies to understand more about network-connected projection systems. After establishing the connection, verify internet connectivity by accessing the projector's network diagnostic tools. Many projectors include a network test or status screen that confirms internet access and displays connection details such as IP address, signal strength, and connection type.
Key steps to confirm internet connectivity:
- Select appropriate network connection method
- Enter correct network credentials
- Verify network signal strength
- Run built-in network diagnostic tests
- Confirm successful internet connection
- Check network connection stability
Should you encounter connection difficulties, consult your projector's user manual or manufacturer's support website.
Some projectors might require specific network configurations or firmware updates to resolve connectivity issues. Patience and systematic troubleshooting are key to establishing a reliable internet connection for your firmware update process.
Step 4: Apply the Firmware Update via Projector Settings
Applying a firmware update requires precision and careful attention to detail. The firmware update process varies between projector manufacturers, making it essential to follow your specific device's recommended procedure. Most modern projectors offer built-in update mechanisms through their onscreen settings menu, providing a straightforward path to improving your device's performance and functionality.
Begin by navigating to the projector's system settings or maintenance menu. Look for options labeled System Update, Firmware Update, or Software Upgrade. These sections are typically found within the projector's main settings menu, often requiring multiple button presses on the remote control or projector's physical control panel. If you downloaded the firmware file to a USB drive in the previous step, insert the drive into the projector's USB port. Some projectors automatically detect the firmware file, while others require manual selection from a file browser menu.
Carefully follow the on-screen instructions for initiating the firmware update. Pay close attention to warning messages about interrupting the update process, as stopping midway can potentially damage your projector's internal software. Most updates require you to confirm the installation by selecting Yes or Confirm on the screen.
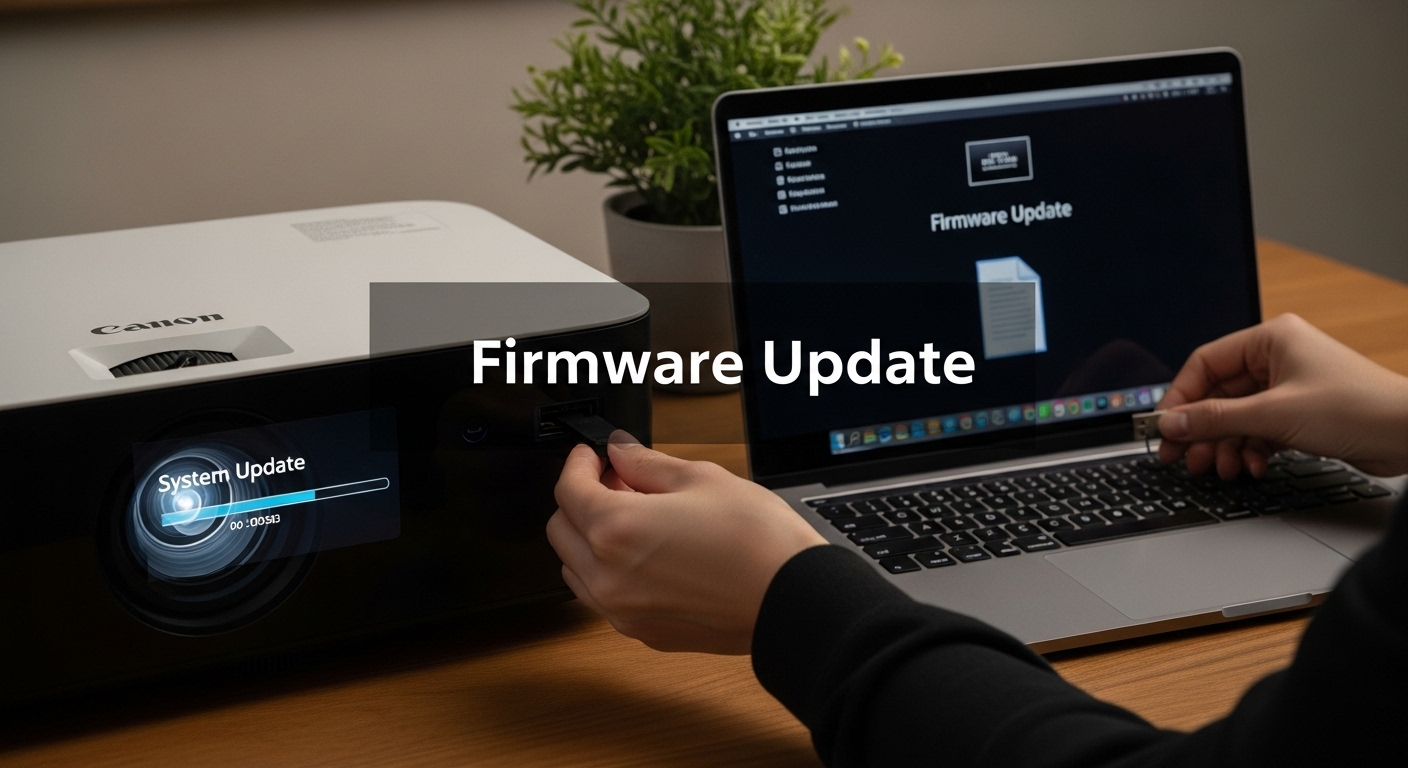 Ensure your projector remains connected to power throughout the entire update process. The update may take several minutes, during which the projector might restart multiple times or display progress indicators. Resist the temptation to interrupt or unplug the device during this critical period.
Explore our comprehensive guide on smart projector technologies to understand more about modern projection systems and their update processes. After the update completes, the projector will typically restart automatically. Some devices display a confirmation message indicating successful firmware installation, while others simply return to the standard home screen.
Key verification steps after firmware update:
- Confirm projector powers on normally
- Check system settings for updated firmware version
- Verify all projector functions operate correctly
- Ensure image quality remains consistent
- Test network and connectivity features
- Validate any specific improvements mentioned in update notes
Should you encounter any issues during or after the update, consult your projector's user manual or contact the manufacturer's customer support. Some firmware updates may require additional configuration or reset of certain system settings. Patience and careful observation are crucial to ensuring a successful firmware update that enhances your projector's overall performance and reliability.
Step 5: Verify Successful Installation of the Firmware Update
Verifying the successful installation of your projector's firmware update is a critical final step that ensures all your previous efforts have produced the desired outcome. Firmware updates can significantly impact your projector's performance, making a thorough verification process essential to confirm that the update has been applied correctly and is functioning as expected.
Begin by checking the projector's system information menu, typically found within the settings or about section. Look for the firmware version number, comparing it carefully with the version you downloaded. Most projectors display the current firmware version prominently, allowing you to quickly confirm that the update has been installed correctly. Pay close attention to any version numbering or date stamps that indicate the most recent update. Some projectors might display additional information about the update, such as the specific improvements or bug fixes included in the new firmware.
Next, conduct a comprehensive functionality test of your projector. Systematically check each major feature and setting to ensure nothing has been disrupted during the update process. Test the projector's video input sources, network connectivity, audio capabilities, and any smart features or built-in applications. Run through a series of standard operations, such as switching between input sources, adjusting picture settings, and connecting to wireless networks. Look for any unusual behavior, unexpected error messages, or performance inconsistencies that might suggest an incomplete or problematic firmware update.
Explore our comprehensive guide on smart projector technologies to understand more about maintaining your projection equipment. If you notice any significant issues, do not panic. Some minor glitches can be resolved by performing a simple restart or returning to factory settings. However, persistent problems may require you to contact the manufacturer's customer support or consider re-downloading and reinstalling the firmware.
Key verification steps for firmware update:
- Confirm updated firmware version number
- Test all input sources and connections
- Verify network and wireless functionality
- Check picture and sound quality
- Ensure all smart features operate correctly
- Validate system settings and configurations
Remember that firmware updates are designed to improve your projector's performance, so any significant degradation in functionality is unusual. Document any issues you encounter, including specific error messages or unexpected behaviors. This information can be valuable if you need to seek technical support. By methodically verifying the firmware update, you ensure that your projector continues to deliver the high-quality performance you expect.
To help readers quickly verify the success of their projector firmware update, the table below summarizes key checks and what to look for during post-update validation.
| Verification Step | What to Check | Success Indicator |
|---|---|---|
| Firmware Version | Check system info menu | Displays new version |
| Video Input Sources | Test all input types | No errors or glitches |
| Network & Wireless | Verify connections | Stable network access |
| Smart Features | Use built-in apps | All features work |
| Picture & Sound | Inspect quality | No degradation seen/heard |
| System Settings | Review configurations | Settings intact & accurate |
| Device Startup | Power cycle projector | Normal startup without errors |
Keep Your Projector System at Peak Performance—Upgrade with Confidence
Are you frustrated by blurred images, unstable connectivity, or missing features even after a firmware update? Many projector owners discover that outdated screens or poor-quality accessories can hold back optimal performance, no matter how current their firmware is. After diligently updating your projector's firmware, don't let subpar components stop you from enjoying clear visuals and seamless operation. Transform your viewing experience with a dependable projector screen designed to showcase the full power of your updated hardware.

Ready to unlock maximum performance from your newly updated projector? Visit ProjectorDisplay.com for the best selection of screens, sound systems, and expert advice tailored to your needs right here in Malaysia. Choose quality solutions today and ensure your upgrades are fully realized. Your perfect projector setup is just a click away.
Frequently Asked Questions
How can I find my projector model and current firmware version?
Locate your projector's model number on a label typically found on the back panel or underneath the unit. You can also check the onscreen menu under the Info or System Settings sections to view the current firmware version.
What should I do before downloading the firmware update?
Before downloading, confirm your exact projector model number and verify the firmware file's compatibility by visiting the manufacturer's website. Ensure your internet connection is stable and prepare a formatted USB drive for the firmware file transfer.
How do I connect my projector to the internet for a firmware update?
To connect your projector to the internet, access the network settings in the projector menu. You can select a wireless Wi-Fi network or use a wired ethernet connection for a more stable link. Enter the correct password for Wi-Fi connections and ensure the cable is securely connected for wired setups.
What steps should I take to verify a successful firmware update?
After the firmware update, check the projector's system information menu for the updated firmware version. Conduct a functionality test to ensure all features, video input sources, and network connectivity are working correctly. If issues arise, consider restarting the device or contacting support.