Projector calibration sounds like something only tech pros obsess over and most people do not realize how much their room setup affects visuals. A single misplaced light source can kill picture quality, no matter how high-end your projector is. Yet surprisingly, the right preparation does more for crisp colors and sharp contrast than any fancy setting buried in your projector menu. Ordinary environments rarely set the stage for great displays and that might be why your movies never quite pop off the wall.
Table of Contents
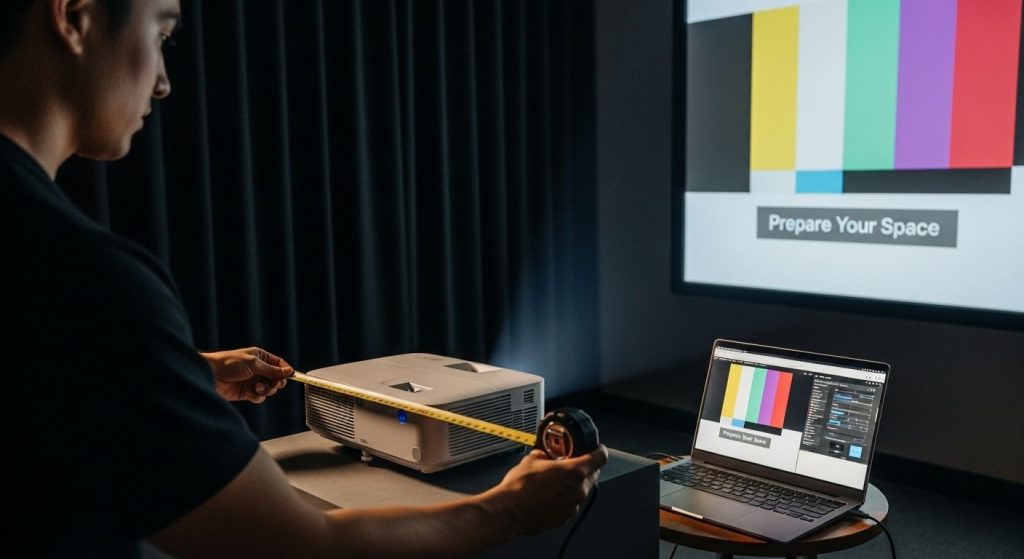
- Step 1: Prepare Your Space for Calibration
- Step 2: Gather Necessary Calibration Tools
- Step 3: Adjust Projector Settings for Optimal Display
- Step 4: Fine-Tune Color and Brightness Levels
- Step 5: Verify Calibration Through Testing
- Step 6: Document Your Calibration Settings
Quick Summary
| Key Point | Explanation |
|---|---|
| 1. Optimize Room Lighting | Select a dark or neutral room to reduce light reflection, which enhances image quality significantly. |
| 2. Use Proper Calibration Tools | Gather essential tools like a colorimeter and laser measuring device to ensure precise projector adjustments. |
| 3. Adjust Settings for Clarity | Set the projector's native resolution and adjust brightness, contrast, and color for optimal visual output. |
| 4. Test with Quality Patterns | Display high-quality test images to identify calibration flaws, ensuring accurate color and detail representation. |
| 5. Document Your Calibration | Maintain detailed records of settings and conditions to easily replicate the optimal projector configuration in the future. |
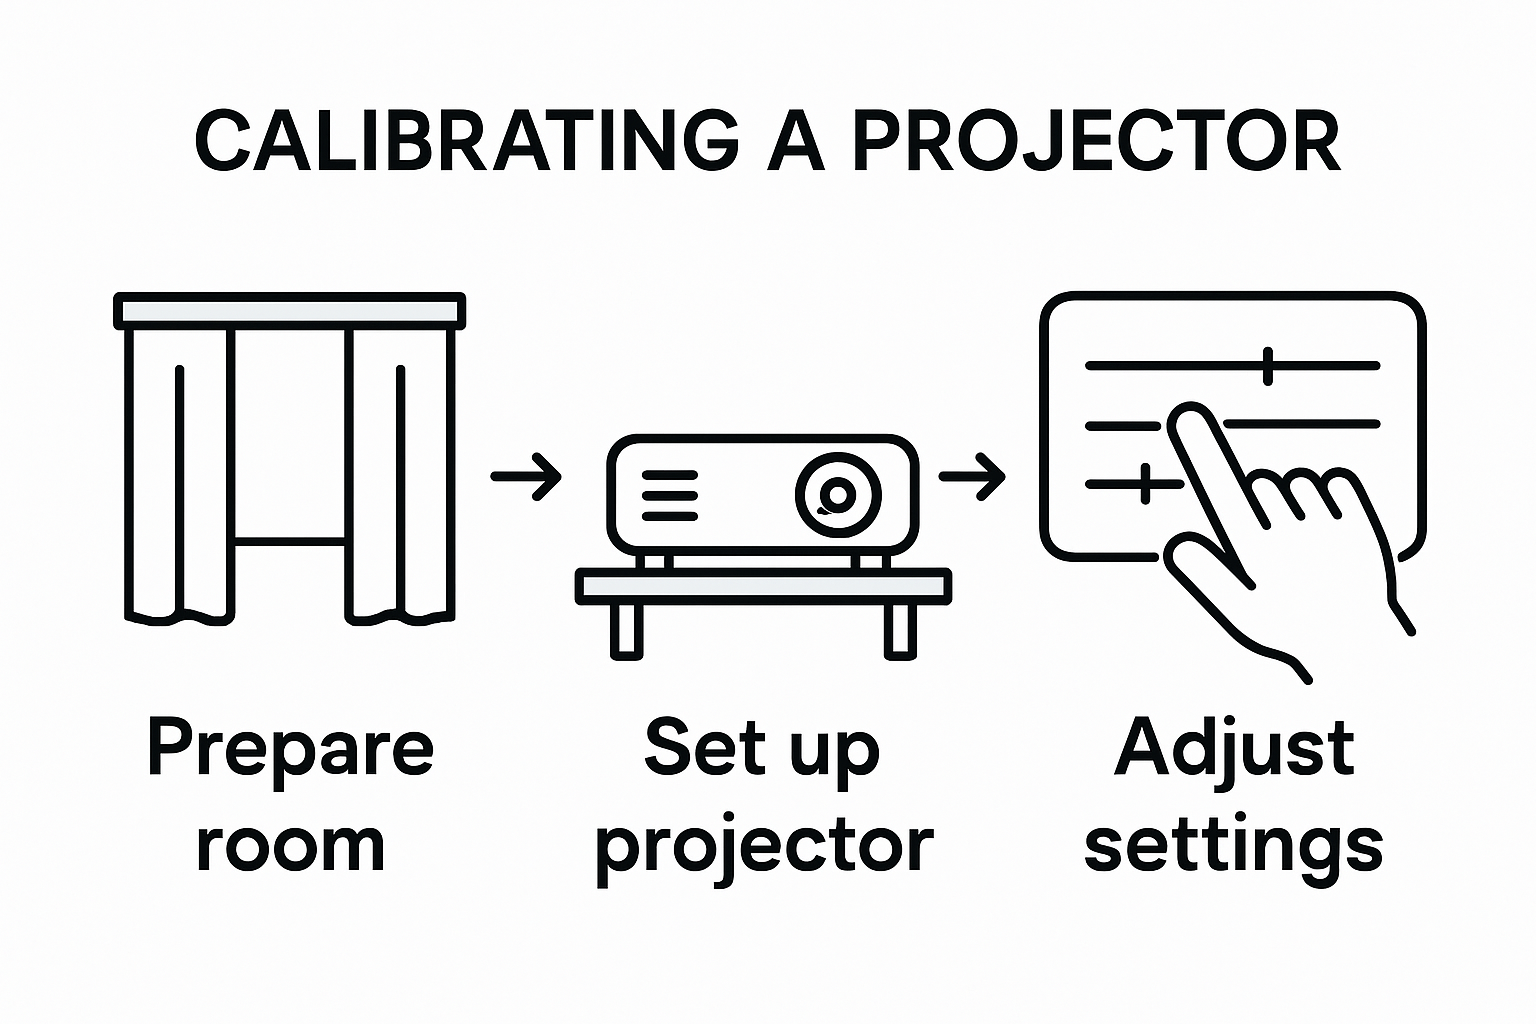
Step 1: Prepare Your Space for Calibration
Calibrating a projector requires more than just technical knowledge. Your physical environment plays a critical role in achieving stunning image quality. Professional AV technicians know that proper space preparation can dramatically enhance projection performance.
Begin by selecting an optimal room with controlled lighting conditions. You want a space where external light can be minimized or completely eliminated. Rooms with dark or neutral colored walls work best since they prevent unwanted light reflection that could distort your projected image. Close curtains, blinds, or use blackout shades to create a controlled visual environment.
Next, focus on positioning. Your projector needs a stable, level surface that allows precise alignment. Avoid unstable platforms like wobbly tables or makeshift stands. If possible, use a dedicated projection mount or a sturdy, flat surface that provides perfect horizontal placement. Ensure the surface is clean and free from vibrations that might cause image instability.
Power and connectivity are equally crucial. Check your electrical outlet's compatibility with the projector's voltage requirements. Use a surge protector to safeguard your equipment from potential electrical fluctuations. Organize your cables neatly to prevent accidental disconnections or tripping hazards. Read our guide on proper projector mounting techniques to understand ideal setup strategies.
Measure the distance between your projector and projection surface carefully. Different projector models have specific throw ratios that determine optimal placement. Most manufacturers provide detailed placement guidelines in their user manuals. Use a measuring tape to ensure precise positioning, which directly impacts image clarity and size.
Finally, verify your room's ambient temperature. Projectors generate heat and perform best in well-ventilated spaces. Avoid cramped areas that could restrict airflow and potentially cause overheating. A comfortable room temperature around 20-25 degrees Celsius provides an ideal operating environment for most projection equipment.
Successful calibration starts with meticulous preparation. By controlling your environment, you set the stage for exceptional visual performance.
Step 2: Gather Necessary Calibration Tools
Successful projector calibration requires more than technical knowledge. Assembling the right tools beforehand transforms a complex process into a precise, manageable task. Professional calibrators understand that preparation is half the battle when achieving optimal visual performance.
Start by collecting essential measurement tools. A digital laser measuring device provides precise distance calculations between your projector and projection surface. Laser distance meters eliminate guesswork and ensure accurate positioning. Complement this with a sturdy tripod that offers stable, adjustable mounting for your projector. The tripod should provide smooth leveling mechanisms and robust weight support matching your specific projector model.
Color calibration requires specialized equipment. A professional colorimeter becomes your most critical tool. This device measures color accuracy, luminance, and contrast across your projected image. While professional models can be expensive, many affordable options exist for home and small office environments. Some advanced colorimeters connect directly to laptops, allowing real-time color profile adjustments.
Your toolkit should also include several practical accessories. Bring a clean microfiber cloth for lens maintenance, compressed air for removing dust particles, and a small screwdriver set for minor adjustments. White balance reference cards help standardize color settings across different projection scenarios. Explore our comprehensive guide on projector mounting techniques to understand additional setup requirements.
Digital tools play an equally important role. Download calibration software compatible with your projector model before beginning. Many manufacturers provide free calibration utilities that guide you through precise image adjustments. Smartphones with light meter apps can serve as budget-friendly alternatives for basic ambient light measurements.
Remember to have your projector's user manual readily available. Manufacturer-specific guidelines often contain model-specific calibration instructions that generic guides might overlook. Keep a notebook or digital document to record your initial settings and progressive adjustments. This documentation helps you track your calibration journey and allows easy restoration if needed.
Below is a table organizing the essential calibration tools mentioned in the article with their purposes and brief notes for each requirement.
| Tool/Material | Purpose | Notes |
|---|---|---|
| Digital Laser Measuring Device | Measure projection distance accurately | Ensures correct projector placement |
| Colorimeter | Adjust and verify color accuracy | Can be professional or consumer-grade |
| Tripod | Provides stable, level mounting surface | Look for models with smooth leveling system |
| Microfiber Cloth | Clean projector lens and surface | Prevents dust and fingerprint artifacts |
| Compressed Air | Remove dust from lens and vents | Maintains ventilation and visuals |
| Screwdriver Set | Make fine physical adjustments | Useful for minor hardware tweaks |
| Calibration Software | Guide image and color adjustments | Should be compatible with projector model |
| White Balance Reference Cards | Standardize color balance | Ensures uniformity in multiple settings |
| User Manual | Reference model-specific settings | Always keep accessible during calibration |
Preparing your calibration toolkit transforms a potentially overwhelming task into a systematic, enjoyable process. Patience and the right equipment will help you unlock your projector's full visual potential.
Step 3: Adjust Projector Settings for Optimal Display
Projector calibration transforms an ordinary viewing experience into an extraordinary visual journey. Precise settings manipulation becomes your gateway to stunning image quality. Professional calibrators understand that each adjustment represents a strategic step toward visual perfection.
Begin with resolution settings. Navigate through your projector's menu and select the native resolution matching your projection surface. Most modern projectors support multiple resolutions, but choosing the native resolution ensures maximum clarity and sharpness. Mismatched resolutions can introduce image distortion or unnecessary scaling artifacts that compromise visual quality.
Brightness and contrast require meticulous attention. Start by adjusting brightness to complement your room's ambient light conditions. Too high brightness creates washed-out images, while insufficient brightness results in muddy, indistinct visuals. Use a reference image with clear white and black zones to fine-tune these settings. Professional colorimeters can help achieve precise calibration, but careful visual assessment works equally well for home users.
Color settings demand a systematic approach. Begin with the color temperature, typically ranging between 6500K (cool, bluish) and 5000K (warm, reddish). Neutral settings around 6000K provide the most natural representation. Adjust color saturation carefully to prevent oversaturated or washed-out images. Explore our comprehensive guide on projector screen placement to understand how screen selection impacts color perception.
Keystone correction helps address angular projection challenges. Most projectors offer both vertical and horizontal keystone adjustments. Use these settings sparingly, as excessive correction can introduce image compression and reduce overall picture quality. Manual physical positioning remains the preferred method for maintaining image integrity.
Advanced projectors offer additional calibration options like gamma settings and color management systems. Gamma controls the relationship between input signal and displayed brightness. Standard gamma settings around 2.2 work well for most home and office environments. Experiment with different settings to find the most comfortable viewing experience.
Verify your calibration by displaying high-quality test images. Look for smooth color transitions, sharp text readability, and balanced contrast. Minor readjustments might be necessary to achieve perfect visual performance. Remember that calibration is an iterative process requiring patience and careful observation.
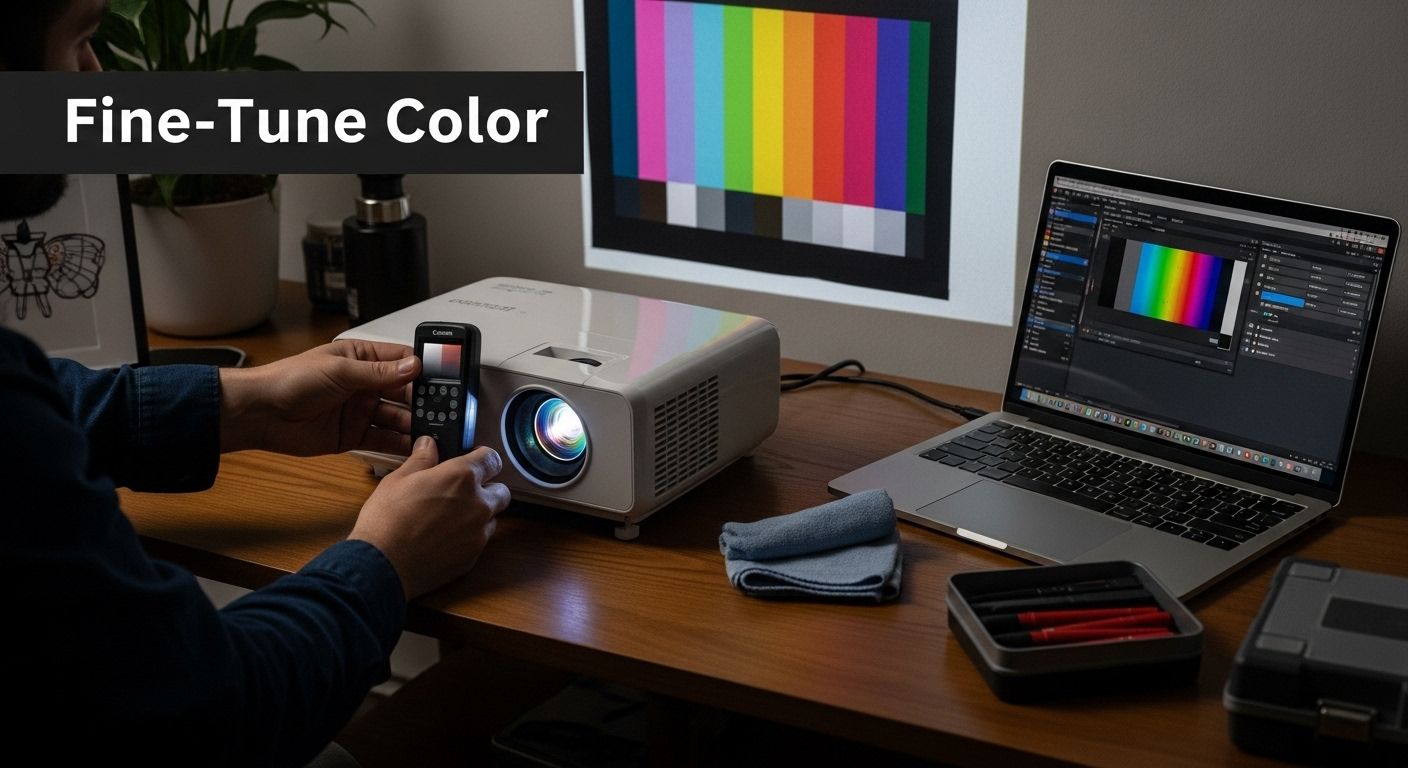
Step 4: Fine-Tune Color and Brightness Levels
Color and brightness calibration represents the heart of projector performance. Mastering these settings transforms your projection from average to extraordinary, creating visual experiences that captivate and immerse viewers. Professional calibrators know that subtle adjustments can dramatically enhance image quality.
Begin by understanding your projection environment. Ambient light plays a critical role in perceived brightness and color accuracy. Darker rooms allow for lower brightness settings, while spaces with more natural light require higher luminance levels. Adjust your projector's brightness to create a balanced image that maintains detail without appearing washed out or overly dark.
Color temperature becomes your primary tool for achieving natural image reproduction. Most projectors offer preset color temperature options ranging from warm (yellowish) to cool (bluish) tones. The standard 6500K setting provides a neutral, daylight-like representation that works well for most viewing scenarios. Pay close attention to skin tones, white backgrounds, and subtle color gradations as you make adjustments. These elements serve as excellent indicators of overall color accuracy.
Learn more about optimal projector screen selection to complement your color calibration efforts. The right screen can significantly enhance color perception and overall image quality.
Contrast settings require a delicate touch. Start by displaying a high-quality test image with complex light and dark areas. Adjust the contrast to reveal maximum detail in both bright and shadowy regions. Too high contrast crushes dark details, while insufficient contrast creates a flat, lifeless image. Use reference images with intricate patterns and varied lighting to fine-tune these settings.
Professional calibrators recommend a systematic approach to color balance. Most projectors offer individual color channel adjustments for red, green, and blue. Make incremental changes, observing how each adjustment impacts overall image quality. A color calibration chart or test pattern can help you achieve precise color reproduction.
Verify your calibration by watching content with diverse visual elements. Films with varied scenes, nature documentaries, and graphic-intensive content provide excellent testing grounds. Pay attention to color consistency, shadow detail, and overall image depth. Successful calibration creates an image that feels natural and immersive, drawing viewers into the visual experience without drawing attention to the projection technology itself.
Step 5: Verify Calibration through Testing
Calibration reaches its true potential through rigorous testing. Verification transforms theoretical adjustments into practical visual excellence, ensuring your projector delivers precisely the image quality you desire. Professional calibrators understand that final testing separates good setups from truly exceptional visual experiences.
Begin with comprehensive test pattern displays. High-quality calibration test images reveal subtle imperfections invisible during standard viewing. Look for specialized test patterns that assess color accuracy, grayscale reproduction, and geometric precision. These diagnostic images typically feature complex gradients, sharp geometric shapes, and detailed color charts that expose even minor calibration inconsistencies.
Focus on critical visual elements during your verification process. Skin tones serve as an excellent benchmark for color accuracy. Display photographs or video clips featuring human subjects, paying close attention to natural skin color reproduction. Watch for unnatural color shifts or overly saturated appearances that indicate misaligned color settings. Scenes with mixed lighting conditions provide particularly challenging test scenarios that reveal calibration nuances.
Explore our comprehensive guide on projector screen selection to understand how screen characteristics impact your verification process. The right screen can dramatically enhance your ability to assess calibration accuracy.
Text readability represents another crucial verification metric. Project documents with small fonts, spreadsheets, and detailed presentations to assess sharpness and clarity. Crisp, clean text without visible artifacts indicates successful resolution and focus calibration. Pay special attention to edge definition and contrast between text and background. Blurry or jagged text suggests need for further fine-tuning.
Move beyond static images by testing dynamic content. Motion video, sports broadcasts, and animated sequences challenge your projector's color and motion handling capabilities. Observe color consistency during rapid scene changes, assess motion blur, and evaluate overall image stability. Professional calibrators recommend testing content across multiple genres to ensure comprehensive performance verification.
Finalize your verification by creating a reference preset. Most modern projectors allow saving custom calibration settings. Document your final configuration, including specific measurements and test pattern results. This approach enables quick restoration of your optimal settings and provides a benchmark for future calibration attempts.
Step 6: Document Your Calibration Settings
Documentation transforms your carefully crafted projector calibration from a one-time adjustment to a repeatable, sustainable process. Meticulous record-keeping ensures you can recreate your perfect visual setup whenever needed, providing a safety net for future recalibration or equipment replacement.
Begin by creating a comprehensive calibration profile spreadsheet. This digital document should capture every critical setting with precision. Include specific details like projector model, firmware version, room lighting conditions, and the exact date of calibration. Photograph your test patterns and screen setup to provide visual context for your future self or technical support team. Detailed documentation becomes your personal calibration blueprint.
Capture numerical settings with extreme precision. Note exact values for brightness, contrast, color temperature, gamma settings, and individual color channel adjustments. Most projectors display these settings numerically, making documentation straightforward. Consider taking screenshots of your projector's menu to supplement your written records. These visual references can prove invaluable when attempting to recreate your optimal configuration.
Explore our comprehensive guide on projector screen placement to understand how environmental factors impact your calibration documentation. Screen characteristics and room conditions are critical context for future reference.
Create multiple backup strategies for your calibration documentation. Save digital copies in at least three locations: your primary computer, a cloud storage service, and an external hard drive. Consider printing a physical copy as an additional backup method. Some professionals even photograph their settings with a high-resolution camera as an additional preservation technique.
Establish a systematic naming convention for your calibration profiles. Include key identifiers like date, room type, and primary usage scenario. For example, a profile might be named "Home Theater_Living Room_2024_02_15_Evening_Calibration". This approach allows quick identification and selection of the most appropriate settings for different viewing environments.
Periodically review and update your calibration documentation. Projector performance can shift over time due to lamp aging, environmental changes, or firmware updates. Schedule a biannual review of your saved settings, comparing them against current performance. This proactive approach ensures your visual setup remains optimized and prevents gradual performance degradation.
Unlock Flawless Projection With Professional Equipment
If you're striving for stunning image quality after learning how to calibrate your projector, you know how frustrating it can be when poor screen materials or the wrong accessories hold you back. Achieving perfect brightness, crisp clarity, and rich color is so much easier when your gear matches your ambition. The right projection screen makes all the difference by enhancing every bit of your careful calibration.

Upgrade your results today with our curated selection of premium projector screens and essential calibration tools. Each option is designed to support better color accuracy and sharper visuals. Visit ProjectorDisplay.com to find the perfect pairing for your projector. Do not let your hard work go to waste — explore our site now and turn your calibration efforts into a truly breathtaking viewing experience.
Frequently Asked Questions
How can I prepare my space for calibrating my projector?
To prepare your space, select a room with controlled lighting, ideally with dark or neutral walls. Ensure the projector is on a stable surface, check power compatibility, and organize your cables to avoid tripping hazards. Measure the distance between the projector and the screen accurately and ensure proper ventilation to prevent overheating.
What tools do I need for projector calibration?
Essential tools for projector calibration include a digital laser measuring device for precise distance calculations, a colorimeter for color accuracy, a tripod for stable mounting, and additional accessories like a microfiber cloth, compressed air, and calibration software that is compatible with your projector model.
What settings should I adjust first when calibrating my projector?
Start with adjusting the resolution to match the projector's native resolution. Next, focus on brightness and contrast settings using reference images for guidance. Follow with color temperature adjustments, keystone correction if necessary, and advanced settings like gamma and color management systems based on your projector's features.
How can I verify if my projector calibration is successful?
Verify calibration by displaying high-quality test images and assessing color accuracy, grayscale reproduction, and text readability. Check skin tones for natural reproduction, and observe dynamic content to evaluate motion handling and color consistency. Create a reference preset to save successful settings for future use.